
使用应用程序库构建服务器应用程序
4.93/5 (18投票s)
本文介绍了提议的“Application”库的新版本,并展示了如何构建长时间运行的应用程序(例如服务器应用程序)
引言
本文介绍了提议的“Application”库(0.4.6版)的新版本,并展示了如何构建长时间运行的应用程序(例如服务器应用程序)。
基本设置
- 第一步是下载最新版本的 Boost 并构建它。
Boost 的构建过程并不容易,但提供了很好的文档,请参阅此链接。
或者您可以查看这篇好文章以帮助构建。
- 第二步是下载
Boost.Application(https://github.com/retf/Boost.Application/zipball/master)Boost.TypeIndex(https://github.com/apolukhin/type_index/zipball/master)
您可以将它们中的每一个解压缩到您的“c:\”或其他目录中。我们将配置 Visual Studio 项目以查找这些目录。
注意
Boost.Application 还不是官方的 Boost C++ 库。它尚未经过审查,无法从www.boost.org下载。此 Beta 版可供 Boost 社区了解实际兴趣并获取改进意见。如果社区认为它有趣,则打算提交该库进行正式审查。
Boost.Application 资源
您可以从 GitHub 此处下载该库。
在线文档(正在建设中)可从此处获取。
动机
有时,我们需要长时间运行应用程序(例如服务器应用程序)。我们需要一种机制来在运行时扩展此应用程序,并且我们需要一些设施来访问路径,确保系统上的单实例实例化,管理和捕获信号等等。
每次我们需要为特定系统构建和部署应用程序时,这项工作都会重复出现,并且在每个系统上执行此操作的方式都会发生很大变化。
例如,在 Windows 端,我们有“服务”,在 Unix (POSIX) 端,我们有用于构建长时间运行的可执行应用程序(例如服务器)的守护程序,这两种 API 之间没有任何相似之处。
因此,在这种情况下,开发人员在 Windows 或 POSIX 上作为服务器运行其应用程序而无需大量工作是如此困难。如果我们需要在两个系统上运行同一个应用程序,那么工作会更加困难。
当用户希望提供一种使用插件机制扩展应用程序的方式时,还会出现另一个问题。像服务/守护程序一样,共享模块(DSO)操作在 Windows 和 POSIX 上变化很大。
获取路径、参数、操作信号等简单的事情可能会很烦人,因为它在两个系统上也没有通用的接口来完成这些操作。
Application
“application”库提供了一种跨平台的 C++ 方式来创建服务/守护程序,提供了一种机制来帮助插件,并提供了一种使用“方面”和其他方式来处理烦人事物的方式。
我们的示例
有时,一项常见任务会以指定的时间间隔执行或检查某些内容(例如 Unix cron)。这可以称为基于时间的作业(任务)调度程序。
我们将使用“application”来构建一个服务器应用程序,该应用程序将计时器事件作为插件中的任务(我们的作业)进行处理。因此,我们的应用程序将有一个计时器,该计时器将到期并触发插件中的任务
最后,如果您在 Windows 上,您将拥有一个在运行时加载“.dll”的服务,如果您在 POSIX 上,您将拥有一个在运行时加载“.so”并触发其任务的守护程序。
当我们的计时器 (asio) 到期时,我们将扫描一个文件夹 (filesystem),并在其中查找插件 (application),然后执行插件内部的作业。
示例业务逻辑和使用的 Boost 库
或示例将联系一个 Web 服务 (api.openweathermap.org) 以获取天气信息。
我们正在为 Windows 构建一个服务器,然后我们将使用Boot.Program_Options来处理服务安装,详情请参见下面的“项目示例和开发环境”。
Web API 返回一个“json”响应,然后我们将使用Boost.Property_Tree和Boost.Foreach来处理此响应。
我们将比较 Web API 返回的“湿度”值,如果它小于 80%,则将其记录到文本文件中。
插件使用一个“sync” Boost.Asio示例客户端连接到 Web API。如果需要,用户可以自行实现“async”插件。
我们需要使用Boost.Filesystem、Boost.Bind、Boost.Function、Boost.System来完成一些事情。
因此,在我们的示例中,我们将使用以下 Boost 库
Boost.AsioBoost.Property_TreeBoost.ForeachBoost.Program_OptionsBoost.FilesystemBoost.BindBoost.FunctionBoost.System
项目示例和开发环境
由于其流行性,我将使用 Windows 和 Visual Studio 作为开发平台。但正如我之前所说,代码在 POSIX 上编译后会生成一个守护程序,无需修改。
在下载链接中,您将找到一个 Visual Studio 2013 项目。如果您使用 POSIX,则需要创建自己的 make/jam 文件来编译项目。如果您在此过程中遇到任何困难,请与我联系,我可以帮助您。
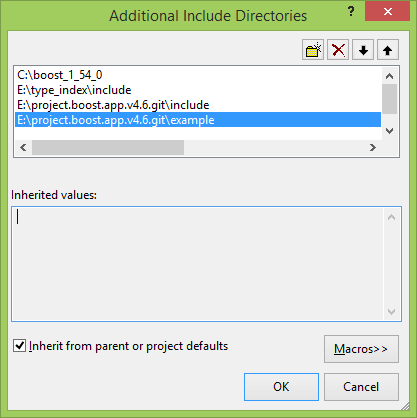
请注意,您需要更改项目的路径以反映您的环境;在我的情况下,我有以下路径
C/C++ | 常规
链接器 | 常规

1. 基础
Boost.Application 需要一个“Functor”类来建模“应用程序”的概念,因此,在您的“main”函数之前,您需要像这样添加您的“functor”类
// our server class
class time_based_job : boost::noncopyable
{
public:

   int operator()()
   {
      return 0;
   }
};

// main
int main(int argc, char *argv[])
{
   time_based_job app;

   return 0;
}
2. 上下文与切面
Boost.Application 有一个“切面”的概念,以方便扩展、定制并使事物更灵活。
任何 C++ 类都可以是一个“切面”,您将使用“应用程序上下文”来访问应用程序的“切面”,因此这引出了另一个概念:“应用程序上下文”。
请注意,Boost.Application 提供了许多即用型切面,我们将在示例中使用其中一些“切面”。
“应用程序上下文”就像一个容器,您可以将您的“应用程序切面”添加到其中。“应用程序上下文”可以通过 2 种方式访问
- 作为函数参数
- 作为全局对象(单例)
用户可以自由选择最适合其应用程序设计的选项。这里我们将使用“global_context”,所以让我们将其添加到我们的源文件中。
// we will use global_context for our sample, we can access global_context in
// any place of our application
inline global_context_ptr this_application_cxt() {
   return global_context::get();
}

// our server class
class time_based_job : boost::noncopyable
{
public:

   int operator()()
   {
      return 0;
   }
};

// main
int main(int argc, char *argv[])
{
   time_based_job app;

   // create a global context for application (our aspect_map),
   // from this point it is available to be used on any part of our application.
   global_context::create();
   boost::shared_ptr<void> global_context_destroy(nullptr, [&](void*) {
      // this code will be executed at the scope exit
      // destroy our global_context and ends our application
      global_context::destroy();
   });

   // 1

   return 0;
}
“global_context::create”将创建我们的上下文,我们使用一个技巧在 main 结束时(超出范围)删除我们的上下文。为此,我们使用“shared_ptr”。
3. 即用型方面
现在,我们将向我们的“应用程序上下文”添加 2 个“即用型”方面。第一个方面将帮助我们处理“args”,另一个将帮助我们处理“paths”。
在“// 1”之后添加;
this_application_cxt()->insert<args>(
      boost::make_shared<args>(argc, argv));

this_application_cxt()->insert<path>(
     boost::make_shared<path_default_behaviour>(argc, argv));

// 2
4. 启动应用程序
Boost.Application 基本上支持两种类型的应用程序
- 通用应用程序
这种应用程序是常见的交互式终端应用程序。
- 服务器应用程序
这种应用程序会生成一个服务(Windows)或一个后台进程/守护程序(Unix)。
请注意,用户可以添加其他类型的应用程序。请参阅此文章,该文章扩展了Boost.Application以支持“Apache Http Module”应用程序模式。
现在我们将启动一个“通用应用程序”。在“// 2”之后添加;
boost::system::error_code ec;

return launch<common>(app, this_application_cxt(), ec);
请注意,Boost.Application 可以处理设置“boost::system::error_code”的错误,或使用抛出类型为boost::system::system_error异常的“异常版本”。
此时,我们有一个完整的应用程序骨架。
5. 构建切面
我们的应用程序将把计时器事件作为任务来处理,因此现在我们将在一个切面中建模该行为,然后将其添加到我们的应用程序上下文中。
// our timer aspect
template< typename Handler >
class timer_job : boost::noncopyable
{
   typedef handler<bool>::global_context_callback job_callback;

public:

   timer_job(Handler h, unsigned int timeout)
      : jtimer_(io_service_), timeout_(timeout), job_(h)
   {
      trigger();
      boost::thread(
         boost::bind(&boost::asio::io_service::run,
            boost::ref(io_service_))).detach();
   }

   void stop()
   {
      io_service_.stop();
   }

protected:

   bool job()
   {
      if(job_()) // retur true from job to stop
         return true;

      trigger(); // trigger next timeout event
      return false;
   }

   void trigger()
   {
      jtimer_.expires_from_now(boost::posix_time::seconds(timeout_));
      jtimer_.async_wait(
         [this](const boost::system::error_code& ec) -> void {
            if(!ec) {
               if(this->job()) {
                  io_service_.stop(); // error
               }
            }
            else
               io_service_.stop(); // 'ec' is true
         }
      );
   }

private:
   unsigned int timeout_;

   job_callback job_;

   boost::asio::io_service io_service_;
   boost::asio::deadline_timer jtimer_;
};

typedef timer_job< handler<bool>::global_context_callback > timer_callback;
在这个类(方面)中,我们使用“asio::deadline_timer”来调度和调用一个回调方法,该方法将执行我们所需的操作。
6. 将我们手工制作的切面添加到上下文中
为此,我们需要将我们的回调处理程序添加到我们的函子类中,如下所示
// our server class
class time_based_job : boost::noncopyable
{
public:

   int operator()()
   {
      return 0;
   }

   bool doit()
   {
      return false;
   }
};
并在 main 函数中“path”切面之后添加以下代码。
   this_application_cxt()->insert<
      timer_callback >(boost::make_shared<
         timer_callback >(
            handler<bool>::make_global_callback(app, &time_based_job::doit), 5));
Boost Application 有一个类可以用来创建回调(handler<bool>::make_global_callback)。在这里,我们用它将我们的计时器事件绑定到我们的 functor 类中的“doit”。
因此,当时间事件到期时,它将调用函子类上的“doit”。
请注意,时间事件将在 5 秒内到期。
7. 制作我们的插件
插件是一个共享库,它导出一些函数(C 函数),这些函数提供对我们行为的访问,请参阅
第一件事是创建我们的插件项目,详细信息请参阅示例文件。它基本上是一个“Win32 控制台应用程序 (DLL)”项目类型。
现在,我们将创建一个名为“job_plugin_api.hpp”的文件,这表示一个插件 API 接口。在这种情况下,我们将构建一个插件,该插件将使用sync Boost.Asio接口“调用 Web 服务”。
class my_plugin_api
{
public:
   virtual ~my_plugin_api(){};
   virtual float version() = 0;
   virtual bool do_the_job(
      const std::string& query, const std::string& resource,
      std::string& result, std::string& err) = 0;
};
实现代码在“job_plugin_library.cpp”中,这里的代码基于Boost.Asio示例:https://boost.ac.cn/doc/libs/1_55_0/doc/html/boost_asio/example/cpp03/http/client/sync_client.cpp。
我将只注释插件访问接口,即
my_plugin_api* create_my_plugin(void)
{
   my_plugin_api *myplugin = new my_job_plugin();
   return myplugin;
}

void delete_my_plugin(my_plugin_api* myplugin)
{
   delete myplugin;
}
如果我们遵守这个接口,我们可以有其他插件,例如:这里我们使用Boost.Asio“sync”示例,但我们可以制作另一个使用Boost.Asio“async”示例的插件
https://boost.ac.cn/doc/libs/1_55_0/doc/html/boost_asio/example/cpp03/http/client/async_client.cpp
8. 使用 Boost.Application “共享库类”加载我们的插件
现在,我们将像这样修改我们的“doit”方法
  bool doit()
   {
     boost::shared_ptr<path> pt
         = this_application_cxt()->find<path>();

      boost::filesystem::path scan_dir(pt->executable_path());

      std::vector<boost::filesystem::path> v; // store paths
      std::copy(boost::filesystem::directory_iterator(scan_dir),
                          boost::filesystem::directory_iterator(), back_inserter(v));

      int count_synced_files = 0;
      for (std::vector<boost::filesystem::path>::const_iterator it
            (v.begin()); it != v.end(); ++it)
      {
         boost::filesystem::path p(*it);

         std::string base = boost::to_lower_copy(p.extension().string());

         if( base == shared_library::suffix() ) // dll or so
         {
            std::cout << "our plugin: " << p.string() << std::endl;

            my_plugin_api* plugin = NULL;

            shared_library sl(library(p.string()));

            if(sl.search_symbol(symbol("create_my_plugin")))
            {
               plugin = ((pluginapi_create)sl(symbol("create_my_plugin")))();
            }

            if(plugin != NULL)
            {
               boost::shared_ptr<void> delete_plugin(nullptr, [&](void*) {
                     // this code will be executed at the scope exit
                     ((pluginapi_delete) sl(symbol("delete_my_plugin")))(plugin);
               });

               std::cout << "Plugin Version: " << plugin->version() << std::endl;

               std::string query = "api.openweathermap.org", resource = "/data/2.5/find?q=Americana,br&mode=json", aswer, err;

               if(plugin->do_the_job(query, resource, aswer, err))
                  std::cout << "Error from plugin: " << err << std::endl;
               else
               {
                  /*
                  {
                      "message": "accurate",
                      "cod": "200",
                      "count": 1,
                      "list": [
                          {
                              "id": 3472343,
                              "name": "Americana",
                              "coord": {
                                  "lon": -47.33139,
                                  "lat": -22.73917
                              },
                              "main": {
                                  "temp": 302.15,
                                  "pressure": 1018,
                                  "humidity": 48,
                                  "temp_min": 302.15,
                                  "temp_max": 302.15
                              },
                              "dt": 1396634400,
                              "wind": {
                                  "speed": 6.7,
                                  "deg": 130
                              },
                              "sys": {
                                  "country": "BR"
                              },
                              "clouds": {
                                  "all": 40
                              },
                              "weather": [
                                  {
                                      "id": 802,
                                      "main": "Clouds",
                                      "description": "scattered clouds",
                                      "icon": "03d"
                                  }
                              ]
                          }
                      ]
                  }
                  */

                  pt::ptree json_reponse; std::istringstream is(aswer);
                  read_json(is, json_reponse);

                  BOOST_FOREACH(boost::property_tree::ptree::value_type& v, json_reponse.get_child("list"))
                  {
                     if(v.second.get<int>("main.humidity") < 80)
                     {
                        // record
                        weather_log_ << v.second.get<std::string>("dt") << ":" << v.second.get<std::string>("main.humidity") << std::endl;
                     }
                  }
               }
            }
          }
      }

      return false;
   }
嗯,这里有很多代码。
这里我们使用“boost::filesystem”扫描文件夹以获取所有共享模块。为此,我们使用切面
boost::shared_ptr<path> pt
   = this_application_cxt()->find<path>();

boost::filesystem::path scan_dir(pt->executable_path());
这为我们提供了可执行模块的路径。
“shared_library::suffix()”在 Windows 上返回字符串“dll”,在 Unix 上返回“so”。
然后我们使用“application::shared_library”加载插件,检查是否提供了特定符号,然后调用它。
shared_library sl(library(p.string()));

if(sl.search_symbol(symbol("create_my_plugin")))
{
   plugin = ((pluginapi_create)sl(symbol("create_my_plugin")))();
}
// ...
插件响应是一个 JSON 字符串,我们使用Boost.Property_Tree来“读取”它。
pt::ptree json_reponse; std::istringstream is(aswer);
read_json(is, json_reponse);
BOOST_FOREACH(boost::property_tree::ptree::value_type& v, json_reponse.get_child("list"))
{
   if(v.second.get<int>("main.humidity") < 80)
   {
      // record
      weather_log_ << v.second.get<std::string>("dt") << ":" << v.second.get<std::string>("main.humidity") << std::endl;
   }
}
9. 将应用程序实例化为服务或守护程序
为此,我们需要稍微更改一下main函数。我们将提供一种方式让用户选择是作为服务还是作为普通应用程序启动应用程序。
   std::vector<std::string> arg_list
      = this_application_cxt()->find<args>()->arg_vector();

   int ret = 0;
   if(std::find(arg_list.begin(), arg_list.end(), "--common") != arg_list.end())
      // launch our application as a common app
      ret = launch<common>(app, this_application_cxt(), ec);
   else
   {
      // launch our application as a server app (service / daemon)
      ret = launch<server>(app, this_application_cxt(), ec);
   }
10. 安装
在此版本的库中,我们不提供“服务或守护程序”安装的官方支持。这是因为我们需要在库支持的所有平台提供的功能之间保持对称性,并且在 POSIX 端,安装过程变化很大。因此,我们提供主要系统的安装功能作为示例在 examples 文件夹中。未来,我们计划将这些功能引入核心库。
注意:对于 POSIX,您需要使用一些 shell 脚本来控制守护程序,请参阅
\example\setup\posix\ubuntu
其中有一些来自 Ubuntu 的示例。
在 Windows 上,我们将使用此示例代码
\example\setup\windows\setup\service_setup.hpp
现在,是时候为 Windows 编写我们的设置方法了。
// my setup code for windows service
bool setup()
{
   boost::shared_ptr<args> myargs
      = this_application_cxt()->find<args>();

   boost::shared_ptr<path> mypath
      = this_application_cxt()->find<path>();

// provide setup for windows service
#if defined(BOOST_WINDOWS_API)

   // get our executable path name
   boost::filesystem::path executable_path_name = mypath->executable_path_name();

   std::string exename = mypath->executable_name().stem().string();

   // define our simple installation schema options
   po::options_description install("service options");
   install.add_options()
      ("help", "produce a help message")
      (",i", "install service")
      (",u", "unistall service")
      ("user", po::value<std::string>()->default_value(""),
         "user logon (optional, installation only)")
      ("pass", po::value<std::string>()->default_value(""),
         "user password (optional, installation only)")
      ("name", po::value<std::string>()->default_value(exename),
         "service name")
      ("display", po::value<std::string>()->default_value(""),
         "service display name (optional, installation only)")
      ("description", po::value<std::string>()->default_value(""),
         "service description (optional, installation only)")
      ;

      po::parsed_options parsed =
      po::command_line_parser(myargs->argc(), myargs->argv()
         ).options(install).allow_unregistered().run();

      po::variables_map vm;
      po::store(parsed, vm);
      boost::system::error_code ec;

      if (vm.count("help"))
      {
         std::cout << install << std::cout;
         return true;
      }

      if (vm.count("-i"))
      {
         example::install_windows_service(
         setup_arg(vm["name"].as<std::string>()),
         setup_arg(vm["display"].as<std::string>()),
         setup_arg(vm["description"].as<std::string>()),
         setup_arg(executable_path_name),
         setup_arg(vm["user"].as<std::string>()),
         setup_arg(vm["pass"].as<std::string>())).install(ec);

         std::cout << ec.message() << std::endl;

         return true;
      }

      if (vm.count("-u"))
      {
         example::uninstall_windows_service(
            setup_arg(vm["name"].as<std::string>()),
            setup_arg(executable_path_name)).uninstall(ec);

         std::cout << ec.message() << std::endl;

         return true;
      }
#endif

   return false;
}
这里,我们使用Boost.Program_Options来了解用户期望的选项。
现在,我们的服务器有一个命令行界面,用于在服务安装后进行安装和卸载。当用户请求安装时,例如:“time_based_plugin_job.exe -i”,安装请求由Boost.Program_options识别,然后执行“-i if”中的代码,安装服务。
请注意,您可以提供“user login”以安装特定 Windows 用户的服务。
命令行选项是
C:\Users\Renato Tegon Forti\Desktop\time_based_plugin_job\Debug>time_based_plugin_job.exe –i
  [I] Setup changed the current configuration.

C:\Users\Renato Tegon Forti\Desktop\time_based_plugin_job\Debug>time_based_plugin_job.exe –u
 [I] Setup changed the current configuration.
要安装服务,您需要有权限执行此操作。一个简单的方法是作为管理员执行安装,如下所示

之后,您将在 SCM 中看到我们的应用程序作为服务。

11. 其他处理程序
Boost.Application 允许您添加一些处理程序,例如,当用户点击停止链接(Windows)或在 POSIX 上发送 CTRL-C 信号时执行一些操作。
我们将添加代码来停止。首先,我们需要像这样将“stop”方法添加到我们的函子类中
   bool stop()
   {
      if (weather_log_.is_open())
      {
         weather_log_.close();
      }

      this_application_cxt()->find<timer_callback>()->stop();

      return true;
   }
这里,我们关闭日志文件并停止计时器引擎。
现在,我们需要在应用程序上下文的main中像这样添加“stop”处理程序
   this_application_cxt()->insert<termination_handler>(
      boost::make_shared<termination_handler_default_behaviour>(
         handler<bool>::make_global_callback(app, &time_based_job::stop)));
现在,当用户点击停止或向应用程序发送 ctrl-c 信号时,将调用“stop”方法!
请注意,如果您从“stop”返回false,应用程序引擎将忽略该操作,并且应用程序将继续运行。
您还有其他可用的句柄,例如暂停或限制单实例。有关更多详细信息,请查看文档。
结论
当任务是构建一个跨平台服务器时,Boost.Application 可以节省时间;否则开发人员必须直接使用为此提供的复杂 API。此外,Boost.Application 提供了一个简单高效的应用程序扩展机制(基于插件),以及许多其他即用型功能。
反馈
如果您是 Boost 用户并使用 Boost 邮件列表,请直接在列表中提供您对该库的反馈。(请注明您是否认为该库应被 boost.org 接受。)
如果您是 CodeProject 用户,请直接在此页面上提供您对该库的反馈。
用途
如果您打算在您的应用程序中使用“Application”,请将您的姓名和项目发送给我。我正在寻找创建“Application”用户列表。
re.tf@acm.or (Renato Tegon Forti)