
在 ASP.NET 中实现一对多关系
4.82/5 (17投票s)
在本文中,我们将创建一个项目来了解如何在 ASP.NET 中实现一对多关系。
引言
我们知道数据库关系有三种类型:
- 一对一关系 发生在一个表中的每个条目在第二个表中只有一个对应的条目。一对一关系很少使用,因为通常将所有信息放在单个表中更有效。
- 一对多关系 是最常见的数据库关系类型。它发生在第一个表中的每个记录对应第二个表中的一个或多个记录,但第二个表中的每个记录仅对应第一个表中的一个记录。例如,小学数据库中“教师”表和“学生”表之间的关系很可能是一对多关系,因为每个学生只有一个老师,但每个老师可能有多个学生。
- 多对多关系 发生在一个表中的每个记录对应第二个表中的一个或多个记录,并且第二个表中的每个记录对应第一个表中的一个或多个记录。例如,“教师”表和“课程”表之间的关系很可能是多对多的,因为每位教师可能教授多门课程,而每门课程可能有多位教师。
在本文中,我们将创建一个项目来了解如何在 ASP.NET 中实现一对多关系。
背景
我们将以一个简单的讲师 - 学生关系为例。例如,一位讲师可以关联一个或多个学生。 我们将分三个步骤完成此示例:
-
数据库更改
-
数据访问层更改
-
表示层更改
数据库更改
让我们执行以下 SQL 语句来创建所需的表和存储过程。
CREATE TABLE [tblLecturer](
 [LecturerID] [int] NOT NULL,
 [Name] [varchar](50) NULL
 )
CREATE TABLE [tblStudent](
 [StudentID] [int] NOT NULL,
 [Name] [varchar](50) NULL
 )
CREATE TABLE [tblLecturerStudent](
 [LecturerID] [int] NOT NULL,
 [StudentID] [int] NOT NULL
 )

CREATE PROCEDURE [spDeleteLecturerStudentRelationByLecturerID]
 @LecturerID  int
AS
BEGIN
 SET NOCOUNT ON;
    DELETE FROM [tblLecturerStudent]
    WHERE [LecturerID] = @LecturerID
END

CREATE PROCEDURE [spInsertLecturerStudentRelation]
 @LecturerID  int,
 @StudentID int
AS
BEGIN
 SET NOCOUNT ON;
    INSERT INTO [tblLecturerStudent]
    VALUES(@LecturerID, @StudentID)
END

INSERT INTO [tblLecturer] VALUES(1, 'Lecturer-1')
INSERT INTO [tblLecturer] VALUES(2, 'Lecturer-2')
INSERT INTO [tblLecturer] VALUES(3, 'Lecturer-3')
INSERT INTO [tblLecturer] VALUES(4, 'Lecturer-4')
INSERT INTO [tblLecturer] VALUES(5, 'Lecturer-5')
INSERT INTO [tblLecturer] VALUES(6, 'Lecturer-6')
INSERT INTO [tblLecturer] VALUES(7, 'Lecturer-7')
INSERT INTO [tblLecturer] VALUES(8, 'Lecturer-8')

INSERT INTO [tblStudent] VALUES(1, 'Student-1')
INSERT INTO [tblStudent] VALUES(2, 'Student-2')
INSERT INTO [tblStudent] VALUES(3, 'Student-3')
INSERT INTO [tblStudent] VALUES(4, 'Student-4')
INSERT INTO [tblStudent] VALUES(5, 'Student-5')
INSERT INTO [tblStudent] VALUES(6, 'Student-6')
INSERT INTO [tblStudent] VALUES(7, 'Student-7')
INSERT INTO [tblStudent] VALUES(8, 'Student-8')
INSERT INTO [tblStudent] VALUES(9, 'Student-9')
INSERT INTO [tblStudent] VALUES(10, 'Student-10')
INSERT INTO [tblStudent] VALUES(11, 'Student-11')
INSERT INTO [tblStudent] VALUES(12, 'Student-12')
数据访问层更改
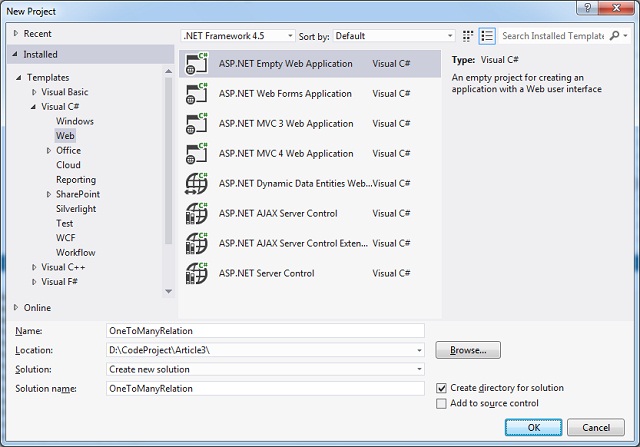
让我们创建一个新的 ASP.NET 空 Web 应用程序 - OneToManyRelation > 单击“确定”。
右键单击项目 > 添加类文件 > DAL.cs。
我们将使其成为一个静态类,以便可以在不实例化任何对象的情况下调用该方法。让我们添加两个公共静态方法来调用我们已经创建的两个存储过程。
public static class DAL
{
    public static void DeleteLecturerStudentRelationByLecturerID(int lecturerID)
    {
        //Get the Database Connection string from web.config file
        string connectionString = ConfigurationManager.ConnectionStrings["TESTConnectionString"].ConnectionString;
        using (SqlConnection con = new SqlConnection(connectionString))
        {
            //Create SqlParameter to hold Lectuere ID
            SqlParameter param1 = new SqlParameter();
            param1.ParameterName = "@LecturerID";
            param1.Value = lecturerID;
            //Create SqlCommand to execute the Stored Procedure
            SqlCommand cmd = new SqlCommand("spDeleteLecturerStudentRelationByLecturerID", con);
            cmd.CommandType = CommandType.StoredProcedure;
            //Add the parameter to the SqlCommand object
            cmd.Parameters.Add(param1);
            //Open Sql Connection
            con.Open();
            cmd.ExecuteNonQuery();
        }
    }
    public static void InsertLecturerStudentRelation(int lecturerID, int studentID)
    {
        //Get the Database Connection string from web.config file
        string connectionString = ConfigurationManager.ConnectionStrings["TESTConnectionString"].ConnectionString;
        using (SqlConnection con = new SqlConnection(connectionString))
        {
            //Create SqlParameter to hold Lectuere ID
            SqlParameter param1 = new SqlParameter();
            param1.ParameterName = "@LecturerID";
            param1.Value = lecturerID;
            //Create SqlParameter to hold Student ID
            SqlParameter param2 = new SqlParameter();
            param2.ParameterName = "@StudentID";
            param2.Value = studentID;
            //Create SqlCommand to execute the Stored Procedure
            SqlCommand cmd = new SqlCommand("spInsertLecturerStudentRelation", con);
            cmd.CommandType =CommandType.StoredProcedure;
            //Add both the parameters to the SqlCommand object
            cmd.Parameters.Add(param1);
            cmd.Parameters.Add(param2);
            //Open Sql Connection
            con.Open();
            cmd.ExecuteNonQuery();
        }
    }
}
现在只剩下前端更改了。让我们添加一个新的 Web 窗体 - WebForm1.aspx(保留默认名称)。
我们将有一个 ListBox 控件和一个 CheckBoxList 控件。所有讲师的列表将显示在 ListBox 控件中,所有学生将显示在 CheckBoxList 控件中。
表示层更改
<table style="width: 500px;" border="1">
    <tr>
        <th>Lecturer</th>
        <th>Student</th>
    </tr>
    <tr>
        <td style="width:50%; height:100px">
            <asp:ListBox ID="lstLecturer" runat="server" Width="100%" Height="100%">
            </asp:ListBox>
        </td>
        <td style="width:50%; height:100px">
            <!-- added Panel to show vertical scrollbar -->
            <asp:Panel ID="Panel2" runat="server" ScrollBars="Vertical" Height="100%">
                <asp:CheckBoxList ID="cblStudent" runat="server" Width="100%">
                </asp:CheckBoxList>
            </asp:Panel>
        </td>
    </tr>
</table>
注意:我们添加了一个 <asp:Panel> 控件,以便在显示更多记录时显示垂直滚动条。
转到页面的设计视图 > 选择 lstLecturer ListBox 控件 > 单击智能菜单 > 单击选择数据源。

数据源配置向导 将出现 > 选择“新建数据源…”

选择数据库 > 单击“确定”。

单击新建连接按钮。

输入服务器名称 > 单击刷新按钮 > 选择数据库名称 > 单击测试连接。
测试成功后 > 单击“确定”。

连接字符串将被创建并选中 > 单击“下一步”按钮。

保留默认连接字符串名称 > 单击“下一步”按钮。

选择 tblLecturer 表 > 单击“下一步”。

单击“测试查询”按钮测试输出 > 单击“完成”按钮。

选择一个数据字段以在 ListBox 中显示:Name。
选择一个数据字段作为 ListBox 的值:LecturerID。
单击“确定”按钮完成 数据源配置向导。

您应该会在 web.config 文件中找到已添加的 <connectionStrings> 部分。
<connectionStrings>
    <add name="TESTConnectionString" connectionString="Data Source=.\SQLEXPRESS;Initial Catalog=TEST;Integrated Security=True"
        providerName="System.Data.SqlClient" />
</connectionStrings>
同样,让我们继续将 tblStudent 表与 cblStudent CheckListBox 控件进行绑定。
现在检查 WebForm.aspx 以查看已发生的更改(粗体显示)。
<table style="width: 500px;" border="1">
    <tr>
        <th>Lecturer</th>
        <th>Student</th>
    </tr>
    <tr>
        <td style="width:50%; height:100px">
            <asp:ListBox ID="lstLecturer" runat="server" Width="100%" Height="100%"
                DataSourceID="SqlDataSource1" DataTextField="Name" DataValueField="LecturerID"></asp:ListBox>
            <asp:SqlDataSource ID="SqlDataSource1" runat="server"
                ConnectionString="<%$ ConnectionStrings:TESTConnectionString %>"
                SelectCommand="SELECT * FROM [tblLecturer]"></asp:SqlDataSource>
        </td>
        <td style="width:50%; height:100px">
            <!-- added Panel to show vertical scrollbar -->
            <asp:Panel ID="Panel2" runat="server" ScrollBars="Vertical" Height="100%">
                <asp:CheckBoxList ID="cblStudent" runat="server" Width="100%"
                    DataSourceID="SqlDataSource2" DataTextField="Name" DataValueField="StudentID">
                </asp:CheckBoxList>
                <asp:SqlDataSource ID="SqlDataSource2" runat="server"
                    ConnectionString="<%$ ConnectionStrings:TESTConnectionString %>"
                    SelectCommand="SELECT * FROM [tblStudent]"></asp:SqlDataSource>
            </asp:Panel>
        </td>
    </tr>
</table>
注意: SqlDataSource1 和 SqlDataSource2 控件已由 数据源配置向导 添加。
让我们运行一次网站,看看页面是否按预期显示数据。

现在我们将添加一个按钮控件来调用将实际删除现有映射并在数据库中插入新关系的方法。
<asp:Button ID="btnSave" runat="server" Text="Save" OnClick="btnSave_Click" />
这是在 WebForm1.aspx.cs 文件中的按钮单击事件中编写的代码。
protected void btnSave_Click(object sender, EventArgs e)
{
    int lecturerId, studentId;
    // Check if a Lecturer is selected
    if (lstLecturer.SelectedIndex >= 0)
    {
        lecturerId = Convert.ToInt32(lstLecturer.Items[lstLecturer.SelectedIndex].Value);
        // Call method to delete all the existing entries from tblLecturerStudent by LecturerID
        DAL.DeleteLecturerStudentRelationByLecturerID(lecturerId);
        foreach (ListItem student in cblStudent.Items)
        {
            if (student.Selected == true)
            {
                studentId = Convert.ToInt32(student.Value);
                // code to insert Lecturer - Student relation in a table
                DAL.InsertLecturerStudentRelation(lecturerId, studentId);
            }
        }
    }
}
让我们运行网站,在从 ListBox 中选择一个 Lecturer 并选择一个或多个 Students 在 CheckBoxList 控件中后,单击“保存”按钮。然后验证数据是否已成功插入数据库。
现在我们希望有一个功能可以从数据库中获取数据并显示关系。让我们在数据库端添加以下存储过程。
CREATE PROCEDURE [spGetAllStudentByLecturerID]
 @LecturerID int
AS
BEGIN
 SET NOCOUNT ON;
    SELECT [StudentID] FROM [tblLecturerStudent]
    WHERE [LecturerID] = @LecturerID
END
我们的想法是传递选定的讲师 ID,然后获取与该讲师关联的所有学生。让我们在 DAL.cs 文件中添加以下静态方法。
public static List<int> GetAllStudentByLecturerID(int lecturerID)
{
    List<int> studentIDs = new List<int>();
    //Get the Database Connection string from web.config file
    string connectionString = ConfigurationManager.ConnectionStrings["TESTConnectionString"].ConnectionString;
    using (SqlConnection con = new SqlConnection(connectionString))
    {
        //Create SqlParameter to hold Lectuere ID
        SqlParameter param1 = new SqlParameter();
        param1.ParameterName = "@LecturerID";
        param1.Value = lecturerID;
        //Create SqlCommand to execute the Stored Procedure
        SqlCommand cmd = new SqlCommand("spGetAllStudentByLecturerID", con);
        cmd.CommandType = CommandType.StoredProcedure;
        //Add the parameter to the SqlCommand object
        cmd.Parameters.Add(param1);
        //Open Sql Connection
        con.Open();
        SqlDataReader dr = cmd.ExecuteReader();
        while (dr.Read())
        {
            studentIDs.Add(Convert.ToInt32(dr["StudentID"]));
        }
    }
    return studentIDs;
}
为 lstLecturer ListBox 控件设置 AutoPostBack="true" 和 OnSelectedIndexChanged="lstLecturer_SelectedIndexChanged"。
protected void lstLecturer_SelectedIndexChanged(object sender, EventArgs e)
{
    int lecturerId, studentId;
    // Check if a Lecturer is selected
    if (lstLecturer.SelectedIndex >= 0)
    {
        lecturerId = Convert.ToInt32(lstLecturer.Items[lstLecturer.SelectedIndex].Value);
        //Get all the Students associated with the selected Lecturer
        List<int> studentIDs = DAL.GetAllStudentByLecturerID(lecturerId);
        foreach (ListItem student in cblStudent.Items)
        {
            studentId = Convert.ToInt32(student.Value);
            if (studentIDs.Contains(studentId))
            {
                student.Selected = true;
            }
            else
            {
                student.Selected = false;
            }
        }
    }
}
让我们执行网站并从 ListBox 控件中选择一位讲师。如果数据库中已有与所选讲师关联的学生,则这些学生将在 CheckBoxList 控件中显示为选中状态。

希望您喜欢这篇文章。
编码愉快 :)