
将 ASP.NET MVC 与 DB2 表关联
如何将 ASP.NET MVC 与 DB2 表关联
概述
在本文中,我将通过一个简单的示例,介绍如何使用 Visual Studio 2012 中的 ASP.NET MVC 4 将 DB2 表 (AS400) 关联到 ADO.NET DataSet。本文还将介绍 Mvcscaffolding,用于处理 CRUD 操作。
目标
在本主题结束时,我将创建一个 ASP.NET MVC 4 Web 应用程序,该应用程序允许用户使用提供的可自定义 CRUD 方法,向 DB2 表添加、更新和删除记录。该应用程序还将创建谁更新了表以及何时更新的审计跟踪。
在 AS400 中
本文中使用的示例是位于 AS400 数据库中的名为 Product 的产品主文件。在这里,我们在名为 RAYALS 的库中有一个名为 Product 的物理文件。

根据 iSeries 中物理文件的数据描述规范 (DDS),它的设置如下:NAME 是产品的名称(长度为 30 的字符),DESCRP(长度为 100)是描述,然后是 PRICE(长度为 15)和 QTY(数量,长度为 10)。

在 Visual Studio 2012 中
我们在 Visual Studio 2012 中创建一个新项目,选择 ASP.NET MVC 4 Web 应用程序。

之后,我们将项目命名为 SampleProductInterface,并将其保存在指定的位置。

然后,我们将选择“Internet 应用程序”作为模板,并接受其余的默认设置。

第一次创建解决方案时,这需要一些时间。
准备就绪后,您应该会在“解决方案资源管理器”中看到以下文件夹和文件。

与之前的 MVC 版本类似,MVC 4 具有通常的 Controllers、Models 和 Views 文件夹,如上所示。我们可以修改应用程序启动时的初始页面的布局。
我们将选择位于以下位置的 _Layout.cshtml razor 文件。

从那里,我们可以根据需要更改页面标题和操作链接标题(突出显示的部分)。
<title>@ViewBag.Title - Sample Product Interface </title>
<p class="site-title">@Html.ActionLink("Product Master Update", "Index", "Home")</p>
创建包含 AS400 表的 DataSet
然后,我们在 Models 文件夹中创建一个 DataSet。右键单击“Models”文件夹,添加项,选择“数据”并选择 DataSet。

将其命名为“ProductDataSet.xsd”。

在“服务器资源管理器”工具箱中,我们按如下方式连接

选择 ![]() 图标,然后将出现以下窗口。服务器名称将出现在下图的蓝色矩形中。
图标,然后将出现以下窗口。服务器名称将出现在下图的蓝色矩形中。

如上所示,关键是获取正确的数据源以及 OLEDB 提供程序。需要填写的其他字段是“服务器或文件名”。
不要忘记点击“测试连接”按钮,以确认远程服务器可连接。之后,您可以单击“确定”。以下连接将显示在“数据连接”部分下方,名为 IBMDA400.BARBUDA。

通过单击 Tables 文件夹,您将看到该特定库(例如 RAYALS)中存在的表列表。我们将重点关注 product 表。
我们在左侧窗格(服务器资源管理器)中单击 PRODUCT 表,并将其拖到右侧的 ProductDataSet.xsd 文件上。这将在 .xsd 文件中创建一个表的实例。

模型设置
在 Models 文件夹中,我们创建一个名为 ProductsMaster 的类,该类负责将数据从 Web UI 输入到 AS400 表 Product。每次向 AS400 表添加新产品时,我们都会有一个关于谁完成此操作以及何时完成的审计跟踪。
namespace SampleProductInterface.Models
{
    public class ProductMaster
    {
        [Key]
        [Required]
        public int ProdId { get; set; }
        public string ProductName { get; set; }
        public string Description {get;set;}
        public string Price {get;set;}
        public string Quantity {get;set;}
        public string Username { get; set; }
        public DateTime DateEntered { get; set; }
    }
}
使用 Mvcscaffolding 进行 CRUD 创建
我们转到程序包管理器控制台,并调用 Mvcscaffolding 命令为 ProductMaster 类创建相关的 CRUD 功能。
首先,我们通过在 PM> 提示符下键入 install-package mvcscaffolding 来安装 mvcscaffolding,如下所示:
![]()
在安装完 mvcscaffolding 的所有内容后,提示符将再次出现,如下所示,上面有消息记录。

在程序包管理器控制台中调用以下命令,以在 Views/ProductMasters 文件夹中为 ProductMaster 类创建必要的 CRUD 视图。
Scaffold Controller ProductMaster -Repository -Force.
创建 DAL 文件夹和类
在项目中按如下方式创建一个 DAL 文件夹。这里将编写访问和修改 AS400 表的类。

然后,在 DAL 文件夹中创建一个名为 UnitOfWork.cs 的类,或者您可以选择其他名称。
using SampleProductInterface.Models;
using SampleProductInterface.Models.ProductDataSetTableAdapters;
using System;
using System.Collections.Generic;
using System.Data.OleDb;
using System.Linq;
using System.Web;
public class UnitOfWork
    {
        public string HostName, Library, UserName, Password, DBConnectionString;

        public static string GetConnectionString
        (string host, string library, string username, string password)
        {
            string _sqlConnectionString = string.Format
            ("Provider=IBMDA400.DataSource.1;Data Source={0};Persist Security Info=True;
            Password={3};User ID={2};Catalog Library List={1}", host, library, username, password);
            return _sqlConnectionString;
        }
        public UnitOfWork(string environment)
        {
            HostName = "BARBUDA";
            UserName = "MICKY";
            Password = "MOUSE";
            Library = "RAYALS";
            DBConnectionString = GetConnectionString(HostName, Library, UserName, Password);
        }

        public void WriteToProduct(ProductMaster prd)
        {
            using (var ta = new PRODUCTTableAdapter())
            {
                 ta.Connection = new OleDbConnection(DBConnectionString);
                 using (var ds = new ProductDataSet())
                 {
                     var productRow = ds.PRODUCT.NewPRODUCTRow();

                     productRow.NAME = prd.ProductName;
                     productRow.DESCRP = prd.Description;
                     productRow.PRICE = prd.Price;
                     productRow.QTY = prd.Quantity;
                     ds.PRODUCT.AddPRODUCTRow(productRow);
                     try
                     {
                         //insert into AS400 table
                         ta.Update(ds.PRODUCT);
                     }
                     catch (Exception ex)
                     {
                         throw new ApplicationException("Failed to insert Row into PRODUCT File", ex);
                     }
                 }
            }
        }
    }
在上面的代码中,WriteToProduct() 方法是写入 AS400 文件的主要过程。构造函数设置 AS400 服务器的登录凭据,包括主机、库、用户名和密码。然后,WriteToProduct() 方法将使用从构造函数中初始化的凭据派生的连接字符串连接到 AS400,并将数据从产品主文件 (ProductMaster) 写入数据集 (ProductDataSet)。然后,表适配器 (PRODUCTTableAdapter) 将执行一个 insert 语句,获取 dataset 的值并写入 AS400 中的 PRODUCT 表。
修改控制器方法
在控制器中,Create 方法应如下所示:
[HttpPost]
        public ActionResult Create(ProductMaster productmaster)
        {
            UnitOfWork uow = new UnitOfWork();
            if (ModelState.IsValid) {
                //call uow to insert into AS400
                uow.WriteToProduct(productmaster);
                productmaster.Username = Environment.UserName;
                productmaster.DateEntered = DateTime.Now;
                productmasterRepository.InsertOrUpdate(productmaster);
                productmasterRepository.Save();
                return RedirectToAction("Index");
            } else {
                return View();
            }
        }
在上面的代码中,我们调用 UnitOfWork 方法‘WriteToProduct()’,该方法将写入 AS400 表。然后,在更新 SQL Server 表 ProductMaster 之前,我们通过将当前 Windows 用户名和当前时间 (DateTime.Now) 分配给相应的字段来确保 Username 和 DateEntered 字段已填充。
因此,在这种情况下,我们将填充两个表:一个是通过 WriteToProduct() 方法在 AS400 中填充,另一个是使用控制器的 Edit 方法 productmasterRepository.InsertOrUpdate (productmaster) 和 productmasterRepository.Save() 进行填充。
修改 cshtml 视图
在 _Layout.cshtml 文件(位于 Views/Shared 中)中,我们还将添加一行以启用对 Index.cshtml 页面的访问,以便更新 ProductMaster 表。下面的额外一行(第三行)是 ProductMasters 的 ActionLink,当选择标记为“Products Update”的选项卡时,它将指向 Index.cshtml 页面。
     <ul id="menu">
         <li>@Html.ActionLink("Home", "Index", "Home")</li>
         <li>@Html.ActionLink("Products Update", "Index", "ProductMasters")</li>
         <li>@Html.ActionLink("About", "About", "Home")</li>
         <li>@Html.ActionLink("Contact", "Contact", "Home")</li>
     </ul>
然后,在 _CreateOrEdit.cshtml 文件(位于 Views/ProductMasters 中)中,删除以下行:
<div class="editor-label">
    @Html.LabelFor(model => model.Username)
</div>
<div class="editor-field">
    @Html.EditorFor(model => model.Username)
    @Html.ValidationMessageFor(model => model.Username)
</div>

<div class="editor-label">
    @Html.LabelFor(model => model.DateEntered)
</div>
<div class="editor-field">
    @Html.EditorFor(model => model.DateEntered)
    @Html.ValidationMessageFor(model => model.DateEntered)
</div>
程序将在创建时自动填充 ProgramMaster(SQL Server 表)中的这些字段,因此我们无需进行任何修改。
运行应用程序
按 F5 运行 Web 应用程序。您将看到以下屏幕:
![]()
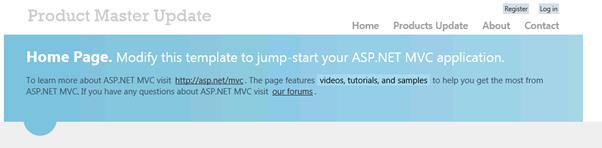
单击 Products Update 链接以进入以下页面:

上述字段名称显示可以格式化为更易读的呈现方式,但现在我们的重点是演示此应用程序如何更新 AS400 表。此时,ProductMaster 的数据库实例已在项目 的 App_Data 文件夹中创建。
单击“Create New”链接,将显示以下页面。字段值已输入。

然后,单击“Create”按钮,将调用 WriteToProduct() 方法将数据写入 AS400 表 PRODUCT。
查看 PRODUCT 表的查询,该行已成功添加,如下所示:

下次访问 Index.cshtml 页面时,我们将看到一条详细记录,显示我们已将条目添加到 AS400 表,其中包括用户配置文件和时间戳。
至此,我们完成了通过 ASP.NET MVC 4 Web 应用程序填充 AS400 表的简单演示。
关注点
推导出上述解决方案并没有什么特别复杂之处。关键在于获取正确的 DB2 (AS400) 凭据设置,然后一切都会变得简单明了。