
Silverlight 4 命令绑定的分步指南
4.90/5 (13投票s)
在本文中,我将介绍如何实现命令绑定来加载一些信息并将其显示在 UI 上。
引言
Silverlight 4 现在支持命令绑定。使用命令绑定,您可以轻松开发 Silverlight MVVM(模型-视图-视图模型)应用程序,其中视图将不知道数据,即视图与模型完全分离。在本文中,我将介绍如何实现命令绑定来加载一些信息并将其显示在 UI 上。
背景
在早期版本的 Silverlight 中,如果您想在单击按钮时加载某些内容,您必须在视图中注册事件,然后调用适当的方法来加载数据。例如,假设我想在单击特定按钮时加载我的杂货店的客户信息。如何在 Silverlight 中实现这一点?答案很简单。我将注册按钮的 Click 事件,然后调用 CustomerProvider 来在我的视图中加载客户信息。这很简单,但您是否同意这会使您的视图充斥着加载信息的逻辑?是的,这些后端相关的调用与您的视图紧密耦合。它们彼此知道,如果我想从不同的按钮执行相同的调用,我必须为该按钮注册单击事件,然后调用。在正常情况下,这看起来有点难看。
现在假设 MVVM 架构,其中视图用于显示 UI 相关内容,模型是数据,视图模型用于执行必要的操作,调用提供程序获取客户信息并将其存储在视图模型中。您的视图将不包含任何关于您数据的信息。一旦绑定到 UI,它将自动加载信息。这将为您提供干净、可维护的代码,并将视图与业务逻辑分离。
DelegateCommand 的实现
要实现命令绑定,您必须创建一个实现 ICommand 接口的 DelegateCommand。ICommand 接口位于 System.Windows.dll 程序集中的 System.Windows.Input 命名空间下。它定义了命令的契约。
- 它有一个
EventHandler“CanExecuteChanged”,当发生影响命令是否应执行的更改时触发。 - 它有一个名为“
CanExecute”的方法,该方法根据命令在其当前状态下是否可以执行来返回布尔值true或false。 - 另一个名为“
Execute”的方法,在调用命令时被调用。
以下是 ICommand 接口的实现
namespace System.Windows.Input
{
   public interface ICommand
   {
       event EventHandler CanExecuteChanged;
       bool CanExecute(object parameter);
       void Execute(object parameter);
    }
}
现在,我们必须将 ICommand 接口中定义的方法实现到我们的 DelegateCommand 类中。以下是其简单的实现
using System;
using System.Windows.Input;

namespace Silverlight4.CommandBinding.Demo.CommandBase
{
    public class DelegateCommand : ICommand
    {
        /// <summary>
        /// Occurs when changes occur that affect whether the command should execute.
        /// </summary>
        public event EventHandler CanExecuteChanged;

        Func<object, bool> canExecute;
        Action<object> executeAction;
        bool canExecuteCache;

        /// <summary>
        /// Initializes a new instance of the <see cref="DelegateCommand"/> class.
        /// </summary>
        /// <param name="executeAction">The execute action.</param>
        /// <param name="canExecute">The can execute.</param>
        public DelegateCommand(Action<object> executeAction,
                               Func<object, bool> canExecute)
        {
            this.executeAction = executeAction;
            this.canExecute = canExecute;
        }

        #region ICommand Members
        /// <summary>
        /// Defines the method that determines whether the command
        /// can execute in its current state.
        /// </summary>
        /// <param name="parameter">
        /// Data used by the command.
        /// If the command does not require data to be passed,
        /// this object can be set to null.
        /// </param>
        /// <returns>
        /// true if this command can be executed; otherwise, false.
        /// </returns>
        public bool CanExecute(object parameter)
        {
            bool tempCanExecute = canExecute(parameter);

            if (canExecuteCache != tempCanExecute)
            {
                canExecuteCache = tempCanExecute;
                if (CanExecuteChanged != null)
                {
                    CanExecuteChanged(this, new EventArgs());
                }
            }

            return canExecuteCache;
        }

        /// <summary>
        /// Defines the method to be called when the command is invoked.
        /// </summary>
        /// <param name="parameter">
        /// Data used by the command.
        /// If the command does not require data to be passed,
        /// this object can be set to null.
        /// </param>
        public void Execute(object parameter)
        {
            executeAction(parameter);
        }
        #endregion
    }
}
ViewModelBase 的实现
现在让我们为我们的应用程序实现 ViewModelBase。虽然对于这个示例应用程序,您可以直接使用 ViewModel,但建议通过继承 INotifyPropertyChanged 接口来创建基类实现,这样如果您创建多个 ViewModel,继承基类会更容易。这是代码
using System.ComponentModel;

namespace Silverlight4.CommandBinding.Demo.CommandBase
{
    public abstract class ViewModelBase : INotifyPropertyChanged
    {
        public event PropertyChangedEventHandler PropertyChanged;
        /// <summary>
        /// Called when [property changed].
        /// </summary>
        /// <param name="propertyName">Name of the property.</param>
        protected void OnPropertyChanged(string propertyName)
        {
            var handler = PropertyChanged;
            if (handler != null)
            {
                handler(this, new PropertyChangedEventArgs(propertyName));
            }
        }
    }
}
ViewModel 的实现
现在所有基类都准备就绪。因此,我们可以继续创建我们的第一个 ViewModel。在此示例中,我们将加载 Customer 信息,因此将其命名为 CustomerViewModel。
首先,我们将创建一个 DelegateCommand“LoadCustomersCommand”的新实例,它是一个 ICommand 类型变量。它接受两个参数。第一个是命令执行时触发的操作,第二个是指向函数的指针,该函数返回命令是否可以执行。如果它返回 true,则绑定到该元素的命令将能够执行操作;如果它返回 false,则绑定到该元素的命令将默认禁用。一旦由于其他操作变为 true,UI 线程会自动启用该元素。
在演示应用程序中,当命令执行时,我们将从提供程序获取客户信息,并将数据存储在名为“CustomerCollection”的 ObservableCollection 中。我们使用 ObservableCollection 是因为它继承了 INotifyPropertyChanged 接口,并在集合更改事件发生时自动触发 UI 线程更新与特定 UI 绑定的 UI。
/// <summary>
/// Initializes a new instance of the <see cref="CustomerViewModel"/> class.
/// </summary>
public CustomerViewModel()
{
    LoadCustomersCommand = new DelegateCommand(LoadCustomers, CanLoadCustomers);
}

/// <summary>
/// Loads the customers.
/// </summary>
/// <param name="parameter">The parameter.</param>
private void LoadCustomers(object parameter)
{
    CustomerCollection = CustomerProvider.LoadCustomers();
}

/// <summary>
/// Determines whether this instance [can load customers] the specified parameter.
/// </summary>
/// <param name="parameter">The parameter.</param>
/// <returns>
///     <c>true</c> if this instance [can load customers] the specified parameter;
///     otherwise, <c>false</c>.
/// </returns>
private bool CanLoadCustomers(object parameter)
{
    return true;
}
UI 实现(XAML)
到目前为止,我们的后端代码实现已准备就绪,现在我们必须创建 UI 来显示客户信息。首先,我们将创建 viewmodel 的 static 实例作为 UserControl 的资源。我们将其命名为“vmCustomer”。现在我们将使用 ListBox 和 Button 设计我们的 UI。一旦我们单击按钮,它应该执行命令并将数据加载到 ListBox 中。
ListBox 的 ItemSource 应该指向 ViewModel 中的 CustomerCollection。按钮将具有与之关联的 LoadCustomersCommand。如果 canExecute 方法返回 false,您会注意到按钮是禁用的;当它返回 true 时,它将启用。
这是完整的 XAML 实现
<UserControl x:Class="Silverlight4.CommandBinding.Demo.MainPage"
    xmlns="http://schemas.microsoft.com/winfx/2006/xaml/presentation"
    xmlns:x="http://schemas.microsoft.com/winfx/2006/xaml"
    xmlns:d="http://schemas.microsoft.com/expression/blend/2008"
    xmlns:mc="http://schemas.openxmlformats.org/markup-compatibility/2006"
    xmlns:local="clr-namespace:Silverlight4.CommandBinding.Demo.ViewModel"
    Width="500" Height="300">

    <UserControl.Resources>
        <local:CustomerViewModel x:Key="vmCustomer"/>
    </UserControl.Resources>

    <Grid x:Name="LayoutRoot" Background="White">
        <Border CornerRadius="10,10,0,0" Background="Black"
                Height="30" VerticalAlignment="Top" Margin="20,20,20,0">
            <TextBlock Text="Silverlight 4 Command Binding Demo" Foreground="White"
                       FontWeight="Bold" Margin="5"/>
        </Border>
        <ListBox ItemsSource="{Binding CustomerCollection,
		Source={StaticResource vmCustomer}}"
                 Margin="20,50,20,40">
            <ListBox.ItemTemplate>
                <DataTemplate>
                    <Grid>
                        <Grid.ColumnDefinitions>
                            <ColumnDefinition Width="150"/>
                            <ColumnDefinition Width="150"/>
                            <ColumnDefinition Width="*"/>
                        </Grid.ColumnDefinitions>
                        <TextBlock Text="{Binding Path=Name}"
				Width="100" Grid.Column="0"/>
                        <TextBlock Text="{Binding Path=Address}"
				Width="200" Grid.Column="1"/>
                        <TextBlock Text="{Binding Path=ContactNumber}"
				Width="100" Grid.Column="2"/>
                    </Grid>
                </DataTemplate>
            </ListBox.ItemTemplate>
        </ListBox>
        <Button Command="{Binding LoadCustomersCommand,
			Source={StaticResource vmCustomer}}"
                Content="Load Customers" Height="25" Margin="380,267,20,8" />
    </Grid>
</UserControl>
下一步是什么?
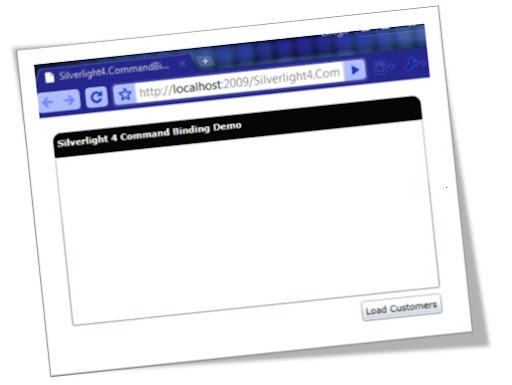
我们完整的代码实现已准备就绪。现在我们可以运行应用程序来查看代码的执行。按 F5 运行它。视图加载后,您会看到 ListBox 是空的,并且在空 ListBox 下方有一个按钮。
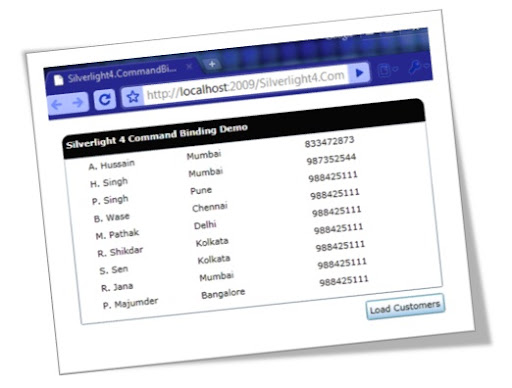
现在按下按钮。它将向 viewmodel 触发命令,并从提供程序获取客户信息以加载到集合中。一旦集合被修改,这将自动触发 PropertyChanged 事件来更新 UI。
结论
您会注意到,在整个示例中,我们没有在 XAML 的 CS 文件中编写任何代码,即 MainPage.xaml.cs 是空的。这确保了业务逻辑与 UI 实现完全分离。这提供了更高的代码可读性和可维护性。
欢迎在此处提出任何疑问、评论或建议。另外,别忘了为它投票。