
Silverlight 应用程序中的数据绑定
4.59/5 (22投票s)
在本文中,您将学习 Silverlight 应用程序中简单数据绑定的基本概念。
目录
概述
在本文中,您将学习 Silverlight 应用程序中简单数据绑定的基本概念。我已经介绍了可用的不同类型的绑定模式,以及如何以声明式和编程方式使用它们。我们还将了解如何为集合进行绑定,INotifyPropertyChanged 接口方法的重要性,以及 ObservableCollection 类。我们的最终目标是从后端或 .NET 对象获取信息并在用户界面中显示它。
这是我关于 Silverlight 技术的其他一些文章
- Silverlight 简介 - ASilverlightIntroduction.aspx
- 开始使用 Silverlight - GettingStartedSilverlight.aspx
数据绑定简介
数据绑定是建立源和目标之间连接的过程。在 Silverlight 数据绑定中,源是 CLR 对象,目标是 Silverlight 控件(XAML 元素)。让我给您看一个示意图。

绑定模式
在 Silverlight 应用程序中,源和目标之间存在三种类型的数据绑定。
- 仅一次数据绑定
- 单向数据绑定(默认模式)
- 双向数据绑定
仅一次数据绑定:顾名思义,数据绑定只在源和目标之间发生一次。在此绑定中,源(CLR 对象)数据仅在页面首次执行时与目标(XAML 元素)绑定。之后,对源所做的任何更改都不会反映回目标元素。如果您知道源属性不会改变,则倾向于使用此绑定模式以减少开销。
单向数据绑定:在此数据绑定中,源会立即将更改通知目标控件。我们仅将此绑定用于频繁更改的元素。这是默认模式。
双向数据绑定:这发生在双向模式下。每当后端或 CLR 对象发生任何更改时,它会立即通知 XAML 控件,反之亦然。
Silverlight 中的绑定需要三样东西

- 我们需要的第一个是目标 UI 元素的属性。它可以是
TextBox控件的Text属性,也可以是ListBox控件的ItemsSource属性等。您可以将其称为FrameworkElement的DependencyProperty。 - 源对象,其中包含在源和目标之间流动的数据。源可以是任何 CLR 对象。
- 一个绑定对象来处理这两个之间的通信。
要在 XAML 代码中实现数据绑定,您需要实现一个绑定语句。以下是如何在 XAML 中使用绑定语句的语法
绑定是使用 {Binding ...} 语法在 XAML 中创建的。
<TextBox x:Name="tbFirstName" Text="{Binding Path=FirstName, Mode=OneTime}"
         Grid.Column="2" Grid.Row="1"></TextBox>
绑定语句有很多属性,但这里是 Binding 语句常用属性的列表
Path是要从中获取数据的源属性的名称。Mode是源和目标之间的连接类型(OneTime、OneWay 和 TwoWay)。Source是包含数据的标准 CLR 对象。Converter用于指定转换器对象,该对象由绑定引擎调用,以便在数据在源和目标之间传递时对其进行修改。Converter Culture指定一个可以传递给数据转换的参数。Conversion Parameter指定一个可以传递给转换器的参数。
什么是DataContext?
在数据库绑定中还有另一个重要的事情,那就是 DataContext 属性。DataContext 属性用于在 FrameworkElement 参与数据绑定时设置或获取其数据上下文。
数据上下文是继承的。如果您在父元素上设置了数据上下文,那么其所有子元素都将使用相同的数据上下文。子元素可以通过在其绑定对象上设置 Source 属性或设置其 DataContext 来覆盖此行为,然后该行为将应用于其所有子元素。
DataContext 属性可以在父控件中设置,也可以为每个子控件设置。在父控件中设置它的唯一优点是,您不必为每个子控件重复设置它。
这是一个如何在父控件中设置 DataContext 属性并在子控件中使用的示例。
<UserControl x:Class="SampleCode.BindingModesExamples"
     xmlns:local="clr-namespace:SampleCode"
     xmlns="http://schemas.microsoft.com/winfx/2006/xaml/presentation"
     xmlns:x="http://schemas.microsoft.com/winfx/2006/xaml"
     xmlns:d="http://schemas.microsoft.com/expression/blend/2008"
     xmlns:mc="http://schemas.openxmlformats.org/markup-compatibility/2006"    >
   <UserControl.Resources>
       <local:Employee x:Key="employeeInfo" FirstName="Anjaiah" LastName="Keesari"/>
   </UserControl.Resources>
   <Grid x:Name="LayoutRoot"
      DataContext="{StaticResource employeeInfo}"
      Background="LightCyan" Width="500" Height="300"
      HorizontalAlignment="Left" >
        <Grid.ColumnDefinitions >
            <ColumnDefinition Width="100" />
            <ColumnDefinition Width="100" />
            <ColumnDefinition Width="200" />
        </Grid.ColumnDefinitions>
        <Grid.RowDefinitions>
            <RowDefinition Height="100"/>
            <RowDefinition Height="Auto"/>
            <RowDefinition Height="Auto"/>
            <RowDefinition Height="Auto"/>
        </Grid.RowDefinitions>

        <TextBlock Text="First Name" Grid.Column="1" Grid.Row="1"></TextBlock>
        <TextBox x:Name="tbFirstName" Text="{Binding Path=FirstName, Mode=OneTime}"
                 Grid.Column="2" Grid.Row="1"></TextBox>

        <TextBlock Text="Last Name" Grid.Column="1" Grid.Row="2"></TextBlock>
        <TextBox x:Name="tbLastName" Text="{Binding Path=LastName, Mode=OneTime}"
                 Grid.Column="2" Grid.Row="2"></TextBox>

        <TextBlock Text="Email ID" Grid.Column="1" Grid.Row="3"></TextBlock>
        <TextBox x:Name="tbEmailID" Text="{Binding Path=EmailID, Mode=OneTime}"
                 Grid.Column="2" Grid.Row="3"></TextBox>
    </Grid>
</UserControl>
大多数时候,您可能不想仅通过 XAML 绑定数据;您也可以使用您喜欢的编程语言(如 C#)执行相同的操作。绑定也可以以编程方式执行。您需要做的就是创建一个新的绑定对象并调用 SetBinding() 方法来执行源和目标之间的绑定。以下是执行此操作的示例代码。
using System;
using System.Collections.Generic;
using System.Linq;
using System.Net;
using System.Windows;
using System.Windows.Controls;
using System.Windows.Documents;
using System.Windows.Input;
using System.Windows.Media;
using System.Windows.Media.Animation;
using System.Windows.Shapes;
using System.Windows.Data;
namespace SampleCode
{
    public partial class BindingModesExamples : UserControl
    {
        public BindingModesExamples()
        {
            InitializeComponent();
            Loaded+=new RoutedEventHandler(BindingModesExamples_Loaded);
        }
        //Example of binding useing code
        private void BindingModesExamples_Loaded(object sender, RoutedEventArgs args)
        {
            Employee employee = new Employee();
            employee.EmailID = "Keesari_anjaiah@yahoo.co.in";
            Binding binding = new Binding()
            {
                Source = employee,
                Path = new PropertyPath("EmailID"),
                Mode = BindingMode.OneTime
            };
            tbEmailID.SetBinding(TextBox.TextProperty, binding);
        }
    }
}
在我们继续之前,我将向您展示我在每个示例中使用的 .NET 对象。不用担心此类中的 PropertyChanged 概念,我们稍后会讨论它们。请继续完整阅读本文,以便理解数据绑定概念。
using System;
using System.Net;
using System.Windows;
using System.Windows.Controls;
using System.Windows.Documents;
using System.Windows.Ink;
using System.Windows.Input;
using System.Windows.Media;
using System.Windows.Media.Animation;
using System.Windows.Shapes;
using System.ComponentModel;
namespace SampleCode
{
    public class Employee :INotifyPropertyChanged
    {
        public event PropertyChangedEventHandler PropertyChanged;
        public void OnPropertyChanged(PropertyChangedEventArgs e)
        {
            if (PropertyChanged != null)
                PropertyChanged(this, e);
        }
        private int employeeID;
        public int EmployeeID
        {
            get
            {
                return employeeID;
            }
            set
            {
                if (employeeID != value)
                {
                    employeeID = value;
                    OnPropertyChanged(new PropertyChangedEventArgs("EmployeeID"));
                }
            }
        }
        private string firstName;
        public string FirstName
        {
            get { return firstName; }
            set
            {
                if (firstName != value)
                {
                    firstName = value;
                    OnPropertyChanged(new PropertyChangedEventArgs("FirstName"));
                }
            }
        }
        private string lastName;
        public string LastName
        {
            get { return lastName; }
            set
            {
                if (lastName != value)
                {
                    lastName = value;
                    OnPropertyChanged(new PropertyChangedEventArgs("LastName"));
                }
            }
        }
        private String emailID;
        public String EmailID
        {
            get
            {
                return emailID;
            }
            set
            {
                if (emailID != value)
                {
                    emailID = value;
                    OnPropertyChanged(new PropertyChangedEventArgs("EmailID"));
                }
            }
        }
        private string title;
        public string Title
        {
            get { return title; }
            set
            {
                if (title != value)
                {
                    title = value;
                    OnPropertyChanged(new PropertyChangedEventArgs ("Title"));
                }
            }
        }
        private DateTime dateOfBirth;
        public DateTime DateOfBirth {
            get { return dateOfBirth; }
            set {
                if (dateOfBirth != value)
                {
                    dateOfBirth = value;
                    OnPropertyChanged(new PropertyChangedEventArgs("DateOfBirth"));
                }
            }
        }
    }
}

绑定集合
现在我们已经清楚了单个对象数据绑定,让我们来谈谈对象集合。
ListBox 是用于绑定数据集合的控件之一。所有集合控件类都由 ItemsControl 类表示。将集合绑定到 ItemsControl 就像将 ItemsSource 属性设置为某个集合并将 DisplayMemberPath 设置为集合项的某个属性一样简单。
<UserControl x:Class="SampleCode.TwoWayBindingExamples"
    xmlns:local="clr-namespace:SampleCode"
    xmlns="http://schemas.microsoft.com/winfx/2006/xaml/presentation"
    xmlns:x="http://schemas.microsoft.com/winfx/2006/xaml"
    xmlns:d="http://schemas.microsoft.com/expression/blend/2008"
    xmlns:mc="http://schemas.openxmlformats.org/markup-compatibility/2006">
    <UserControl.Resources>
        <local:Employees  x:Key="Employees" />
    </UserControl.Resources>
    <StackPanel DataContext="{StaticResource Employees}"
              Background="LightCyan" Width="500" Height="300" >
        <TextBox x:Name="tbDescription"
            Text="{Binding Path=SelectedItem.Title, ElementName=lbEmployees, Mode=TwoWay}"
            HorizontalAlignment="Left" VerticalAlignment="Top" Margin="10" Width="325" />
        <ListBox x:Name="lbEmployees" ItemsSource="{Binding}"
            DisplayMemberPath="Title" HorizontalAlignment="Left" VerticalAlignment="Top"
            Margin="10" Width="323" />
    </StackPanel>
</UserControl>
using System;
using System.Net;
using System.Windows;
using System.Windows.Controls;
using System.Windows.Documents;
using System.Windows.Ink;
using System.Windows.Input;
using System.Windows.Media;
using System.Windows.Media.Animation;
using System.Windows.Shapes;
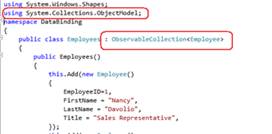
using System.Collections.ObjectModel;
namespace SampleCode
{
public class Employees : ObservableCollection<Employee>
{
public Employees()
{
this.Add(new Employee()
{
EmployeeID=1,
FirstName = "Nancy",
LastName = "Davolio",
Title = "Sales Representative",
});
this.Add(new Employee()
{
EmployeeID = 2,
FirstName = "Andrew",
LastName = "Fuller",
Title = "Vice President, Sales",
});
this.Add(new Employee()
{
EmployeeID = 3,
FirstName = "Janet",
LastName = "Leverling",
Title = "Sales Manager",
});
}
}
}
更改通知
正如我们之前讨论的,我们需要允许对数据源所做的更改立即反映在目标上。这怎么可能?这可以通过实现 INotifyPropertyChanged 接口来实现。它是 ObservableCollection<T> 的子类,并且该接口已为您实现。您需要做的是获取命名空间 System.ComponentModel 来实现 INotifyPropertyChanged 接口。它有一个名为 PropertyChanged() 的单一方法。在设置属性值时,如果任何值发生更改,您需要调用 OnPropertyChanged() 方法。

ObservableCollection
为了提供集合更改(添加新项、删除或刷新整个列表)的通知,我们需要从 ObservableCollection<T> 继承我们的集合对象。在使用 ObservableCollection 之前,请添加对 System.Collections.ObjectModel 的引用。
Silverlight 提供了 ObservableCollection<T> 类,它是一个实现 INotifyCollectionChanged 接口和 INotifyPropertyChanged 接口的基类数据集合。它还具有预期的集合支持,通过从 Collection<T> 类派生而来。

注意:当 TextBox 失去焦点时,将发生更新。

结论
希望您喜欢我的文章。请不要忘记写下您对本文的评论,这对我来说非常重要。