
SharePoint 2010 Web 部件中的 Bing Maps
0/5 (0投票)
本文介绍了如何在 SharePoint 2010 中创建简单的 Web 部件并使用 Bing Maps 服务渲染地图。
引言
本文将指导您为 SharePoint 2010 创建自定义 Web 部件并在其中渲染 Bing 地图。以下是一些先决条件:
- 您必须熟悉 SharePoint 2010 的基本功能。
- 您必须安装了 Visual Studio 2010 和 SharePoint 扩展。
- 您必须阅读过 使用 Bing Maps Web 服务的 WPF 示例应用程序。本文将指导您如何创建 Bing Maps 帐户以及 Bing Maps 公开的基本服务。
您的 Web 部件应该看起来像这样:

Using the Code
代码分为以下几个部分:
BingMapsWebPart- 这是实际的 Web 部件,将包含调用BingMapHelper中定义的帮助方法的代码(见下文)。- BingMapNav.ascx - 此用户控件将提供地图的导航按钮。按钮包括放大/缩小、平移左/右/上/下。
- BingMapHelper.cs -此类包含调用 Bing Maps 服务的帮助方法。
在 Visual Studio 2010 中,创建一个新的 Visual Web Part 项目。或者,您也可以直接打开附加 zip 文件中的代码。

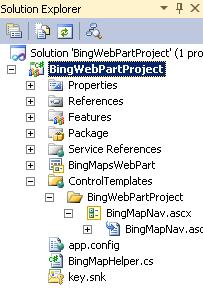
视觉上,项目结构如下:
BingMapHelper.cs
我们将从 BingMapHelper.cs 开始。此类公开两个方法:GeocodeAddressGeocodeResponse 和 GetImagery。GeocodeAddressGeocodeResponse 基本上是将英语般的地址转换为 GeocodeResponse(经纬度)。代码非常简单。您创建一个 GeoCodeService 实例,设置您的凭据(从您的 Bing 帐户获取的密钥),将其地址设置为筛选器,然后调用 Geocode() 方法。代码如下所示:
public static GeocodeResponse GeocodeAddressGeocodeResponse(string address)
{
    GeocodeRequest geocodeRequest = new GeocodeRequest();
    // Set the credentials using a valid Bing Maps key
    geocodeRequest.Credentials = new GeocodeService.Credentials();
    geocodeRequest.Credentials.ApplicationId = key;

    // Set the full address query
    geocodeRequest.Query = address;

    // Set the options to only return high confidence results
    ConfidenceFilter[] filters = new ConfidenceFilter[1];
    filters[0] = new ConfidenceFilter();
    filters[0].MinimumConfidence = GeocodeService.Confidence.High;

    // Add the filters to the options
    GeocodeOptions geocodeOptions = new GeocodeOptions();
    geocodeOptions.Filters = filters;
    geocodeRequest.Options = geocodeOptions;

    // Make the geocode request
    GeocodeServiceClient geocodeService = new GeocodeServiceClient();
    GeocodeResponse geocodeResponse = geocodeService.Geocode(geocodeRequest);
    return geocodeResponse;
}
接下来,我们来看 GetImagery() 方法。此方法接收经纬度和缩放级别,并将它们作为参数传递给 ImageryService。调用服务的概念与上述非常相似。您创建一个 ImageryService 实例,设置凭据,然后设置 MapUriRequest 对象中的参数。代码如下所示:
static string GetImagery(double latitude, double longititude, int zoom)
{
    MapUriRequest mapUriRequest =
	new MapUriRequest();// Set credentials using a valid Bing Maps key
    mapUriRequest.Credentials = new ImageryService.Credentials();

    mapUriRequest.Credentials.ApplicationId = key;
    new ImageryService.Credentials();// Set the location of the requested image
    mapUriRequest.Center = new ImageryService.Location();

    mapUriRequest.Center.Latitude = latitude;

    mapUriRequest.Center.Longitude = longititude;
    new ImageryService.Location();// Set the map style and zoom level
    mapUriOptions.Style = MapStyle.AerialWithLabels;

    mapUriOptions.ZoomLevel = zoom;
    MapUriOptions mapUriOptions =
	new MapUriOptions();MapStyle.AerialWithLabels;// Set the size of the
						// requested image in pixels
    mapUriOptions.ImageSize = new ImageryService.SizeOfint();
    mapUriOptions.ImageSize.Height = 400;
    mapUriOptions.ImageSize.Width = 500;
    mapUriRequest.Options = mapUriOptions;
    new ImageryService.SizeOfint();

    //Make the request and return the URI
    ImageryServiceClient imageryService = new ImageryServiceClient();
    MapUriResponse mapUriResponse = imageryService.GetMapUri(mapUriRequest);
    return mapUriResponse.Uri;
}
BingMapWebPart
准备好此类后,就可以创建 Web 部件了。为此,右键单击项目 -> 添加新项 -> Visual web part。将其命名为 BingMapsWebPart。
Web 部件的 HTML 部分非常简单。只有一个标签、一个文本框和一个按钮,用于调用地图服务。下方有一个将渲染地图的图像,再下方是用于导航的用户控件。
<asp:updatepanel runat="server">
    <ContentTemplate>
        <table width="100%" height="500px">
        <tr height="30px" valign="top">
            <td align="center" height="30px">Enter address
                <asp:textbox runat="server" ID="txtAddress" ValidationGroup="BingMapsWP"
                Width="300px">Space Needle, WA</asp:textbox>
                <asp:RequiredFieldValidator ID="RequiredFieldValidator1" runat="server"
                ControlToValidate="txtAddress" ErrorMessage="* Required"
                ValidationGroup="BingMapsWP"></asp:RequiredFieldValidator>
            </td>
        </tr>
        <tr height="40px" valign="top">
            <td align="center" height="30px">
                <asp:Button ID="btnGetMap" runat="server" Text="Get Maps"
                ValidationGroup="BingMapsWP" onclick="btnGetMap_Click" />
                <br />
                <asp:Label ID="lblError" runat="server" Text=""></asp:Label>
            </td>
        </tr>
        <tr>
            <TD align="center">
                <asp:image runat="server" ID="mapImage" Visible="False"></asp:image>
            </TD>
        </tr>
        <tr height="30px">
            <td align="center">
                <uc1:BingMapNav ID="BingMapNav1" runat="server" />
            </td>
        </tr>
        </table>
    </ContentTemplate>
</asp:updatepanel>
请注意,我们将整个表格放在了一个更新面板内。这有助于通过避免在进行任何操作(单击按钮)时页面闪烁来略微改善用户体验。
此控件的代码隐藏非常简单。主要有三个部分:
- 按钮单击时运行并调用帮助方法以获取地图的代码:代码如下所示。
protected void btnGetMap_Click(object sender, EventArgs e) { lblError.Visible = false; try { //Get map GeocodeResponse resp = BingMapHelper.GeocodeAddressGeocodeResponse(txtAddress.Text); latitude = resp.Results[0].Locations[0].Latitude; longititude = resp.Results[0].Locations[0].Longitude; //Get URI and set image mapImage.ImageUrl = BingMapHelper.GetImagery(latitude, longititude, zoom); //Show image mapImage.Visible = true; } catch (Exception ex) { lblError.Visible = true; lblError.Text = ex.Message + "<BR>" + ex.StackTrace; } } - 在视图状态中获取/设置经纬度和缩放级别的代码。
- 导航按钮单击时执行某些操作的代码:为了获得所需的放大或缩小,或平移效果,我们将用户单击按钮时存储的当前经纬度和缩放级别存储在视图状态中,我们会更新三个属性之一。例如,如果用户单击向左滚动按钮,我们将经度减去 0.2。
BingMapNav.ascx
这是一个小控件,有助于导航。它实际上是 6 个按钮,用于缩放(放大/缩小)和左/右/上/下平移。这些按钮将仅触发一个事件,主用户控件将根据单击情况执行操作。
部署
VSTS 2010 使 SharePoint 对象的部署变得轻而易举。您只需在解决方案资源管理器中右键单击项目,然后单击“部署”。

不再需要痛苦地编写 XML 文件和使用 10 条命令来安装一个简单的 Web 部件。VSTS 会为您完成。 
但是,您需要做一件事,那就是在您的 Web 应用程序的 web.config 中指定 WCF 设置。要找到 web.config,您应该转到 IIS,选择要更新的 Web 应用程序,然后右键单击 -> 浏览。在那里,您将看到 web.config。将以下部分添加到 web.config 中,位于 configuration->system.ServiceModel 下。
   <bindings>
      <basicHttpBinding>
        <binding name="BasicHttpBinding_IGeocodeService"
		closeTimeout="00:01:00" openTimeout="00:01:00"
		receiveTimeout="00:10:00" sendTimeout="00:01:00"
		allowCookies="false" bypassProxyOnLocal="false"
		hostNameComparisonMode="StrongWildcard"
		maxBufferSize="65536" maxBufferPoolSize="524288"
		maxReceivedMessageSize="65536" messageEncoding="Text"
		textEncoding="utf-8" transferMode="Buffered" useDefaultWebProxy="true">
          <readerQuotas maxDepth="32" maxStringContentLength="8192"
		maxArrayLength="16384" maxBytesPerRead="4096"
		maxNameTableCharCount="16384" />
          <security mode="None">
            <transport clientCredentialType="None" proxyCredentialType="None" realm="">
              <extendedProtectionPolicy policyEnforcement="Never" />
            </transport>
            <message clientCredentialType="UserName" algorithmSuite="Default" />
          </security>
        </binding>
        <binding name="BasicHttpBinding_IImageryService"
		closeTimeout="00:01:00" openTimeout="00:01:00"
		receiveTimeout="00:10:00" sendTimeout="00:01:00"
		allowCookies="false" bypassProxyOnLocal="false"
		hostNameComparisonMode="StrongWildcard" maxBufferSize="65536"
		maxBufferPoolSize="524288" maxReceivedMessageSize="65536"
		messageEncoding="Text" textEncoding="utf-8"
		transferMode="Buffered" useDefaultWebProxy="true">
          <readerQuotas maxDepth="32" maxStringContentLength="8192"
		maxArrayLength="16384" maxBytesPerRead="4096"
		maxNameTableCharCount="16384" />
          <security mode="None">
            <transport clientCredentialType="None" proxyCredentialType="None" realm="">
              <extendedProtectionPolicy policyEnforcement="Never" />
            </transport>
            <message clientCredentialType="UserName" algorithmSuite="Default" />
          </security>
        </binding>
      </basicHttpBinding>
    </bindings>
    <client>
      <endpoint address=http://dev.virtualearth.net/webservices/v1/geocodeservice/
	GeocodeService.svc">http://dev.virtualearth.net/webservices/v1/
	geocodeservice/GeocodeService.svc binding="basicHttpBinding"
	bindingConfiguration="BasicHttpBinding_IGeocodeService"
	contract="GeocodeService.IGeocodeService"
	name="BasicHttpBinding_IGeocodeService" />
      <endpoint address="
测试
部署 Web 部件后,转到您想添加此 Web 部件的 SharePoint 网站页面。在那里,单击“编辑页面”并在 Web 部件库中选择您的 Web 部件。
注意:新 Web 部件将出现在“自定义”类别下。添加此 Web 部件后,尝试输入各种地址并使用导航按钮进行玩耍。
关注点
我花了一段时间才弄清楚如何让我的 Web 部件知道如何读取 WCF 配置。最后,我将其保留在 Web 应用程序的 web.config 中。如果您认为有更好的地方存放它,请告诉我。
平移逻辑有点偏差。当您单击左/右/上/下平移按钮时,我只是通过 0.2 更新坐标。我本应该根据缩放级别偏移坐标,但这项工作我留给您。
我想指出的最后一点是,这是一个非常原始的 Web 部件。它没有拖放功能,也无法在街景之间切换,也无法执行我希望它执行的许多其他功能。非常欢迎您对其进行扩展。
历史
- 2010 年 5 月 17 日:初始发布