
Android 连接性
4.97/5 (69投票s)
探索 Android 中的连接选项。
引言
人类对以不同形式和情况下的通信和信息共享的追求,促使了许多创新的连接技术的发明,例如蓝牙和 NFC,以及 Wi-Fi 和 4G 等标准网络连接。越来越多的移动设备用户希望能够自由便捷地与其他设备进行直接交互和信息交换,而无需经过传统的网络基础设施。
在这方面,Android 提供了一套丰富的软件库,称为 API (应用程序编程接口),您的应用程序可以使用这些 API 以多种方式与其他设备连接和交互。在本文中,您将有机会通过实践来探索以下连接选项的基本机制:
准备工作
首先,您将按如下方式准备一个新的 Android 项目:
-
将新项目命名为“AndroidConnection”。
-
在新项目中,创建一个名为“MainActivity”的 Activity。这将是提供导航到其他页面的按钮的主页。
-
“activity_main.xml”显示如下:
<RelativeLayout xmlns:android="http://schemas.android.com/apk/res/android"
    xmlns:tools="http://schemas.android.com/tools"
    android:layout_width="match_parent"
    android:layout_height="match_parent"
    android:paddingLeft="@dimen/activity_horizontal_margin"
    android:paddingRight="@dimen/activity_horizontal_margin"
    android:paddingTop="@dimen/activity_vertical_margin"
    android:paddingBottom="@dimen/activity_vertical_margin"
    tools:context=".MainActivity">

    <Button
        android:layout_width="match_parent"
        android:layout_height="wrap_content"
        android:text="@string/Bluetooth"
        android:id="@+id/btnBluetooth"
        android:layout_alignParentTop="true"
        android:layout_alignParentLeft="true"
        android:layout_alignParentStart="true" />

</RelativeLayout>
“MainActivity”的预览应如图 1 所示。要测试运行项目,您将需要一个真实设备。
 图 1:MainActivity 预览
我们将从蓝牙开始。
蓝牙
Android 平台包含用于蓝牙连接的 Android 蓝牙 API,它允许 Android 设备与启用了蓝牙的其他设备进行无线数据交换。通过 Android 蓝牙 API,应用程序可以执行以下蓝牙功能:
-
扫描其他蓝牙设备。
-
查询已配对的蓝牙设备。
-
建立蓝牙设备之间的连接。
-
与其他蓝牙设备交换数据。
蓝牙议程
完整的 Android 蓝牙 API 可以在 android.bluetooth 包中找到。当您创建用于执行以下蓝牙功能的 Activity 时,您将遇到此包中的一些类:
- 启用/禁用蓝牙。
-
使蓝牙设备可被其他蓝牙设备发现。
-
发现其他蓝牙设备。
-
在“ListView”中列出这些已发现蓝牙设备的名称和 MAC 地址。
-
与“ListView”中的其中一个蓝牙设备建立连接。
在当前项目中:
-
创建一个名为“BluetoothActivity”的新 Activity,使用“RelativeLayout”作为布局,其中包含一个“ToggleButton”和一个“ListView”。
-
“activity_bluetooth.xml”显示如下:
<RelativeLayout xmlns:android="http://schemas.android.com/apk/res/android"
    xmlns:tools="http://schemas.android.com/tools"
    android:layout_width="match_parent"
    android:layout_height="match_parent"
    android:paddingLeft="@dimen/activity_horizontal_margin"
    android:paddingRight="@dimen/activity_horizontal_margin"
    android:paddingTop="@dimen/activity_vertical_margin"
    android:paddingBottom="@dimen/activity_vertical_margin"
    tools:context="com.peterleow.androidconnection.BluetoothActivity">

    <ToggleButton
        android:layout_width="wrap_content"
        android:layout_height="wrap_content"
        android:id="@+id/toggleButton"
        android:textOn="Bluetooth On"
        android:textOff="Bluetooth Off"
        android:onClick="onToggleClicked"
        android:layout_alignParentTop="true"
        android:layout_alignParentLeft="true"
        android:layout_alignParentStart="true" />

    <ListView
        android:layout_width="wrap_content"
        android:layout_height="wrap_content"
        android:id="@+id/listView"
        android:layout_centerHorizontal="true"
        android:layout_below="@+id/toggleButton" />

</RelativeLayout>
“BluetoothActivity”的预览应如图 2 所示。
 图 2:BluetoothActivity 预览
从现在开始,您将专注于在“BluetoothActivity.java”中构建代码,以实现以下各部分中的蓝牙功能。
验证蓝牙支持
在应用程序中尝试使用蓝牙功能之前,必须验证设备是否支持蓝牙。为此,我们必须调用 Android 蓝牙 API 的“BluetoothAdapter”类。
"BluetoothAdapter" 是 Android 蓝牙 API 中最重要的类。它代表 Android 设备的蓝牙适配器。目前,Android 只支持每个设备一个蓝牙适配器。“BluetoothAdapter”是所有蓝牙操作的起点。要开始任何蓝牙操作,应用程序必须首先调用静态方法“getDefaultAdapter()”,该方法返回一个句柄,代表默认的本地蓝牙适配器。如果“getDefaultAdapter()”返回 null,则表示设备不支持蓝牙,并且操作就到此为止。有效的“BluetoothAdapter”句柄允许您扫描其他蓝牙设备、查询已配对设备列表、实例化一个代表远程蓝牙设备的“BluetoothDevice”,以及创建一个“BluetoothServerSocket”来监听来自其他设备的连接请求。例如:
BluetoothAdapter bluetoothAdapter = BluetoothAdapter.getDefaultAdapter();
if (bluetoothAdapter == null) {
    // Device does not support Bluetooth
} else {
    // Any valid Bluetooth operations
}
启用蓝牙
一旦确认了设备上的蓝牙支持,下一步就是确保蓝牙已启用。为此,应用程序将调用“BluetoothAdapter”句柄的“isEnabled()”方法来检查蓝牙当前是否已启用。如果此方法返回 false,则表示蓝牙已禁用。要请求启用蓝牙,请使用“ACTION_REQUEST_ENABLE”操作 Intent 调用“startActivityForResult()”。例如:
if (!bluetoothAdapter.isEnabled()) {
    Intent enableBluetoothIntent = new Intent(BluetoothAdapter.ACTION_REQUEST_ENABLE);
    startActivityForResult(enableBluetoothIntent, ENABLE_BT_REQUEST_CODE);
}
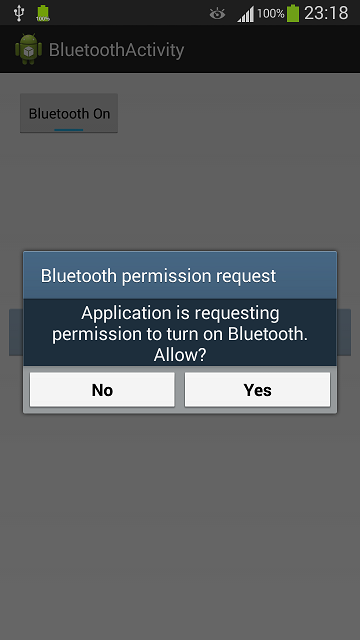
将出现一个对话框,请求用户许可以启用蓝牙,如图 3 所示。
 |
|
图 3:蓝牙权限请求
|
如果用户单击“是”,系统将继续启用蓝牙。传递给“startActivityForResult()”的“ENABLE_BT_REQUEST_CODE”常量是一个本地定义的整数,其值必须大于 0,以便系统可以在“onActivityResult()”实现中将其作为“requestCode”参数回传给您的代码。
如果蓝牙已成功启用,您的 Activity 将在“onActivityResult()”回调中收到“RESULT_OK”的“resultCode”。如果蓝牙未启用(无论是由于错误还是用户单击“否”),则“resultCode”为“RESULT_CANCELED”。例如:
public void onActivityResult(int requestCode, int resultCode, Intent data) {
    if (requestCode == ENABLE_BT_REQUEST_CODE) {
        if (resultCode == Activity.RESULT_OK) {
            Toast.makeText(getApplicationContext(), "Ha! Bluetooth has been enabled.",
                   Toast.LENGTH_SHORT).show();
        } else { // RESULT_CANCELED as user refuse or failed
            Toast.makeText(getApplicationContext(), "Bluetooth is not enabled.",
                    Toast.LENGTH_SHORT).show();
        }
    }
}
使蓝牙可被发现
蓝牙启用后,您将使其可被其他蓝牙设备发现。为此,请使用“ACTION_REQUEST_DISCOVERABLE”操作 Intent 调用“startActivityForResult()”。例如:
protected void makeDiscoverable(){
    // Make local device discoverable
    Intent discoverableIntent = new Intent(BluetoothAdapter.ACTION_REQUEST_DISCOVERABLE);
    discoverableIntent.putExtra(BluetoothAdapter.EXTRA_DISCOVERABLE_DURATION, DISCOVERABLE_DURATION);
    startActivityForResult(discoverableIntent, DISCOVERABLE_BT_REQUEST_CODE);
}
传递给“startActivityForResult()”的“DISCOVERABLE_BT_REQUEST_CODE”常量是一个本地定义的整数,其值必须大于 0,以便系统可以在“onActivityResult()”实现中将其作为“requestCode”参数回传给您的代码。
默认情况下,设备将可被发现 120 秒。您可以通过为“EXTRA_DISCOVERABLE_DURATION” Intent Extra 赋值一个不同的整数来定义不同的持续时间。应用程序可以为该持续时间设置介于 0 到 3600 之间的任何整数,超出该范围的任何值都将恢复为 120。在我们的示例中,我使用了一个名为“DISCOVERABLE_DURATION”的局部变量,其值为 300。
将出现一个对话框,请求用户许可以启用蓝牙可发现性,如图 4 所示。
 |
|
图 4:蓝牙权限请求
|
如果用户单击“是”,设备将可被发现指定的持续时间。您的 Activity 将在“onActivityResult()”回调中收到等于指定可发现持续时间的“resultCode”。如果用户单击“否”或发生错误,“resultCode”为“RESULT_CANCELED”。例如:
public void onActivityResult(int requestCode, int resultCode, Intent data) {

    if (requestCode == ENABLE_BT_REQUEST_CODE) {
        // other code
    } else if (requestCode == DISCOVERABLE_BT_REQUEST_CODE){

        if (resultCode == DISCOVERABLE_DURATION){
            Toast.makeText(getApplicationContext(), "Your device is now discoverable by other devices for " +
                                DISCOVERABLE_DURATION + " seconds",
                        Toast.LENGTH_SHORT).show();
        } else {
            Toast.makeText(getApplicationContext(), "Fail to enable discoverability on your device.",
                        Toast.LENGTH_SHORT).show();
        }
     }
}
注意启用设备可发现性将自动启用蓝牙(如果尚未在设备上启用)。
发现远程蓝牙设备
接下来,使应用程序能够发现远程蓝牙设备。在范围内的任何远程蓝牙设备,如果已启用可发现性,将响应发现请求。要开始发现过程,应用程序将调用“BluetoothAdapter”句柄的“startDiscovery()”方法。例如:
protected void discoverDevices(){
    // To scan for remote Bluetooth devices
    if (bluetoothAdapter.startDiscovery()) {
        Toast.makeText(getApplicationContext(), "Discovering other bluetooth devices...",
                Toast.LENGTH_SHORT).show();
    } else {
        Toast.makeText(getApplicationContext(), "Discovery failed to start.",
                Toast.LENGTH_SHORT).show();
    }
}
该过程是异步的,“startDiscovery()”方法将立即返回一个布尔值,指示发现是否已成功启动。应用程序如何被告知发现过程的结果?这里就发挥了“BroadcastReceiver”类的作用。
对于发现的每个设备,Android 系统将广播“ACTION_FOUND” Intent。此 Intent 始终返回两个数据包,如下所示:
- 一个“EXTRA_DEVICE”,其中包含一个代表已发现的远程蓝牙设备的“BluetoothDevice”;以及
- 一个“EXTRA_CLASS”,其中包含一个描述该已发现设备的一般特征和功能的“BluetoothClass”。
为了捕获此广播,您的应用程序必须为该“ACTION_FOUND” Intent 注册一个“BroadcastReceiver”。首先,您创建一个“BroadcastReceiver”类,如下所示:
private final BroadcastReceiver broadcastReceiver = new BroadcastReceiver() {
    public void onReceive(Context context, Intent intent) {
        String action = intent.getAction();
        // Whenever a remote Bluetooth device is found
        if (BluetoothDevice.ACTION_FOUND.equals(action)) {
            // Get the BluetoothDevice object from the Intent
            BluetoothDevice device = intent.getParcelableExtra(BluetoothDevice.EXTRA_DEVICE);
            // Add the name and address to an array adapter to show in a ListView
            adapter.add(device.getName() + "\n" + device.getAddress());
        }
    }
};
然后像这样为该“ACTION_FOUND” Intent 注册此“BroadcastReceiver”类:
// Register the BroadcastReceiver for ACTION_FOUND
IntentFilter filter = new IntentFilter(BluetoothDevice.ACTION_FOUND);
this.registerReceiver(broadcastReceiver, filter);
注意由于应用程序在暂停时不会收到任何 Intent,因此请始终在“Activity.onPause()”中注销“BroadcastReceiver”,并在“Activity.onResume()”中注册它,这样可以减少不必要的系统开销。
每当发现新设备时,应用程序将通过“BroadcastReceiver”收到通知,该接收器会从 Intent 额外数据中获取新设备作为“BluetoothDevice”对象,并通过“ArrayAdapter”将其名称和 MAC 地址添加到“ListView”中。
禁用蓝牙
要关闭切换按钮时禁用蓝牙,请调用“BluetoothAdapter”句柄的“disable()”方法,如下所示:
bluetoothAdapter.disable();
中期回顾
到目前为止,我们已经探索了包括启用蓝牙、使蓝牙可被发现、发现远程蓝牙设备、显示已发现设备的名称和 MAC 地址以及禁用蓝牙在内的各种主题。在“BluetoothActivity.java”中,所有这些活动都将在单击“ToggleButton”时发生,该操作会触发“onToggleClicked”事件处理程序。“BluetoothActivity.java”显示如下:
// other code

public class BluetoothActivity extends Activity {

    // Create a BroadcastReceiver for ACTION_FOUND
    private final BroadcastReceiver broadcastReceiver = new BroadcastReceiver() {
        public void onReceive(Context context, Intent intent) {
            String action = intent.getAction();
            // Whenever a remote Bluetooth device is found
            if (BluetoothDevice.ACTION_FOUND.equals(action)) {
                // Get the BluetoothDevice object from the Intent
                BluetoothDevice bluetoothDevice = intent.getParcelableExtra(BluetoothDevice.EXTRA_DEVICE);
                // Add the name and address to an array adapter to show in a ListView
                adapter.add(bluetoothDevice.getName() + "\n"
                        + bluetoothDevice.getAddress());
            }
        }
    };
    private BluetoothAdapter bluetoothAdapter;
    private ToggleButton toggleButton;
    private ListView listview;
    private ArrayAdapter adapter;
    private static final int ENABLE_BT_REQUEST_CODE = 1;
    private static final int DISCOVERABLE_BT_REQUEST_CODE = 2;
    private static final int DISCOVERABLE_DURATION = 300;

    @Override
    protected void onCreate(Bundle savedInstanceState) {
        super.onCreate(savedInstanceState);
        setContentView(R.layout.activity_bluetooth);

        toggleButton = (ToggleButton) findViewById(R.id.toggleButton);

        listview = (ListView) findViewById(R.id.listView);

        adapter = new ArrayAdapter
                (this,android.R.layout.simple_list_item_1);
        listview.setAdapter(adapter);

        bluetoothAdapter = BluetoothAdapter.getDefaultAdapter();
    }

    public void onToggleClicked(View view) {

        adapter.clear();

        ToggleButton toggleButton = (ToggleButton) view;

        if (bluetoothAdapter == null) {
            // Device does not support Bluetooth
            Toast.makeText(getApplicationContext(), "Oop! Your device does not support Bluetooth",
                    Toast.LENGTH_SHORT).show();
            toggleButton.setChecked(false);
        } else {

            if (toggleButton.isChecked()){ // to turn on bluetooth
                if (!bluetoothAdapter.isEnabled()) {
                    // A dialog will appear requesting user permission to enable Bluetooth
                    Intent enableBluetoothIntent = new Intent(BluetoothAdapter.ACTION_REQUEST_ENABLE);
                    startActivityForResult(enableBluetoothIntent, ENABLE_BT_REQUEST_CODE);
                } else {
                    Toast.makeText(getApplicationContext(), "Your device has already been enabled." +
                                    "\n" + "Scanning for remote Bluetooth devices...",
                            Toast.LENGTH_SHORT).show();
                    // To discover remote Bluetooth devices
                    discoverDevices();
                    // Make local device discoverable by other devices
                    makeDiscoverable();
                }
            } else { // Turn off bluetooth

                bluetoothAdapter.disable();
                adapter.clear();
                Toast.makeText(getApplicationContext(), "Your device is now disabled.",
                        Toast.LENGTH_SHORT).show();
            }
        }
    }

    public void onActivityResult(int requestCode, int resultCode, Intent data) {

        if (requestCode == ENABLE_BT_REQUEST_CODE) {

            // Bluetooth successfully enabled!
            if (resultCode == Activity.RESULT_OK) {
                Toast.makeText(getApplicationContext(), "Ha! Bluetooth is now enabled." +
                                "\n" + "Scanning for remote Bluetooth devices...",
                        Toast.LENGTH_SHORT).show();

                // Make local device discoverable by other devices
                makeDiscoverable();

               // To discover remote Bluetooth devices
                discoverDevices();

            } else { // RESULT_CANCELED as user refused or failed to enable Bluetooth
                Toast.makeText(getApplicationContext(), "Bluetooth is not enabled.",
                        Toast.LENGTH_SHORT).show();

                // Turn off togglebutton
                toggleButton.setChecked(false);
            }
        } else if (requestCode == DISCOVERABLE_BT_REQUEST_CODE){

            if (resultCode == DISCOVERABLE_DURATION){
                Toast.makeText(getApplicationContext(), "Your device is now discoverable by other devices for " +
                                DISCOVERABLE_DURATION + " seconds",
                        Toast.LENGTH_SHORT).show();
            } else {
                Toast.makeText(getApplicationContext(), "Fail to enable discoverability on your device.",
                        Toast.LENGTH_SHORT).show();
            }
        }
    }

    protected void discoverDevices(){
        // To scan for remote Bluetooth devices
        if (bluetoothAdapter.startDiscovery()) {
            Toast.makeText(getApplicationContext(), "Discovering other bluetooth devices...",
                    Toast.LENGTH_SHORT).show();
        } else {
            Toast.makeText(getApplicationContext(), "Discovery failed to start.",
                    Toast.LENGTH_SHORT).show();
        }
    }

    protected void makeDiscoverable(){
        // Make local device discoverable
        Intent discoverableIntent = new
                Intent(BluetoothAdapter.ACTION_REQUEST_DISCOVERABLE);
        discoverableIntent.putExtra(BluetoothAdapter.EXTRA_DISCOVERABLE_DURATION, DISCOVERABLE_DURATION);
        startActivityForResult(discoverableIntent, DISCOVERABLE_BT_REQUEST_CODE);
    }

    @Override
    protected void onResume() {
        super.onResume();
        // Register the BroadcastReceiver for ACTION_FOUND
        IntentFilter filter = new IntentFilter(BluetoothDevice.ACTION_FOUND);
        this.registerReceiver(broadcastReceiver, filter);
    }

    @Override
    protected void onPause() {
        super.onPause();
        this.unregisterReceiver(broadcastReceiver);
    }

// other code
}
测试 1, 2, 3...
在您可以在真实设备上测试之前,您需要从“MainActivity”创建导航。请执行以下操作:
-
在“activity_main.xml”中,为“<Button>”节点添加“android:onClick”属性,如下所示:
android:onClick="getBluetoothActivity"
-
在“MainActivity.java”中,添加“getBluetoothActivity()”方法以在按钮被单击时导航到“BluetoothActivity”。
public void getBluetoothActivity(View view) {
    Intent intent = new Intent(getApplicationContext(), BluetoothActivity.class);
    startActivity(intent);
}
在真实设备上启动应用程序,导航到“BluetoothActivity”页面,然后单击“ToggleButton”以开启蓝牙。糟糕!怎么回事?它崩溃了!(图 5)原因是应用程序尚未获得在设备上访问蓝牙的权限。
 |
|
图 5:应用程序崩溃
|
授予蓝牙访问权限
在使用蓝牙之前,您必须在应用程序的清单文件中声明蓝牙权限“BLUETOOTH”。您需要此权限才能执行任何蓝牙操作,例如请求连接、接受连接和交换数据。此外,如果应用程序需要发现远程蓝牙设备并执行配对,那么您还必须声明“BLUETOOTH_ADMIN”权限。请注意,要授予“BLUETOOTH_ADMIN”权限,您必须首先拥有“BLUETOOTH”权限。在应用程序的“AndroidManifiest.xml”中声明蓝牙权限。例如:
<uses-permission android:name="android.permission.BLUETOOTH" />
<uses-permission android:name="android.permission.BLUETOOTH_ADMIN" />
发现和可被发现
添加了必要的权限后,您的应用程序应该能够发现范围内所有可见的远程蓝牙设备。(图 6 至 8)。
 |
|
图 6:请求开启蓝牙的权限
|
 |
|
图 7:请求开启可发现性的权限
|
 |
|
图 8:已发现设备并可被发现
|
连接设备
发现设备只是任何蓝牙操作的第一步,例如监听传入连接、请求连接、接受连接和交换数据。连接机制遵循客户端-服务器模型的原理。通常,要实现两个设备之间的连接,其中一个设备必须充当服务器,另一个充当客户端。服务器使自己可被发现,并等待客户端的连接请求。另一方面,客户端使用发现过程中发现的服务器设备的 MAC 地址发起连接。
我们将逐步介绍在 Android 设备之间设置连接的过程。
设置监听服务器
充当服务器的设备必须持有一个打开的“BluetoothServerSocket”,这是一个监听传入连接请求的服务器套接字。连接请求被接受后,服务器套接字将返回一个已连接的“BluetoothSocket”用于管理连接。一旦获取了“BluetoothSocket”,就可以丢弃“BluetoothServerSocket”。该过程如下:
-
调用“BluetoothAdapter”句柄的“listenUsingRfcommWithServiceRecord()”方法,以返回一个具有服务记录的安全 RFCOMM (Radio Frequency Communication)“BluetoothServerSocket”。例如:
BluetoothServerSocket bluetoothServerSocket = bluetoothAdapter.listenUsingRfcommWithServiceRecord(getString(R.string.app_name), uuid);
第一个字符串参数是服务名称,可以是应用程序名称。第二个参数是通用唯一标识符 (UUID),它是一种标准化的 128 位格式的字符串 ID,用于唯一标识应用程序中的蓝牙服务。系统将自动将服务名称、UUID 和 RFCOMM 通道写入设备上的服务发现协议 (SDP) 数据库。然后,远程蓝牙设备可以使用相同的 UUID 查询 SDP 服务器,并发现要连接到哪个通道和服务。您可以使用在线 UUID 生成器生成 UUID 字符串,然后像这样将其转换为 UUID:
private final static UUID uuid = UUID.fromString("fc5ffc49-00e3-4c8b-9cf1-6b72aad1001a"); -
调用“BluetoothServerSocket”的“accept()”方法开始监听连接请求。此调用将阻塞当前线程,直到接受连接或发生异常。“BluetoothServerSocket”仅接受具有匹配 UUID 的连接请求。一旦接受连接,“accept()”将返回一个“BluetoothSocket”来管理连接。一旦获取了“BluetoothSocket”,您应该通过调用其“close()”方法来关闭“BluetoothServerSocket”,因为它不再需要。例如:
BluetoothSocket bluetoothSocket = bluetoothServerSocket.accept();
bluetoothServerSocket.close();
由于“accept()”将阻塞任何其他交互,直到接受连接,因此不应在主 UI 线程中运行它。事实上,最好在应用程序管理的、新创建的线程中处理涉及“BluetoothServerSocket”或“BluetoothSocket”的任何操作。这是一个处理 Android 设备上服务器设置的线程示例:
private class ListeningThread extends Thread {
    private final BluetoothServerSocket bluetoothServerSocket;

    public ListeningThread() {
        BluetoothServerSocket temp = null;
        try {
            temp = bluetoothAdapter.listenUsingRfcommWithServiceRecord(getString(R.string.app_name), uuid);

        } catch (IOException e) {
                e.printStackTrace();
        }
            bluetoothServerSocket = temp;
    }

    public void run() {
        BluetoothSocket bluetoothSocket;
        // This will block while listening until a BluetoothSocket is returned
        // or an exception occurs
        while (true) {
            try {
                bluetoothSocket = bluetoothServerSocket.accept();
            } catch (IOException e) {
                break;
            }
            // If a connection is accepted
            if (bluetoothSocket != null) {

                runOnUiThread(new Runnable() {
                    public void run() {
                        Toast.makeText(getApplicationContext(), "A connection has been accepted.",
                                Toast.LENGTH_SHORT).show();
                    }
                });

                // Manage the connection in a separate thread

                try {
                    bluetoothServerSocket.close();
                } catch (IOException e) {
                    e.printStackTrace();
                }
                break;
            }
        }
    }

    // Cancel the listening socket and terminate the thread
    public void cancel() {
        try {
            bluetoothServerSocket.close();
        } catch (IOException e) {
            e.printStackTrace();
        }
    }
}
然后像这样从主 UI 线程调用它:
ListeningThread t = new ListeningThread();
t.start();
设置连接客户端
一旦您将一个设备设置为可被发现的服务器,并保持一个打开的“BluetoothServerSocket”并监听连接请求,那么范围内的任何其他蓝牙设备都可以将其作为客户端发现并发起连接请求。要实现这一点,该客户端设备必须知道该服务器设备的 MAC 地址和一个匹配该特定连接的 UUID。
在前面关于“发现远程蓝牙设备”的部分,您已经学会了如何查找远程蓝牙设备并在“ListView”上显示它们的名称和 MAC 地址。您将选择其中一个来发起连接请求。为此,您将为“ListView”设置一个“setOnItemClickListener”来监听对此“ListView”执行的任何单击事件,当事件发生时,在“onItemClick()”事件处理程序中拾取选定的项。通过这种方式,应用程序将能够拾取选定的 MAC 地址,将其作为参数传递给“BluetoothAdapter”句柄的“getRemoteDevice()”方法以获取代表远程服务器设备的“BluetoothDevice”对象。然后,您的应用程序将此“BluetoothDevice”对象传递给新线程以向该对象发起连接请求。例如:
listview.setOnItemClickListener(new AdapterView.OnItemClickListener() {
    @Override
    public void onItemClick(AdapterView<?> parent, View view, int position, long id) {
        String  itemValue = (String) listview.getItemAtPosition(position);
        String MAC = itemValue.substring(itemValue.length() - 17);
        BluetoothDevice bluetoothDevice = bluetoothAdapter.getRemoteDevice(MAC);
        // Initiate a connection request in a separate thread
        ConnectingThread t = new ConnectingThread(bluetoothDevice);
        t.start();
    }
});
在新线程中,过程如下:
-
使用代表远程服务器设备的“BluetoothDevice”对象,应用程序将调用“createRfcommSocketToServiceRecord(UUID)”方法创建一个 RFCOMM “BluetoothSocket”,该套接字准备好使用 UUID 参数上的 SDP 查找与此远程设备建立安全连接。这里传递的 UUID 必须与服务器设备的打开“BluetoothServerSocket”使用的 UUID 匹配。例如:
BluetoothSocket bluetoothSocket = bluetoothDevice.createRfcommSocketToServiceRecord(uuid);
-
调用“BluetoothSocket”的“connect()”方法以发起连接请求。在此调用之后,系统将对远程设备执行 SDP 查找,以找到与 UUID 匹配的服务。此调用将阻塞当前线程,直到连接被接受或由于连接错误或 12 秒超时而发生异常。如果查找成功且连接请求被接受,则“connect()”将建立一个共享 RFCOMM 通道上的连接,以供后续通信使用。例如:
bluetoothSocket.connect();
由于“connect()”将阻塞任何其他交互,直到连接被接受,因此不应在主 UI 线程中运行它。这是一个处理 Android 设备上客户端连接请求的线程示例:
private class ConnectingThread extends Thread {
    private final BluetoothSocket bluetoothSocket;
    private final BluetoothDevice bluetoothDevice;

    public ConnectingThread(BluetoothDevice device) {

        BluetoothSocket temp = null;
        bluetoothDevice = device;

        // Get a BluetoothSocket to connect with the given BluetoothDevice
        try {
            temp = bluetoothDevice.createRfcommSocketToServiceRecord(uuid);
        } catch (IOException e) {
            e.printStackTrace();
        }
        bluetoothSocket = temp;
    }

    public void run() {
        // Cancel any discovery as it will slow down the connection
        bluetoothAdapter.cancelDiscovery();

        try {
            // This will block until it succeeds in connecting to the device
            // through the bluetoothSocket or throws an exception
            bluetoothSocket.connect();
        } catch (IOException connectException) {
            connectException.printStackTrace();
            try {
                bluetoothSocket.close();
            } catch (IOException closeException) {
                closeException.printStackTrace();
            }
        }

        // Code to manage the connection in a separate thread
        /*
            manageBluetoothConnection(bluetoothSocket);
        */
    }

    // Cancel an open connection and terminate the thread
    public void cancel() {
        try {
            bluetoothSocket.close();
        } catch (IOException e) {
            e.printStackTrace();
        }
    }
}
注意始终调用“BluetoothAdapter”的“cancelDiscovery()”方法来取消任何设备发现活动,然后才能尝试任何连接请求,以免其减慢过程并导致超时失败。
然后像这样从主 UI 线程调用它:
ConnectingThread t = new ConnectingThread(bluetoothDevice);
t.start();
一旦成功建立连接,两个已连接的设备就可以在新线程中使用各自的“BluetoothSockets”开始交换数据。下面的示例显示了一个名为“manageBluetoothConnection()”的虚拟方法,该方法将启动数据传输线程。
// Code to manage the connection in a separate thread
/*
    manageBluetoothConnection(bluetoothSocket);
*/
管理连接
一旦成功建立了连接,服务器设备和客户端设备将分别拥有一个已连接的“BluetoothSocket”。然后,它们可以使用“BluetoothSocket”共享数据。通常,过程如下:
-
通过分别调用“getInputStream()”和“getOutputStream()”从“BluetoothSocket”获取“InputStream”句柄和“OutputStream”句柄。
-
通过“InputStream”句柄的“read()”方法开始监听传入数据。
-
数据发送通过“OutputStream”句柄的“write()”方法进行。
由于 read() 和 write() 都是阻塞调用,因此它们应该在新线程中运行。我将把实际编码留给您作为作业。深入研究 I/O 流操作的细节,因为它超出了本文的范围。;P
测试蓝牙
“BluetoothActivity.java”的完整代码可以在下载中找到。
在该代码中,应用程序已将设备设置为服务器和客户端。在不同的 Android 设备上运行此应用程序,然后使用“ToggleButton”打开蓝牙。每个设备将打开一个服务器套接字并开始监听连接,同时它也可以发起连接到运行此应用程序的其他设备。它们应该能够相互发现并在“ListView”上显示。当您单击“ListView”上的设备项目时,它将开始向该选定设备发起连接请求。如果两个设备尚未配对,用户将在连接过程中收到配对请求对话框,如图 9 所示。连接尝试将一直阻塞,直到用户接受配对,或者如果用户拒绝配对,则会失败。
 |
|
图 9:配对请求
|
 |
|
图 10:蓝牙连接已建立
|
Wi-Fi
Android 平台提供了“WifiManager”API 来管理 Android 设备上 Wi-Fi 连接的所有方面。通过此 API,应用程序可以:
-
扫描接入点并获取信息,例如 BSSID、SSID、频率、密钥管理和加密方案。
-
建立或终止 Wi-Fi 连接。
- 配置网络。
“WifiManager”还定义了各种 Intent 操作,这些操作可以在 Wi-Fi 状态发生任何变化时广播,例如“SCAN_RESULTS_AVAILABLE_ACTION”和“NETWORK_STATE_CHANGED_ACTION”。
Wi-Fi 议程
我们将创建一个 Activity 来执行以下 Wi-Fi 功能:
- 启用/禁用 Wi-Fi。
-
发现接入点。
-
在“ListView”中列出这些已发现接入点的信息。
在当前项目中:
-
创建一个名为“WiFiActivity”的新 Activity,使用“RelativeLayout”作为布局,其中包含一个“ToggleButton”和一个“ListView”。
-
“activity_wi_fi.xml”显示如下:
<RelativeLayout xmlns:android="http://schemas.android.com/apk/res/android"
    xmlns:tools="http://schemas.android.com/tools"
    android:layout_width="match_parent"
    android:layout_height="match_parent"
    android:paddingLeft="@dimen/activity_horizontal_margin"
    android:paddingRight="@dimen/activity_horizontal_margin"
    android:paddingTop="@dimen/activity_vertical_margin"
    android:paddingBottom="@dimen/activity_vertical_margin"
    tools:context="com.peterleow.androidconnection.WiFiActivity">

    <ToggleButton
        android:layout_width="wrap_content"
        android:layout_height="wrap_content"
        android:id="@+id/toggleButton"
        android:textOn="Wi-Fi On"
        android:textOff="Wi-Fi Off"
        android:onClick="onToggleClicked"
        android:layout_alignParentTop="true"
        android:layout_alignParentLeft="true"
        android:layout_alignParentStart="true" />

    <ListView
        android:layout_width="wrap_content"
        android:layout_height="wrap_content"
        android:id="@+id/listView"
        android:layout_centerHorizontal="true"
        android:layout_below="@+id/toggleButton" />

</RelativeLayout>
“WiFiActivity”的预览应如图 11 所示。
 图 11:WiFiActivity 预览
授予 Wi-Fi 访问权限
在使用 Wi-Fi 之前,您必须在应用程序的清单文件中声明“ACCESS_WIFI_STATE”和“CHANGE_WIFI_STATE”的“<user-permission>”。您需要“ACCESS_WIFI_STATE”权限来访问有关 Wi-Fi 网络的信息,需要“CHANGE_WIFI_STATE”来更改 Wi-Fi 连接状态。例如:
<uses-permission android:name="android.permission.ACCESS_WIFI_STATE" />
<uses-permission android:name="android.permission.CHANGE_WIFI_STATE" />
验证 Wi-Fi 支持
在尝试使用 Wi-Fi 功能之前,必须验证设备是否支持 Wi-Fi。为此,您需要通过调用“Context.getSystemService(Context.WIFI_SERVICE)”来获取“WifiManager”类的句柄。例如:
WifiManager wifiManager = (WifiManager) getSystemService(Context.WIFI_SERVICE);
if (wifiManager == null) {
    // Device does not support Wi-Fi
} else {
    // Any vaild Wi-Fi operations
}
切换 Wi-Fi
获取“WifiManager”句柄后,应用程序可以通过调用“WifiManager”句柄的“setWifiEnabled()”方法来切换设备上 Wi-Fi 的开/关状态,该方法接受一个布尔参数,true 表示开启,false 表示关闭。例如:
wifiManager.setWifiEnabled(true); // To turn on the Wi-Fi
发现接入点
接下来,通过调用“WifiManager”句柄的“startScan()”方法使应用程序能够发现接入点。例如:
wifiManager.startScan();
该过程是异步的,“startScan()”方法将立即返回一个布尔值,指示发现是否已成功启动。应用程序如何被告知发现过程的结果?这里就发挥了“BroadcastReceiver”类的作用。
扫描完成后,Android 系统将广播“SCAN_RESULTS_AVAILABLE_ACTION” Intent。然后可以通过调用“WifiManager”句柄的“getScanResults()”方法来获取扫描结果。
为了捕获此广播,您的应用程序必须为该“SCAN_RESULTS_AVAILABLE_ACTION” Intent 注册一个“BroadcastReceiver”。首先,您创建一个“BroadcastReceiver”类,如下所示:
class WiFiScanReceiver extends BroadcastReceiver {
    public void onReceive(Context context, Intent intent) {
        String action = intent.getAction();
        if (WifiManager.SCAN_RESULTS_AVAILABLE_ACTION.equals(action)) {
            List<ScanResult> wifiScanResultList = wifiManager.getScanResults();
            for(int i = 0; i < wifiScanResultList.size(); i++){
                String hotspot = (wifiScanResultList.get(i)).toString();
                adapter.add(hotspot);
            }
        }
    }
}
然后像这样为该“SCAN_RESULTS_AVAILABLE_ACTION” Intent 注册此“BroadcastReceiver”类:
IntentFilter filter = new IntentFilter(WifiManager.SCAN_RESULTS_AVAILABLE_ACTION);
registerReceiver(wifiReciever, filter);
注意由于应用程序在暂停时不会收到任何 Intent,因此请始终在“Activity.onPause()”中注销“BroadcastReceiver”,并在“Activity.onResume()”中注册它,这样可以减少不必要的系统开销。
当扫描完成时,应用程序将通过“BroadcastReceiver”收到通知。然后,应用程序可以通过调用“WifiManager”句柄的“getScanResults()”方法获取扫描结果,并通过“ArrayAdapter”将结果填充到“ListView”中。每个已发现的接入点将以“ScanResult”对象的形式返回,该对象包含有关该接入点的以下信息:
- BSSID
- SSID
- 功能
- 频率
- 信号强度
- 时间戳
测试 Wi-Fi
“WiFiActivity.java”的完整代码可以在下载中找到。
在您可以在真实设备上测试之前,您需要从“MainActivity”创建导航。请执行以下操作:
-
在“activity_main.xml”中,添加第二个“<Button>”并带有“android:onClick”属性,如下所示:
<Button
    android:layout_width="match_parent"
    android:layout_height="wrap_content"
    android:text="@string/wifi"
    android:id="@+id/btnWifi"
    android:onClick="getWifiActivity"
    android:layout_below="@+id/btnBluetooth"
    android:layout_centerHorizontal="true" />
“MainActivity”页面应如图 12 所示。
 图 12:MainActivity 预览
 -
在“MainActivity.java”中,添加“getBluetoothActivity()”方法以在按钮被单击时导航到“WiFiActivity”。
public void getWifiActivity(View view) {
    Intent intent = new Intent(getApplicationContext(), WiFiActivity.class);
    startActivity(intent);
}
在真实设备上启动应用程序,导航到“WiFiActivity”,单击“ToggleButton”以开启 Wi-Fi,它将开始扫描接入点。扫描完成后,您将在“ListView”中看到已发现接入点的列表。示例如图 13 所示。
 |
|
图 13:已发现的接入点
|
NFC
NFC 或近场通信是一系列短距离无线技术。它允许您在 NFC 标签和 NFC 启用设备之间,或在距离不超过 4 厘米的 NFC 启用设备之间交换少量数据。NFC 标签的功能和数据格式差异很大。功能可以是从 Android 设备仅提供读写的被动标签,到可以与标签上执行的代码交互的更智能的标签。尽管有许多数据格式,但大多数 Android 框架 API 都基于一种称为“NDEF”(NFC 数据交换格式)的标准。NDEF 数据封装在由 NdefMessage 对象实现的的消息中,该消息又包含一个或多个作为 NdefRecord 对象的记录。
Android 应用程序可以利用 NFC 技术执行以下操作:
-
读写 NFC 标签。
-
在两个启用了 NFC 的设备之间执行点对点 (P2P) 数据交换。此功能称为“Android Beam”,在 API 级别 14 中引入。它允许快速短距离交换联系人、书签、视频等数据。
- 将支持 NFC 的设备变成 NFC 卡,以便外部 NFC 读取器可以访问它。例如,通过将支持 NFC 的 Android 设备在 NFC 销售点终端上刷卡来支付您的杂货费用。
NFC 议程
我们将创建一个 Activity 来实现“Android Beam”功能,以在两个 Android 设备之间执行简单的点对点 NDEF 消息交换。想要将数据 beam 到另一台设备的应用程序必须处于前台,而接收数据的设备不得锁定。与需要手动发现和配对的蓝牙不同,NFC 连接在两个设备进入范围时自动启动。此时,beam 设备将显示“Touch to Beam”消息。用户可以继续通过触摸屏幕进行 beam,或者只需将设备拉开以取消 beam。
在当前项目中:
-
创建一个名为“NfcActivity”的新 Activity,使用“RelativeLayout”作为布局,其中包含一个“EditText”文本字段。
-
“activity_nfc.xml”显示如下:
<RelativeLayout xmlns:android="http://schemas.android.com/apk/res/android"
    xmlns:tools="http://schemas.android.com/tools"
    android:layout_width="match_parent"
    android:layout_height="match_parent"
    android:paddingLeft="@dimen/activity_horizontal_margin"
    android:paddingRight="@dimen/activity_horizontal_margin"
    android:paddingTop="@dimen/activity_vertical_margin"
    android:paddingBottom="@dimen/activity_vertical_margin"
    tools:context="com.peterleow.androidconnection.NfcActivity">

    <EditText
        android:layout_width="wrap_content"
        android:layout_height="wrap_content"
        android:textAppearance="?android:attr/textAppearanceLarge"
        android:id="@+id/editText"
        android:hint="Type something..."
        android:layout_alignParentTop="true"
        android:layout_centerHorizontal="true"
        android:layout_marginTop="39dp" />

</RelativeLayout>
“NfcActivity”的预览应如图 14 所示。
 图 14:NfcActivity 预览
授予 NFC 访问权限
在使用 NFC 之前,您必须在应用程序的清单文件中声明“NFC”的“<user-permission>”。您需要此“NFC”权限才能执行 NFC I/O 操作,如下所示:
<uses-permission android:name="android.permission.NFC" />
并非所有 Android 设备都提供 NFC 支持,为确保应用程序仅在具有 NFC 硬件的设备上显示在 Google Play 中,请在应用程序的清单文件中添加“<uses-feature>”,如下所示:
<uses-feature android:name="android.hardware.nfc" android:required="true" />
启用 Android Beam
在尝试使用 NFC 之前,必须验证设备是否支持 NFC。为此,您需要通过调用“NfcAdapter.getDefaultAdapter(Context)”来获取“NfcAdapter”类的句柄。例如:
// Check for NFC support
NfcAdapter nfcAdapter = NfcAdapter.getDefaultAdapter(this);
if (nfcAdapter == null) {
    // Device does not support NFC
}
准备 Beam...
要 beam NDEF 消息,应用程序必须首先使用“NfcAdapter”句柄注册“setNdefPushMessageCallback()”方法。此方法接受一个回调,其中包含一个“createNdefMessage()”,当设备进入范围以 beam 数据时将调用该回调。它允许应用程序动态生成 NDEF 消息。此方法应在 Activity 的 onCreate() 过程中注册。例如:
nfcAdapter.setNdefPushMessageCallback(this, this);
以及一个生成要发送的 NDEF 消息的回调示例:
public NdefMessage createNdefMessage(NfcEvent event) {
    EditText editText = (EditText) findViewById(R.id.editText);
    String text = editText.getText().toString();
    NdefMessage ndefMessage = new NdefMessage(
                        new NdefRecord[] { createMime(
                               "application/vnd.com.peterleow.androidconnection", text.getBytes())
                      });
    return ndefMessage;
}
“createNdefMessage()”创建一个“NdefRecord”对象来包含来自“EditText”的文本作为有效载荷,以及自定义 MIME 类型“application/vnd.com.peterleow.androidconnection”。然后,此“NdefRecord”被放入“NdefMessage”对象中。“NdefMessage”对象可以包含多个“NdefMessage”对象,第一个“NdefRecord”包含一个用于将 NDEF 消息映射到 MIME 类型或 URI 的 TNF(类型名称字段)。如果成功,它会将该信息封装在“ACTION_NDEF_DISCOVERED” Intent 中,以及用于 beam 的实际有效载荷。
准备接收...
要使应用程序能够处理从另一台设备 beam 的 NDEF 消息,应用程序必须在清单文件中过滤“ACTION_NDEF_DISCOVERED” Intent。下面的示例过滤具有 MIME 类型“application/vnd.com.peterleow.androidconnection”的“ACTION_NDEF_DISCOVERED” Intent,该类型与“NdefMessage”中的类型匹配。
<activity
    android:name=".NfcActivity"
    android:label="@string/title_activity_nfc"
    android:launchMode="singleTask" >
        <intent-filter>
            <action android:name="android.nfc.action.NDEF_DISCOVERED"/>
            <category android:name="android.intent.category.DEFAULT"/>
            <data android:mimeType="application/vnd.com.peterleow.androidconnection"/>
        </intent-filter>
</activity>
响应 NFC beam 的 Activity 应该检查 ACTION_NDEF_DISCOVERED Intent,并从“EXTRA_NDEF_MESSAGES” Intent Extra 中检索 NDEF 消息。例如:
public void onResume() {
    super.onResume();
    // Check to see that the Activity started due to an Android Beam
    Intent intent = getIntent();
    if (NfcAdapter.ACTION_NDEF_DISCOVERED.equals(intent.getAction())) {
        Parcelable[] ndefMessageArray = intent.getParcelableArrayExtra(
                NfcAdapter.EXTRA_NDEF_MESSAGES);
        NdefMessage ndefMessage = (NdefMessage) ndefMessageArray[0];
        Toast.makeText(this, new String(ndefMessage.getRecords()[0].getPayload()), Toast.LENGTH_LONG).show();
    }
}
测试 Android Beam
“NfcActivity.java”的完整代码可以在下载中找到。
在您可以在真实设备上测试之前,您需要从“MainActivity”创建导航。请执行以下操作:
-
在“activity_main.xml”中,添加第三个“<Button>”并带有“android:onClick”属性,如下所示:
<Button
    android:layout_width="match_parent"
    android:layout_height="wrap_content"
    android:text="@string/nfc"
    android:id="@+id/btnNfc"
    android:onClick="getNfcActivity"
    android:layout_below="@+id/btnWifi"
    android:layout_centerHorizontal="true" />
“MainActivity”页面应如图 15 所示。
 图 15:MainActivity 预览
 -
在“MainActivity.java”中,添加“getNfcActivity()”方法以在按钮被单击时导航到“NfcActivity”。
public void getNfcActivity(View view) {
    Intent intent = new Intent(getApplicationContext(), NfcActivity.class);
    startActivity(intent);
}
将应用程序部署到两个真实的 Android 设备上,分别称为 Sender 和 Receiver。按照以下步骤进行测试:
-
在两个设备上打开 NFC。
-
在两个设备上启动应用程序。
-
在 Sender 上,从“ManiActivity”导航到“NfcActivity”,在文本字段中输入内容。
-
在 Receiver 上,从应用程序导航到其他页面,使其不显示在前台。
-
将两个设备背靠背放置。当它们足够近时,Sender 将显示“Touch to beam”消息,如图 16 所示。触摸屏幕,您在文本字段中输入的文本将 beam 到 Receiver。
-
在 Receiver 端,“NfcActivity”将显示在前台并显示接收到的文本,如图 17 所示。
 |
 |
| 图 16:发送者 |
图 17:接收者
|
做得好!您已成功实现 Android Beam,通过 NFC 技术在两个 Android 设备之间传输数据。
移动数据
Android 平台提供了“ConnectivityManager”API,允许应用程序查询网络连接状态,包括移动数据。让我们创建一个简单的 Activity 来启用/禁用移动数据。
-
创建一个名为“MobileDataActivity”的新 Activity,使用“RelativeLayout”作为布局,其中包含一个“ToggleButton”。
-
“activity_mobile_data.xml”显示如下:
<RelativeLayout xmlns:android="http://schemas.android.com/apk/res/android"
    xmlns:tools="http://schemas.android.com/tools"
    android:layout_width="match_parent"
    android:layout_height="match_parent"
    android:paddingLeft="@dimen/activity_horizontal_margin"
    android:paddingRight="@dimen/activity_horizontal_margin"
    android:paddingTop="@dimen/activity_vertical_margin"
    android:paddingBottom="@dimen/activity_vertical_margin"
    tools:context="com.peterleow.androidconnection.MobileDataActivity">

    <ToggleButton
        android:layout_width="wrap_content"
        android:layout_height="wrap_content"
        android:id="@+id/toggleButton"
        android:textOn="Mobile Data On"
        android:textOff="Mobile Data Off"
        android:onClick="onToggleClicked"
        android:layout_alignParentTop="true"
        android:layout_alignParentLeft="true"
        android:layout_alignParentStart="true"
        android:checked="false" />

</RelativeLayout>
“MobileDataActivity”的预览应如图 18 所示。
 图 18:MobileDataActivity 预览
授予网络访问权限
在使用应用程序访问和修改网络状态之前,您必须在应用程序的清单文件中声明“ACCESS_NETWORK_STATE”的“<user-permission>”。您需要此“ACCESS_NETWORK_STATE”权限来访问有关网络的信息。例如:
<uses-permission android:name="android.permission.ACCESS_NETWORK_STATE" />
切换移动数据
应用程序不会直接修改移动数据连接。相反,它将通过“startActivityForResult()”调用系统 UI(图 19),让用户在每次单击切换按钮时进行选择。
 |
|
图 19:数据使用系统 UI
|
执行此操作的代码如下所示:
public void onToggleClicked(View view) {
    Intent intent = new Intent();
    intent.setClassName("com.android.settings",
            "com.android.settings.Settings$DataUsageSummaryActivity");
    startActivityForResult(intent, 1);
}
系统 UI 完成后,您的 Activity 将通过“onActivityResult()”回调收到通知。在“onActivityResult()”中,它将首先通过调用“Context.getSystemService(Context.CONNECTIVITY_SERVICE)”来获取“ConnectivityManager”的实例。例如:
ConnectivityManager connectivityManager = (ConnectivityManager) getSystemService(Context.CONNECTIVITY_SERVICE);
通过调用“ConnectivityManager”实例的“getActiveNetworkInfo()”来获取包含网络连接状态的“NetworkInfo”对象。例如:
NetworkInfo networkInfo = connectivityManager.getActiveNetworkInfo();
如果“NetworkInfo”对象不为 null,则通过调用“NetworkInfo”对象的“isConnected()”将其设置为与网络的连接状态相同的切换按钮状态。例如:
if (networkInfo != null) {
    toggleButton.setChecked(networkInfo.isConnected());
}
测试移动数据
“MobileDataActivity.java”的完整代码可以在下载中找到。
在您可以在真实设备上测试之前,您需要从“MainActivity”创建导航。请执行以下操作:
-
在“activity_main.xml”中,添加第四个“<Button>”并带有“android:onClick”属性,如下所示:
<Button
    android:layout_width="match_parent"
    android:layout_height="wrap_content"
    android:text="@string/mobile_data"
    android:id="@+id/btnMobileData"
    android:onClick="getMobileDataActivity"
    android:layout_below="@+id/btnNfc"
    android:layout_centerHorizontal="true" />
“MainActivity”页面应如图 20 所示。
 图 20:MainActivity 预览
 -
在“MainActivity.java”中,添加“getMobileDataActivity()”方法以在按钮被单击时导航到“MobileDataActivity”。
public void getMobileDataActivity(View view) {
    Intent intent = new Intent(getApplicationContext(), MobileDataActivity.class);
    startActivity(intent);
}
SIP
SIP 或会话发起协议是一种协议,它使应用程序能够通过计算机网络拨打和接听语音呼叫。SIP 可用于建立音频/视频会议、即时消息、文件传输、在线游戏和 IP 网络呼叫转接的会话。
Android 提供了一个支持完整 SIP 协议的 API,您的应用程序可以使用该 API 来集成基于 SIP 的互联网电话功能。SIP 提供以下主要功能:
-
管理呼叫。
-
建立用户位置。
-
协商呼叫参与者之间要支持的功能。
开发要求
在开发 SIP 应用程序之前,您必须准备好以下内容以测试该应用程序:
-
至少两台运行 Android 2.3(API 级别 9)或更高版本的真实 Android 设备。
-
每台设备必须具有 Internet 连接。这就是为什么您无法在模拟器上测试 SIP 应用程序的原因。
-
SIP 会话中的每个参与者都必须拥有有效的 SIP 帐户。有许多 SIP 提供商提供免费帐户,只需咨询 Google。
SIP API 概述
Android SIP API 由九个类和一个接口组成,如表 1 所述。
| 类/接口 | 描述 |
|---|---|
| SipAudioCall | 提供处理 SIP 音频呼叫的方法。 |
| SipAudioCall.Listener | 代表一个监听器,用于跟踪与 SIP 呼叫相关的事件,并在发生某些事件时调用相应的事件处理程序。例如,当新呼叫进来时,会调用“onRinging()”。 |
| SipErrorCode | 包含 SIP 操作的错误代码。 |
| SipManager | 提供方法来访问 API 类,以执行各种 SIP 任务,例如创建 SIP 会话、拨打呼叫和接收呼叫。 |
| SipProfile | 表示一个 SIP 配置文件,包括 SIP 帐户、域和服务器信息。 |
| SipProfile.Builder | 表示一个用于创建 SipProfile 的辅助类。 |
| SipSession | 代表一个 SIP 会话。 |
| SipSession.Listener | 代表一个监听器,用于跟踪与 SIP 会话相关的事件,并在发生某些事件时调用相应的事件处理程序。例如,当发送注册请求时,会调用“onRegistering()”。 |
| SipSession.State | 包含代表各种 SIP 会话状态的常量,例如“INCOMING_CALL”、“OUTGOING_CALL”。 |
| SipRegistrationListener |
这是一个接口,代表一个监听器,用于跟踪与 SIP 注册相关的事件,并在发生某些事件时调用相应的事件处理程序。例如,当注册成功时,会调用“onRegistrationDone()”。 |
从“SipDemo”学习
我们后续关于 SIP 的讨论将基于一个名为“SipDemo”的演示应用程序,该应用程序由“Android 开源项目”开发。“SipDemo”演示了 SIP API 的各种功能。它是绝佳的学习材料,我将借用“SipDemo”的代码片段来加强我们的讨论。您应该获取一份“SipDemo”项目副本,并将其安装在您的 Android Studio 中并进行尝试。
“SipDemo”包含在 Android Studio 目录的“sdk/samples/android-10/”中。如果您找不到它,可以使用 SDK Manager(图 21)进行下载。在 Android Studio 中,单击工具 > Android > SDK Manager,然后在 Android 2.3.3 (API10) 版本下选择“SDK Platform”和“Samples for SDK”选项进行安装。
 |
|
图 21:SDK Manager
|
接下来,通过选择文件 >导入项目将“SipDemo”导入到 Android Studio 中。
成功设置后,在真实的 Android 设备上运行它,您应该会看到如图 22、23 和 24 所示的屏幕。
 |
|
图 22:SipDemo 主页
|
 |
|
图 23:设置 SIP 配置文件
|
 |
|
图 24:拨打电话
|
授予 SIP 访问权限
在使用 SIP 之前,您必须在应用程序的清单文件中声明“<user-permission>”,如下所示:
<uses-permission android:name="android.permission.USE_SIP" />
<uses-permission android:name="android.permission.INTERNET" />
并非所有 Android 设备都提供 SIP 支持,为确保应用程序仅在支持 SIP 的设备上显示在 Google Play 中,请在应用程序的清单文件中添加“<uses-feature>”,如下所示:
<uses-feature android:name="android.hardware.sip.voip" android:required="true" />
获取 API 管理器
SIP API 中最重要的类是“SipManager”。这是管理所有其他 SIP API 类的管理器。在应用程序可以使用 SIP API 进行任何工作之前,它必须首先创建一个“SipManager”句柄,该句柄将负责以下功能:
-
向 SIP 服务提供商注册和注销。
-
发起会话。
-
拨打呼叫。
-
接收呼叫。
-
验证会话连接性。
应用程序将使用“newInstance()”方法创建一个“SipManager”句柄。请参见“SipDemo”中的示例。
public SipManager manager = null;
// other code
if(manager == null) {
    manager = SipManager.newInstance(this);
}
创建本地 SIP 配置文件
创建一个“SipProfile”对象,该对象定义一个本地 SIP 配置文件,包括 SIP 帐户以及域和服务器信息,使用“SipProfile.Builder”辅助类。例如:
public SipProfile me = null;
// other code
SipProfile.Builder builder = new SipProfile.Builder(username, domain);
builder.setPassword(password);
me sipProfile = builder.build();
创建 PendingIntent
创建“Intent Action”(在“SipDemp”中为“android.SipDemo.INCOMING_CALL”)并将其分配给一个“PendingIntent”,通过“getBroadcast()”,该操作将在接收设备上的整个系统上广播此“Intent Action”。PendingIntent 指定了将来要执行的操作。它可以传递给另一个应用程序来执行它。请参见“SipDemo”中的示例。
Intent i = new Intent();
i.setAction("android.SipDemo.INCOMING_CALL");
PendingIntent pi = PendingIntent.getBroadcast(this, 0, i, Intent.FILL_IN_DATA);
向 SIP 服务器注册
通过调用“SipManager”句柄的“open()”方法,并传递“SipProfile”对象和“PendingIntent”句柄作为参数,来注册和打开此“SipProfile”对象。这将打开本地 SIP 配置文件,用于拨打和接听 SIP 呼叫。请参见“SipDemo”中的示例。
manager.open(me, pi, null);
监听注册事件
在“SipManager”句柄上设置一个“SipRegistrationListener”来跟踪 SIP 注册进度和结果。请参见“SipDemo”中的示例。
manager.setRegistrationListener(me.getUriString(), new SipRegistrationListener() {
    public void onRegistering(String localProfileUri) {
        updateStatus("Registering with SIP Server...");
    }

    public void onRegistrationDone(String localProfileUri, long expiryTime) {
        updateStatus("Ready");
    }

    public void onRegistrationFailed(String localProfileUri, int errorCode, String errorMessage) {
        updateStatus("Registration failed.  Please check settings.");
    }
});
设置 Intent Filter 以拦截传入呼叫
当“SigProfile”收到新的 SIP 呼叫时,“caller”发送的“PendingIntent”将执行一个广播,该广播将被“Intent Filter”拦截,以过滤“Intent Action”(在“SipDemo”中为“android.SipDemo.INCOMING_CALL”)并触发已注册响应此“Intent Action”的“BroadcastReceiver”(在“SipDemo”中为“IncomingCallReceiver”)的子类(在“SipDemo”中为“callReceiver”)。“BroadcastReceiver”类将在下一节中介绍。您可以在应用程序的清单文件中指定此“Intent Filter”,也可以在代码中指定。在“SipDemo”中,它是按如下方式在代码中创建的:
public IncomingCallReceiver callReceiver;
// other code
IntentFilter filter = new IntentFilter();
filter.addAction("android.SipDemo.INCOMING_CALL");
callReceiver = new IncomingCallReceiver();
this.registerReceiver(callReceiver, filter);
接收呼叫
为了接收和响应呼叫,应用程序必须:
- 创建一个能够响应指示传入呼叫的“Intent Action”(“android.SipDemo.INCOMING_CALL”)的“BroadcastReceiver”类(“SipDemo”中的“IncomingCallReceiver”)。请参见“SipDemo”中的代码片段。
/** * Listens for incoming SIP calls, intercepts and hands them off to WalkieTalkieActivity. */ public class IncomingCallReceiver extends BroadcastReceiver { /** * Processes the incoming call, answers it, and hands it over to the * WalkieTalkieActivity. * @param context The context under which the receiver is running. * @param intent The intent being received. */ @Override public void onReceive(Context context, Intent intent) { SipAudioCall incomingCall = null; try { SipAudioCall.Listener listener = new SipAudioCall.Listener() { @Override public void onRinging(SipAudioCall call, SipProfile caller) { try { call.answerCall(30); } catch (Exception e) { e.printStackTrace(); } } }; WalkieTalkieActivity wtActivity = (WalkieTalkieActivity) context; incomingCall = wtActivity.manager.takeAudioCall(intent, listener); incomingCall.answerCall(30); incomingCall.startAudio(); incomingCall.setSpeakerMode(true); if(incomingCall.isMuted()) { incomingCall.toggleMute(); } wtActivity.call = incomingCall; wtActivity.updateStatus(incomingCall); } catch (Exception e) { if (incomingCall != null) { incomingCall.close(); } } } } -
在应用程序的清单文件中声明前面创建的“BroadcastReceiver”类的“<receiver>”。请参见“SipDemo”中的示例。
<receiver android:name=".IncomingCallReceiver" android:label="Call Receiver"/>
拨打音频呼叫
为了让应用程序拨打 SIP 呼叫,应用程序必须:
- 首先,设置一个“SipAudioCall.Listener”来处理与呼叫相关的所有事件,例如新呼叫进来时的“onRinging()”。请参见“SipDemo”中的代码片段。
SipAudioCall.Listener listener = new SipAudioCall.Listener() { @Override public void onCallEstablished(SipAudioCall call) { call.startAudio(); call.setSpeakerMode(true); call.toggleMute(); updateStatus(call); } @Override public void onCallEnded(SipAudioCall call) { updateStatus("Ready."); } }; -
一旦设置了“SipAudioCall.Listener”,应用程序就可以通过调用“SipManager”的“makeAudioCall()l”方法来继续拨打呼叫,该方法将本地 SIP 配置文件(呼叫方)、对端 SIP 配置文件(被叫方)、“SipAudioCall.Listener”以及超时时间(以秒为单位)作为参数。请参见“SipDemo”中的示例。
call = manager.makeAudioCall(me.getUriString(), sipAddress, listener, 30);
关闭和注销配置文件
当不再需要配置文件时(例如在 Activity 的“onDestroy()”期间),应关闭它以释放内存并从服务器注销。这在“SipDemo”中是这样完成的:
public void closeLocalProfile() {
    if (manager == null) {
        return;
    }
    try {
        if (me != null) {
            manager.close(me.getUriString());
        }
    } catch (Exception ee) {
        Log.d("WalkieTalkieActivity/onDestroy", "Failed to close local profile.", ee);
    }
}
USB
Android 支持两种模式下的各种 USB 外设——USB Host 和 USB Accessory。
-
USB Host - Android 设备充当主机并为总线供电。此类 USB 设备包括键盘和游戏控制器。
-
USB Accessory - 外部 USB 硬件充当主机并为总线供电。此模式允许 Android 设备与不具备其功能特性的 USB 硬件通信。例如,USB 硬件如键盘、健身器材、医疗设备、机器人控制器、读卡器等等。为了让这些 USB 硬件与 Android 设备协同工作,它必须遵守 Android accessory communication protocol。
USB Host 和 USB Accessory 模式均在 Android 3.1(API 级别 12)及更新平台通过 API 包“android.hardware.usb”支持。
对于旧平台,“Google APIs add-on library”提供了“com.android.future.usb”包来支持 Android 2.3.4 中的 USB Accessory 模式。
USB API 概述
“android.hardware.usb”包总共提供了八个类,应用程序可以使用这些类与 USB 硬件外设通信。它们总结在表 2 中。
| 类 | 描述 |
|---|---|
| UsbManager | 允许应用程序枚举和通信已连接的 USB 设备。 |
| UsbDevice | 代表 USB Host 模式下的已连接 USB 设备。 |
| UsbAccessory | 代表 USB Accessory 模式下的已连接 USB 设备。 |
| UsbInterface | 表示“UsbDevice”对象上的一个接口,该接口定义了一组功能,并具有一个或多个用于通信的“UsbEndPoints”。 |
| UsbEndpoint |
表示“UsbInterface”对象的一个通信通道,主机通过该通道与设备传输数据。一个接口可以有一个或多个端点,例如用于双向通信的输入和输出端点。 |
| UsbDeviceConnection | 表示用于同步或异步传输数据的连接。 |
| UsbRequest | 表示一个 USB 请求包,可用于通过“UsbDeviceConnection”读取和写入数据。 |
| UsbConstants | 包含 USB 协议的常量,这些常量对应于 Linux 内核中 linux/usb/ch9.h 中的定义。 |
让我们分别逐步介绍在两种模式下设置与伪 USB 设备通信的步骤。我们将从 USB Host 模式开始。
USB Host
设置 Android Manifest
在应用程序能够使用 USB Host API 之前,它需要按照列出的方式设置清单文件:
-
声明一个“<uses-feature>”元素,表明该应用程序需要 USB Host API 支持。例如:
<uses-feature android:name="android.hardware.usb.host" />
-
将应用程序的最低 SDK 版本设置为 API 级别 12。例如:
<uses-sdk android:minSdkVersion="12" />
-
在“res/xml/”位置创建一个 XML 资源文件,例如“usb_devices.xml”,在“<usb-device>”元素中声明应用程序要访问的 USB 设备列表的配置文件。例如:
<resources>
    <usb-device vendor-id="xxxx" product-id="yyyy" />
</resources>
每个“<usb-device>”元素可以包含以下属性 - “vendor-id”、“product_id”或“vendor-id”、“class”、“subclass”和“protocol”。使用“vendor-id”和“product_id”来选择特定的 USB 设备。要选择一组 USB 设备,请添加“class”、“subclass”和“protocol”属性。如果“sub-device>”元素未指定任何属性,它将选择所有可用的 USB 设备。
- 为了让您的应用程序在 USB 设备附加时收到通知,在应用程序的主 Activity 中,指定一个“<intent-filter>”来过滤“android.hardware.usb.action.USB_DEVICE_ATTACHED” Intent,以及一个指向声明要连接的 USB 设备配置文件的 XML 资源文件的“<meta-data>”。
<intent-filter>
    <action android:name="android.hardware.usb.action.USB_DEVICE_ATTACHED" />
</intent-filter>

<meta-data android:name="android.hardware.usb.action.USB_DEVICE_ATTACHED" android:resource="@xml/usb_devices" />
发现 USB 设备
应用程序可以通过 Intent Filter 在设备附加时发出通知来发现 USB 设备,或者通过遍历应用程序启动之前已连接的设备来发现。
如果您已在 XML 资源文件中设置了设备配置文件,并在清单文件中的 Intent Filter 中进行了过滤,则应用程序可以像这样从 Intent 获取代表已附加设备的“UsbDevice”:
UsbDevice usbDevice = (UsbDevice) intent.getParcelableExtra(UsbManager.EXTRA_DEVICE);
另一方面,您可以通过枚举等方式从已连接设备列表中获取特定的“UsbDevice”:
UsbManager usbManager = (UsbManager) getSystemService(Context.USB_SERVICE);
HashMap<String, UsbDevice> deviceList = usbManager.getDeviceList();
UsbDevice usbDevice = deviceList.get("deviceName");
获取权限
如果应用程序使用意图过滤器检测 USB 设备,当用户连接与设备过滤器匹配的 USB 设备时,他们会看到一个对话框,询问他们是否要启动应用程序。如果用户接受,应用程序将被自动授予访问 USB 设备的权限,直到其断开连接。
另一方面,如果应用程序通过枚举检测到 USB 设备,它必须明确从用户那里获取权限才能与 USB 设备通信。为此,应用程序将调用 requestPermission() 来向用户显示一个对话框,询问连接设备的权限。例如:
private static final String ACTION_USB_PERMISSION = "com.peterleow.USB_PERMISSION";
UsbDevice usbDevice;
PendingIntent pi = PendingIntent.getBroadcast(this, 0, new Intent(ACTION_USB_PERMISSION), 0);
usbManager.requestPermission(usbDevice, pi);
当用户回复对话框时,结果将作为 Intent 返回,其中包含“EXTRA_PERMISSION_GRANTED”额外项,该项为 true 或 false。只有当此额外项的值为 true 时,应用程序才会连接到设备。此 Intent 将被广播,并且必须由“BroadcastReceiver”捕获。例如,创建一个“BroadcastReceiver”如下:
private static final String ACTION_USB_PERMISSION = "com.peterleow.USB_PERMISSION";
// other code
private final BroadcastReceiver usbReceiver = new BroadcastReceiver() {
    @Override
    public void onReceive(Context context, Intent intent) {
        String action = intent.getAction();
        if (ACTION_USB_PERMISSION.equals(action)) {
            synchronized (this) {
                // Obtain a USB device
                UsbDevice usbDevice = (UsbDevice)intent.getParcelableExtra(UsbManager.EXTRA_DEVICE);

                if (intent.getBooleanExtra(UsbManager.EXTRA_PERMISSION_GRANTED, false)) {
                    if(usbDevice != null){
                      // permission granted
                   }
                }
                else {
                    // permission denied
                }
            }
        }
    }
};
然后像这样注册“BroadcastReceiver”:
IntentFilter filter = new IntentFilter(ACTION_USB_PERMISSION);
registerReceiver(usbReceiver, filter);
进行通信
与 USB 设备的通信应在新线程中进行,以免阻塞 UI 线程。要设置通信,应用程序必须首先获取您要通信的 USB 设备的相应“UsbInterface”和“UsbEndpoint”,在该端点上打开“UsbDeviceConnection”,然后使用“bulkTransfer()”或“controlTransfer()”方法提供要传输到端点的数据。例如:
private Byte[] bytes;

UsbInterface usbInterface = device.getInterface(0);
UsbEndpoint usbEndpoint = usbInterface.getEndpoint(0);
UsbDeviceConnection usbDeviceConnection  = usbManager.openDevice(usbDevice);
usbDeviceConnection.claimInterface(usbInterface, true);
usbDeviceConnection.bulkTransfer(usbEndpoint, bytes, bytes.length, 0);
终止通信
当连接的 USB 设备被分离或与 USB 设备的通信会话不再需要时,应用程序应通过调用“releaseInterface()”和“close()”来关闭“UsbInterface”和“UsbDeviceConnection”。要监听分离事件,请创建并注册一个“BroadcastReceiver”,如前面的示例。
USB Accessory
在 USB Accessory 模式下设置与 USB accessory 通信的过程与 USB Host 模式非常相似,只有细微差别。例如,在 USB Host 模式下,USB 设备表示为“UsbDevice”对象,而在 USB Accessory 模式下,它表示为“UsbAccessory”对象。
如果您使用附加库来支持 Android 2.3.4,您会很高兴地知道该附加库中支持 USB accessory 功能的类与“android.hardware.usb”中的类相似,这意味着如果您使用附加库,您可以使用“android.hardware.usb”的文档。但是,它们有两个区别,如下所示:
-
使用附加库创建“UsbManager”句柄,请执行此操作:
UsbManager usbManager = UsbManager.getInstance(this);
使用“android.hardware.usb”包创建“UsbManager”句柄,请执行此操作:
UsbManager usbManager = (UsbManager) getSystemService(Context.USB_SERVICE);
-
使用附加库创建“UsbAccessory”对象,请执行此操作:
UsbAccessory usbAccessory = UsbManager.getAccessory(intent);
使用“android.hardware.usb”包创建“UsbAccessory”句柄,请执行此操作:
UsbAccessory usbAccessory = ((UsbAccessory)intent.getParcelableExtra(UsbManager.EXTRA_ACCESSORY);
设置 Android Manifest
在应用程序能够使用 USB Accessory API 之前,它需要按照列出的方式设置清单文件:
-
声明一个“<uses-feature>”元素,表明该应用程序需要 USB accessory API 支持。例如:
<uses-feature android:name="android.hardware.usb.accessory" />
-
如果使用“android.hardware.usb”包,将应用程序的最低 SDK 版本设置为 API 级别 12;如果使用附加库,则设置为 API 级别 10。例如:
<uses-sdk android:minSdkVersion="12" />
-
在“res/xml/”位置创建一个 XML 资源文件,例如“usb_accessory.xml”,在“<usb-accessory>”元素中声明应用程序要访问的 USB accessory 列表的配置文件。例如:
<resources>
    <usb-accessory model="xxxx" manufacturer="yyyy" version="1.0" />
</resources>
-
为了让您的应用程序在 USB accessory 附加时收到通知,在应用程序的主 Activity 中,指定一个“<intent-filter>”来过滤“android.hardware.usb.action.USB_ACCESSORY_ATTACHED” Intent,以及一个指向声明要连接的 USB accessory 配置文件的 XML 资源文件的“<meta-data>”。
<intent-filter>
    <action android:name="android.hardware.usb.action.USB_ACCESSORY_ATTACHED" />
</intent-filter>

<meta-data android:name="android.hardware.usb.action.USB_ACCESSORY_ATTACHED" android:resource="@xml/usb_accessory" />
发现 USB 设备
应用程序可以通过 Intent Filter 在 accessory 附加时发出通知来发现 USB accessory,或者通过遍历应用程序启动之前已连接的 accessory 来发现。
如果您已在 XML 资源文件中设置了设备配置文件,并在清单文件中的 Intent Filter 中进行了过滤,则应用程序可以通过以下任一方式从 Intent 获取代表已附加 accessory 的“UsbAccessory”:
- 使用附加库
UsbAccessory usbAccessory = UsbManager.getAccessory(intent);
- 使用“android.hardware.usb”包
UsbAccessory usbAccessory = ((UsbAccessory)intent.getParcelableExtra(UsbManager.EXTRA_ACCESSORY);
另一方面,您可以通过枚举等方式从已连接 accessory 列表中获取特定的“UsbAccessory”:
UsbAccessory[] usbAccessoryList = usbManager.getAcccessoryList();
获取权限
如果应用程序使用意图过滤器检测 USB accessory,当用户连接与 accessory 过滤器匹配的 USB 设备时,他们会看到一个对话框,询问他们是否要启动应用程序。如果用户接受,应用程序将被自动授予访问 USB accessory 的权限,直到其断开连接。
另一方面,如果应用程序通过枚举检测到 USB accessory,它必须明确从用户那里获取权限才能与 USB accessory 通信。为此,应用程序将调用 requestPermission() 来向用户显示一个对话框,询问连接 accessory 的权限。例如:
private static final String ACTION_USB_PERMISSION = "com.peterleow.USB_PERMISSION";
UsbAccessory usbAccessory;
PendingIntent pi = PendingIntent.getBroadcast(this, 0, new Intent(ACTION_USB_PERMISSION), 0);
usbManager.requestPermission(usbAccessory, pi);
当用户回复对话框时,结果将作为 Intent 返回,其中包含“EXTRA_PERMISSION_GRANTED”额外项,该项为 true 或 false。只有当此额外项的值为 true 时,应用程序才会连接到 accessory。此 Intent 将被广播,并且必须由“BroadcastReceiver”捕获。例如,创建一个“BroadcastReceiver”如下:
private static final String ACTION_USB_PERMISSION = "com.peterleow.USB_PERMISSION";
// other code
private final BroadcastReceiver usbReceiver = new BroadcastReceiver() {
    @Override
    public void onReceive(Context context, Intent intent) {
        String action = intent.getAction();
        if (ACTION_USB_PERMISSION.equals(action)) {
            synchronized (this) {
                // Obtain a USB device
                 UsbAccessory usbAccessory = (UsbAccessory) intent.getParcelableExtra(UsbManager.EXTRA_ACCESSORY);

                if (intent.getBooleanExtra(UsbManager.EXTRA_PERMISSION_GRANTED, false)) {
                    if(usbAccessory != null){
                      // permission granted
                   }
                }
                else {
                    // permission denied
                }
            }
        }
    }
};
然后像这样注册“BroadcastReceiver”:
IntentFilter filter = new IntentFilter(ACTION_USB_PERMISSION);
registerReceiver(usbReceiver, filter);
进行通信
与 USB accessory 的通信应在新线程中进行,以免阻塞 UI 线程。您可以通过首先从“UsbManager”获取文件描述符,然后设置输入和输出流来使用文件描述符读写数据来与 accessory 通信。您可以将文件描述符解释为 USB accessory 的通信终结点。例如:
FileInputStream inputStream;
FileOutputStream outputStream;
ParcelFileDescriptor fileDescriptor = usbManager.openAccessory(usbAccessory);

if fileDescriptor != null) {
    FileDescriptor fileDescriptor = mFileDescriptor.getFileDescriptor();
    inputStream = new FileInputStream(fileDescriptor );
    outputStream = new FileOutputStream(fileDescriptor );
    Thread t = new Thread(null, this, "USB AccessoryThread");
    t.start();
}
终止通信
当连接的 USB accessory 被分离或与 USB accessory 的通信会话不再需要时,应用程序应通过调用“close()”来关闭文件描述符。要监听分离事件,请创建并注册一个“BroadcastReceiver”,如前面的示例。
最佳实践
我总结了一些关于在 Android 中实现连接的最佳实践。
-
在适用时,在应用程序的清单文件中声明“<user-feature>”,以防止不支持某些连接选项的不兼容设备访问实现该连接选项的应用程序。
-
始终在新线程中执行 I/O 相关操作,以免阻塞用户在主 UI 线程上的交互。
- 始终在“Activity.onPause()”中注销“BroadcastReceiver”,并在“Activity.onResume()”中注册它,以最大限度地减少系统开销。
摘要
您已经通过实践了解了 Android 中的基本连接选项。我希望这段旅程能激发您进一步探索这些选项,并将它们集成到您的下一个 Android 应用程序中。为了方便参考,我已将它们整理成一个快速链接列表,以便在本文中快速跳转到相应的选项。
现在是时候断开连接,休息一下了。再见。