
WPF MVVM 实用的快速入门教程
本文为应用程序开发者提供一个关于 WPF 中 MVVM 的实际快速入门教程。
引言
本文为应用程序开发者提供一个关于 WPF 中 MVVM 模式的实际快速入门教程。
背景
MVVM(Model-View-ViewModel)设计模式是近期在软件开发界引入的一种设计模式。这种设计模式是 WPF 和 Silverlight 应用程序的一种专用设计模式。下图来自 Xianzhong Zhu 的文章 "A WaspKiller Game with Silverlight 3, .NET RIA Services, MVP, and MVVM Patterns",以图形方式展示了 MVVM 模式。

根据 维基百科,MVVM 模式可以描述如下:
- Model (模型):与经典的 MVC 模式一样,Model 指的是:
- 表示真实状态内容的面向对象模型(面向对象方法),或
- 表示内容的(以数据为中心的方法)数据访问层。
- View (视图):与经典的 MVC 模式一样,View 指的是 GUI 显示的所有元素,如按钮、窗口、图形和其他控件。
- ViewModel (视图模型):ViewModel 是“View 的模型”,意味着它是 View 的一个抽象,同时也用于 View 和 Model 之间的数据绑定。它可以被看作是 Controller(在 MVC 模式中)的一种专门化,充当数据绑定器/转换器,将 Model 信息转换为 View 信息,并将命令从 View 传递到 Model。ViewModel 公开了公共属性、命令和抽象。ViewModel 被比作数据的概念状态,而不是 Model 中数据的实际状态。
您可以在网上找到许多关于开发 MVVM WPF 和 Silverlight 应用程序的教程。本文旨在通过快速创建一个严格遵循微软建议的 MVVM WPF 应用程序,为应用程序开发者提供一个实际的快速入门。
本文假设读者能够创建一些基本的 WPF 应用程序,创建“XAML”文件,并理解“绑定”的基础知识。本教程应用程序在 Visual Studio 2008 中开发,使用的语言是 C#。
让我们首先设置开发环境,开始本教程。
设置开发环境
为了快速创建我们自己的 WPF MVVM 应用程序,让我们先下载“WPF Model-View-ViewModel Toolkit”。您可以在“CodePlex”网站上下载该工具包。本文使用的工具包版本是“0.1”。
创建 WPF MVVM 应用程序
安装工具包后,我们就可以创建 WPF MVVM 应用程序了。启动 Visual Studio,创建一个新项目。Visual Studio 会让您选择项目类型。

安装“WPF Model-View-ViewModel Toolkit”时,一个名为“WPF Model-View Application”的项目模板会被添加到 Visual Studio 中。选择此模板,将应用程序命名为“WpfModelViewDemoApplication”,浏览到您希望保存 Visual Studio 生成文件的文件夹,然后点击“OK”按钮;WPF MVVM 项目即被生成。下图显示了模板生成的项目文件。

与大多数 WPF 应用程序一样,此应用程序的起点是“App.xaml”文件的代码隐藏文件。文件夹“Models”、“Views”和“ViewModels”用于开发 Models、Views 和 View-Models。我们需要特别关注这三个文件。
- Commands\CommandReferences.cs
- Commands\DelegatedCommand.cs
- ViewModels\ViewModelBase.cs
这些文件由模板创建,用于帮助应用程序开发者管理路由 命令 和 事件。“ViewModels\ViewModelBase.cs”文件中实现的“ViewModelBase”类应该是 MVVM 中所有 Views 的基类。在开发我们自己的 MVVM 应用程序时,我们通常不需要对这些文件进行任何更改。我们可以直接使用它们来开发遵循微软建议的 MVVM 应用程序。我们应该将大部分开发精力集中在项目的 IT 和业务方面。
虽然它没有 Model,但由模板创建的应用程序是一个可运行的 MVVM 应用程序。现在让我们编译并运行该应用程序。当 Visual Studio 处于焦点状态时,按“F5”键,应用程序将启动并打开“Views\MainView.xaml” WPF 窗口,这在 MVVM 模式中称为 View。
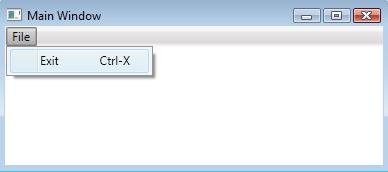
如果我们在菜单中选择“File”(文件),然后点击“Exit”(退出)菜单项,应用程序就会停止。现在让我们看一下“MainView.xaml” WPF 窗口的代码隐藏文件。
using System;
using System.Collections.Generic;
using System.Linq;
using System.Text;
using System.Windows;
using System.Windows.Controls;
using System.Windows.Data;
using System.Windows.Documents;
using System.Windows.Input;
using System.Windows.Media;
using System.Windows.Media.Imaging;
using System.Windows.Navigation;
using System.Windows.Shapes;

namespace WpfModelViewDemoApplication.Views
{
    public partial class MainView : Window
    {
        public MainView()
        {
            InitializeComponent();
        }
    }
}
您会注意到这个代码隐藏文件没有任何事件处理程序。当我们在下拉菜单中选择“Exit”时,应用程序如何关闭?答案就在模板创建的三个文件中。看来微软倾向于从 Views 的代码隐藏文件中删除所有事件处理程序,并将它们移动到 ViewModels。对于“Exit”命令的事件处理程序实现在“ViewModels\MainViewModel.cs”文件中的“MainView.xaml”文件的 View-Model 中。
private DelegateCommand exitCommand;
public ICommand ExitCommand
{
        get
        {
         if (exitCommand == null)
                {
                    exitCommand = new DelegateCommand(Exit);
                }
                return exitCommand;
        }
}

private void Exit()
{
    Application.Current.Shutdown();
}
在三个文件的帮助下,“Exit”命令将被路由到“ViewModels\MainViewModel.cs”,并且此处实现的“Exit”方法将被执行。
本文旨在为您提供 WPF MVVM 应用程序开发的快速入门。我将把这三个文件当作黑盒子,只使用它们提供的功能。如果您对“Exit”命令如何路由到“Exit”方法感兴趣,您可以查看这些文件,并查阅一些文章,例如 这篇文章。
理论上,我们现在可以完成本教程,因为我们已经实现了一个完全可运行的 WPF MVVM 应用程序。但这个应用程序还没有任何功能。在教程的后续部分,我将添加一个模型类,并基于这个模板 WPF MVVM 应用程序实现一些功能。我将创建一个显示学生列表并允许您添加学生的应用程序。
本文附带教程应用程序的源代码;建议您在继续阅读文章之前下载并运行该应用程序。这将使您对我们将要做的内容有更好的了解。如果您在 Debug 模式下运行应用程序时遇到任何运行时错误,您可以参考文章的 后面部分 来调整您的 Visual Studio 设置。
添加模型类
为了给 WPF MVVM 应用程序添加一些功能,我们将首先创建应用程序的数据模型。模型类在 C# 文件“StudentsModel.cs”的“Models”文件夹中创建。
using System;
using System.Collections.ObjectModel;
using System.Collections.Generic;
using System.Linq;
using System.Text;

namespace WpfModelViewDemoApplication.Models
{
    public class Student
    {
        public string Name {get; set;}
        public int Score {get; set;}
        public DateTime TimeAdded {get; set;}
        public string Comment {get; set;}

        public Student(string Name, int Score,
            DateTime TimeAdded, string Comment) {
            this.Name = Name;
            this.Score = Score;
            this.TimeAdded = TimeAdded;
            this.Comment = Comment;
        }
    }

    public class StudentsModel: ObservableCollection
    {
        private static object _threadLock = new Object();
        private static StudentsModel current = null;

        public static StudentsModel Current {
            get {
                lock (_threadLock)
                if (current == null)
                    current = new StudentsModel();

                return current;
            }
        }

        private StudentsModel() {

            Random rd = new Random();
            for (int Idex = 1; Idex <= 5; Idex++)
            {
                string Name = "Student Name No. " + Idex.ToString();
                int Score =
                    System.Convert.ToInt16(60 + rd.NextDouble() * 40);
                DateTime TimeAdded = System.DateTime.Now;
                string Comment = "This student is added @ " +
                    TimeAdded.ToString();

                Student aStudent = new Student(Name, Score,
                    TimeAdded, Comment);
                Add(aStudent);
            }
        }

        public void AddAStudent(String Name,
            int Score, DateTime TimeAdded, string Comment) {
            Student aNewStudent = new Student(Name, Score,
                TimeAdded, Comment);
            Add(aNewStudent);
        }
    }
}
“StudentsModel.cs”文件实现了两个类:
StudentStudentsModel
“Student”类代表单个学生,包含姓名、分数、添加到系统的时间以及关于该学生的注释信息。“StudentsModel”类是一个“Student”对象的“ObservableCollection”。此类实现为一个线程安全的单例类。在构造此类时,构造函数会将五个随机生成的学生插入到“ObservableCollection”中。这些学生将在应用程序启动时列出。
修改“ViewModels\MainViewModel.cs”文件中的 View-Model
在 WPF MVVM 应用程序中,Models 会通过 View-Model 类与 Views (UI) 进行通信。在本教程中,我不会创建新的 View-Model 类。我将修改在“ViewModels\MainViewModel.cs”中实现的 View-Model。
using System;
using System.Collections.Generic;
using System.Linq;
using System.ComponentModel;
using System.Text;
using System.Collections.ObjectModel;
using System.Windows;
using System.Windows.Input;
using WpfModelViewDemoApplication.Models;
using WpfModelViewDemoApplication.Commands;

namespace WpfModelViewDemoApplication.ViewModels
{
    public class MainViewModel : ViewModelBase
    {
        private DelegateCommand exitCommand;

        #region Constructor

        public StudentsModel Students { get; set; }
        public string StudentNameToAdd { get; set; }
        public int StudentScoreToAdd { get; set; }


        public MainViewModel()
        {
            Students = StudentsModel.Current;
        }

        #endregion

        public ICommand ExitCommand
        {
            get
            {
                if (exitCommand == null)
                {
                    exitCommand = new DelegateCommand(Exit);
                }
                return exitCommand;
            }
        }

        private void Exit()
        {
            Application.Current.Shutdown();
        }

        private ICommand _AddStudent;
        public ICommand AddStudent
        {
            get
            {
                if (_AddStudent == null)
                {
                    _AddStudent = new DelegateCommand(delegate()
                    {
                        StudentNameToAdd.Trim();

                        StringBuilder SB = new StringBuilder();
                        if (StudentNameToAdd == "")
                        {
                            SB.Remove(0, SB.Length);
                            SB.Append("Please type in a name for the student.");
                            throw new ArgumentException(SB.ToString());
                        }

                        if (StudentNameToAdd.Length < 10)
                        {
                            SB.Remove(0, SB.Length);
                            SB.Append("We only take students whose name is longer than ");
                            SB.Append("10 characters.");
                            throw new ArgumentException(SB.ToString());
                        }
                        if ((StudentScoreToAdd < 60) || (StudentScoreToAdd > 100))
                        {
                            SB.Remove(0, SB.Length);
                            SB.Append("We only take students " +
                                      "whose score is between 60 and 100. ");
                            SB.Append("Please give a valid score");
                            throw new ArgumentException(SB.ToString());
                        }

                        DateTime Now = DateTime.Now;
                        SB.Remove(0, SB.Length);
                        SB.Append("Student ");
                        SB.Append(StudentNameToAdd);
                        SB.Append(" is added @ ");
                        SB.Append(Now.ToString());

                        Students.AddAStudent(StudentNameToAdd,
                            StudentScoreToAdd, Now, SB.ToString());
                    });
                }

                return _AddStudent;
            }
        }
    }
}
此类继承自“ViewModels\ViewModelBase.cs”文件中实现的“ViewModelBase”类。如果您想创建自己的 View-Models,也应该使您的 View-Model 类成为“ViewModelBase”类的子类,这样您就可以更好地利用“WPF Model-View Application”模板生成的功能。“ViewModelBase”类实现了“INotifyPropertyChanged”接口,因此当绑定到它的公共属性发生更改时,UI (View) 会收到通知。
在不更改“MainViewModel”类中任何现有功能的情况下,我们添加了四个公共属性:
public StudentsModel Studentspublic string StudentNameToAddpublic int StudentScoreToAddpublic ICommand AddStudent
其中三个属性与“数据绑定”相关。“Students”属性持有对应用程序单例模型类“StudentsModel”的引用。“StudentNameToAdd”和“StudentScoreToAdd”属性用于获取用户输入,以便可以将新学生添加到 Model 中。
“AddStudent”属性返回一个“ICommand”接口引用,用于“命令绑定”。要添加一个学生,此属性中实现的“DelegateCommand”将首先验证公共属性“StudentNameToAdd”和“StudentScoreToAdd”,以检查用户是否提供了有效的学生姓名和分数。如果输入信息无效,则会抛出异常。“Exception”对象包含有关添加“Student”时遇到的问题的详细消息。
向“App.xaml”添加“DispatcherUnhandledException”处理程序
我们刚刚实现的 View-Model 类会抛出“Exception”。我们需要处理这些异常,否则应用程序将停止。我们将在“App.xaml”文件的代码隐藏文件中实现异常处理程序,方法是“APP_DispatcherUnhandledException”。
using System;
using System.Collections.Generic;
using System.Configuration;
using System.Data;
using System.Windows;
using System.Linq;
using System.Windows.Threading;

namespace WpfModelViewDemoApplication
{
    public partial class App : Application
    {
        private void OnStartup(object sender, StartupEventArgs e)
        {
            Views.MainView view = new Views.MainView();
            view.DataContext = new ViewModels.MainViewModel();
            view.Show();
        }

        private void APP_DispatcherUnhandledException(object sender,
            DispatcherUnhandledExceptionEventArgs e)
        {
            MessageBox.Show(e.Exception.Message);
            e.Handled = true;
        }
    }
}
为了让异常处理程序能够捕获异常,我们需要修改“App.xaml”文件,在“<Application />”标签中将“DispatcherUnhandledException”属性设置为“APP_DispatcherUnhandledException”。
<Application x:Class="WpfModelViewDemoApplication.App"
    xmlns="http://schemas.microsoft.com/winfx/2006/xaml/presentation"
    xmlns:x="http://schemas.microsoft.com/winfx/2006/xaml"
    DispatcherUnhandledException="APP_DispatcherUnhandledException"
    Startup="OnStartup">
    <Application.Resources>

    </Application.Resources>
</Application>
此异常处理程序仅捕获从 UI 线程抛出的未处理异常。如果应用程序有也抛出异常的工作线程,这些异常需要被“派发”到 UI 线程,以便被此处理程序捕获。
修改“MainView.xaml”
我们将继续使用“MainView.xaml”作为应用程序的主 View。我们将保留模板创建的所有功能,并添加应用程序所需组件。
<Window x:Class="WpfModelViewDemoApplication.Views.MainView"
    xmlns="http://schemas.microsoft.com/winfx/2006/xaml/presentation"
    xmlns:x="http://schemas.microsoft.com/winfx/2006/xaml"
    xmlns:c="clr-namespace:WpfModelViewDemoApplication.Commands"
    FontFamily="Verdana"
    Title="WPF MVVM Tutorial">

<Window.Resources>
    <c:CommandReference x:Key="ExitCommandReference"
                        Command="{Binding ExitCommand}" />
        <Style x:Key="LabelStyle" TargetType="{x:Type TextBlock}">
            <Setter Property="FontWeight" Value="Bold" />

        </Style>
        <Style x:Key="GridViewHeaderStyle"
               TargetType="{x:Type GridViewColumnHeader}">
            <Setter Property="FontWeight" Value="Bold" />
            <Setter Property="Foreground" Value="Maroon" />
            <Setter Property="Background" Value="LightSkyBlue" />
        </Style>
    </Window.Resources>

<Window.InputBindings>
    <KeyBinding Key="X" Modifiers="Control"
                Command="{StaticResource ExitCommandReference}" />
</Window.InputBindings>

<Grid>
    <Grid.RowDefinitions>
        <RowDefinition Height="Auto" />
        <RowDefinition Height="40" />
        <RowDefinition Height="*" />
    </Grid.RowDefinitions>

    <Menu Grid.Row="0">
        <MenuItem Header="_File">
            <MenuItem Command="{Binding ExitCommand}"
                      Header="E_xit" InputGestureText="Ctrl-X" />
        </MenuItem>
    </Menu>

    <Grid Grid.Row="1" HorizontalAlignment="Right"
          Margin="0, 5, 20, 10" VerticalAlignment="Center">
        <StackPanel Orientation="Horizontal">
            <TextBlock Style="{StaticResource  LabelStyle}">
                Student name</TextBlock>
            <TextBox Width="200" Margin="10, 0, 5, 0"
                     Text="{Binding Path=StudentNameToAdd,
                Mode=OneWayToSource}">
            </TextBox>
            <TextBlock Style="{StaticResource  LabelStyle}">
                Score</TextBlock>
                <TextBox Width="100" Margin="10, 0, 5, 0"
                         Text="{Binding Path=StudentScoreToAdd,
                    Mode=OneWayToSource}">
                </TextBox>

                    <Button x:Name="btnAddStudent"
                            Content="Add a student"
                            Command="{Binding AddStudent}">
            </Button>
        </StackPanel>
    </Grid>

        <ListView  Grid.Row="2" BorderBrush="White"
                   ItemsSource="{Binding Path=Students}"
                   HorizontalAlignment="Stretch">
            <ListView.View>
                <GridView>
                    <GridViewColumn Header="Name"
                                    HeaderContainerStyle=
                                    "{StaticResource GridViewHeaderStyle}"
                                    DisplayMemberBinding="{Binding Path=Name}" />
                    <GridViewColumn Header="Score"
                                    HeaderContainerStyle=
                                    "{StaticResource GridViewHeaderStyle}"
                                    DisplayMemberBinding="{Binding Path=Score}" />
                    <GridViewColumn Header="TimeAdded"
                                    HeaderContainerStyle=
                                    "{StaticResource GridViewHeaderStyle}"
                                    DisplayMemberBinding="{Binding Path=TimeAdded}" />
                    <GridViewColumn Header="Comment"
                                    HeaderContainerStyle=
                                    "{StaticResource GridViewHeaderStyle}"
                                    DisplayMemberBinding="{Binding Path=Comment}" />
                </GridView>
            </ListView.View>
        </ListView >
    </Grid>
</Window>
除了添加样式,我还添加了一个“ListView”来显示我们“StudentsModel”中的学生列表。我还添加了两个“TextBox”控件来获取用户输入学生姓名和分数。“XAML”文件中的“Button”发出命令以添加新学生。
“ListView”的“ItemsSource”绑定到 View-Model 类“MainViewModel”的“Students”属性,两个“TextBox”控件分别绑定到“StudentNameToAdd”和“StudentScoreToAdd”属性。“Add a student”(添加学生)按钮的“Command”属性绑定到 View-Model 的“AddStudent”“ICommand”属性,因此 View-Model 类中实现的“DelegateCommand”将被调用来添加新学生。
“MainView.xaml”文件的代码隐藏文件不再负责处理用户命令,它只会将“MainView.xaml”的“DataContext”设置为 View-Model 类的实例。
using System;
using System.Collections.Generic;
using System.Linq;
using System.Text;
using System.Windows;
using System.Windows.Controls;
using System.Windows.Data;
using System.Windows.Documents;
using System.Windows.Input;
using System.Windows.Media;
using System.Windows.Media.Imaging;
using System.Windows.Navigation;
using System.Windows.Shapes;
using WpfModelViewDemoApplication.ViewModels;

namespace WpfModelViewDemoApplication.Views
{
    public partial class MainView : Window
    {
        public MainView()
        {
            InitializeComponent();
            DataContext = new MainViewModel();
        }
    }
}
运行应用程序
现在我们已经完成了为 MVVM 应用程序添加一些功能。为了在 Debug 模式下顺利运行应用程序,我们需要对 Visual Studio 设置进行一些调整。这是因为应用程序会抛出异常,而我们不希望应用程序在异常处停止。我们希望异常能被应用程序级别的异常处理程序“APP_DispatcherUnhandledException”捕获。在 Visual Studio 的“Debug”(调试)菜单中选择“Exceptions”(异常)。

取消勾选“Common Language Runtime Exceptions”(公共语言运行时异常)的“user-unhandled”(用户未处理)复选框,然后点击“OK”(确定)按钮。

调整 Visual Studio 的设置后,我们就可以调试运行应用程序了。下图显示了学生列表。为新学生输入姓名和分数,然后点击“Add a student”(添加学生)按钮,您将看到该学生已被添加。您还可以为学生输入非常低或非常高的分数,以查看学生信息验证是否有效。

关注点
- 本文为应用程序开发者提供了关于 MVVM 的实际快速入门教程。借助“WPF Model-View-ViewModel Toolkit”,创建 WPF MVVM 应用程序非常简单易行。
- 本文没有详细介绍“WPF Model-View Application”模板创建的文件,只是使用了它们。如果您有兴趣,可以查看这些文件以更好地理解“路由命令”。
- 为简便起见,View-Model 类中的用户输入数据验证使用了“异常”来报告验证错误。您可能会找到更好的数据验证方法,选择此方法只是为了本文的简便。
- 本教程旨在为您提供快速入门。如果您想了解更多关于 MVVM 的信息,还有很多其他参考资料,我强烈建议您查阅它们。
结论
为了总结本文,我想从维基百科借用一些信息,这来自 MVVM 的创造者 John Gossman:
实现 MVVM 的开销对于简单的 UI 操作来说是“过度的”。对于大型应用程序,泛化 View 层会变得更加困难。此外,数据绑定如果管理不当,会导致应用程序消耗大量内存。
John 所说的应该是正确的。即使有“WPF Model-View-ViewModel Toolkit”的帮助,您可能会注意到本教程应用程序的实现相当复杂,而其他许多方法可以更简单地实现。MVVM 的主要声称优势之一是,由于业务数据对象与 UI 分离,我们可以简单地更改 UI 而不触及业务对象。在某些情况下,当 UI 的更改是外观上的更改时,这可能是真的。实际上,大多数由于业务需求而对 UI 进行的更改将是功能性更改。这些更改几乎总是需要我们一起更改 UI 和数据对象。
尽管对 MVVM 模式有批评,但 MVVM 的思想,如将数据关注点与 UI 关注点分离,使 Models 和 View-Models 可进行单元测试,这些都是软件工程中非常有价值的思想。
在您的应用程序中,是否遵循 MVVM 模式以及在多大程度上遵循它,是您需要做出的设计选择。无论您做出何种决定,最好的设计模式是与您的应用程序需求最契合的模式。
历史
这是本文的第一个修订版。