
使用 WPFWidgetizer 框架构建可扩展且灵活的 WPF 客户端应用程序(第一部分)
4.98/5 (19投票s)
借助 WPFWidgetizer 框架,
重要提示
各位朋友,我很乐意在评论区听到您的任何反馈。谢谢
引言
当一个软件团队在构建应用程序时,需要在让不同的人尽可能独立地工作,以及让他们辛勤工作的成果无缝地协同工作之间取得平衡。正是因为这种平衡的需要,几乎所有成功的 UI 架构都会将应用程序拆分成“组件”(Widgets)。
组件(Widget)是主要的 UI 单元,可以独立于其他组件进行开发和测试,并且可能在应用程序之外对用户具有其自身的价值。
WPFWidgetizer 框架提出的基于组件的架构将解决创建由组件无缝协同工作的灵活 UI 基础设施的需求。这里介绍的技术已经在许多成功的项目中经过测试并证明是有效的。
请注意,WPFWidgetizer 框架预计将继续进行更改和进一步开发。
阅读和学习本文将为您的项目节省数百万美元:通过构建灵活的基础设施,您将能够专注于创建您需要的业务组件,而不是为让它们协同工作而苦苦挣扎。此外,学习这些技术将使您能够避免做出错误的架构决策(架构反模式,不幸的是,许多 WPF 项目都饱受其困扰)。
我们将这种方法称为构建“可扩展且灵活”的应用程序,因为它允许创建由可以轻松添加、删除或重新配置的组件组成的应用程序。这些组件使用 Prism 的 EventAggregator 消息进行相互通信。
在架构(而非实现)中,应用程序的主要单位是组件,而不是单个控件,因此我们将重点放在描述如何在组件层面构建应用程序。当然,我们也会使用一些简单的控件作为更细粒度的构建块,但重点将放在组件上。
除了 Microsoft 的 Prism 和 Microsoft 的 Expression Blend SDK 之外,我们几乎避免在应用程序中使用任何第三方组件。
我们将 Prism 用作控制反转(IoC)容器,同时也利用其事件聚合器消息功能。
Expression Blend SDK 用于提供 XAML 和 C# 代码之间的连接。与 Expression Blend 不同,Expression Blend SDK 是免费使用和重新分发的。
我们提供的示例中包含了 Prism 和 Expression Blend SDK 的所有必需的 dll 文件,因此您无需下载任何额外内容。
本文描述的大部分技术都可以应用于构建任何 UI 客户端应用程序,而不一定是 WPF 甚至 .NET 应用程序。然而,我们所有的示例都是使用 WPF 构建的。
我们在此不讨论应用程序的数据库和服务层的实现。但是,我们会展示如何实现一个模拟服务层,该层将返回模拟数据给客户端。我们还提供了一种机制,可以用几乎不改变应用程序其余部分的方式来替换这个模拟服务层。
本文不适合 WPF 初学者 - 我假设您已经具备 WPF 的一些知识,包括 MVVM 模式、依赖项、附加属性和可通知属性、绑定、路由事件、XAML。
文章概述
与我最初的意图相反,我要涵盖的材料发现对于一篇文章来说太大了——它将被分成两部分。本部分涵盖的主题如下:
本文将涵盖以下主要主题:
- 回顾如何使用 Prism 作为 IoC 容器和事件聚合。
- 组件 - 组件组装模式 - 这是本文的核心模式。
- 代码结构讨论。
- 通过单个组件示例探索 ViewModel 和 UI 代码以及数据获取功能。
- 通过简单的组件组装示例探索组件 UI 操作事件、组件间消息传递和组件组装功能。
以下是续集中将涵盖的主要主题:
- 包含组件组装以及其中包含子组件的组件。
- 基于范围的层次化组件间通信。
- 不同组件组装之间的导航。
- 元素工厂模式。
- ViewModel 层次结构模式。
使用 MS Prism 框架回顾控制反转(IoC)和事件聚合
我建议即使是那些熟悉 IoC 和事件聚合的人,也应该回顾一下,因为它描述了我们如何在文章中进一步使用这些概念,并提供了一些关于代码结构的思路。
控制反转(IoC)
IoC 的用途
IoC 允许用实现相同接口的完全不同的实现来替换应用程序的某些部分,而代码更改很少或没有更改。大多数时候,IoC 用于为应用程序的某些(通常是非可视的)部分提供临时或测试插件。例如,在许多项目中,我使用了一个模拟数据插件来在后端/服务准备好之前构建应用程序。即使后端已准备好使用,您可能仍希望模拟自己的模拟数据,以测试应用程序在某些罕见条件下的行为是否良好,或者仅仅是为了让数据返回得更快。
有许多各种类型的 IoC 容器,包括 MEF 和 Unity。在本文中,我们将使用 Microsoft Prism 软件附带的 MEF 容器。
IoC 滥用反模式
许多应用程序架构师可能不同意我的观点,但我坚信在许多项目中 IoC 被严重过度使用。不幸的是,MEF 和其他 IoC 容器支持插件链式传播,也就是说,如果一个组件被实现为一个 MEF 插件,那么包含该组件的类也更容易被实现为 MEF 插件。
过度使用插件架构会导致代码混乱、异常不明确以及调试困难,同时并不会使应用程序更加灵活。
请注意,仅在您确实可能想要在项目中的某个时间点替换其实现的那些部分使用插件!
IoC Prism 示例
我们使用的是 Prism 5.0 for .NET 4.5,可从 Microsoft Prism Download 免费获取。
您无需从上述 URL 下载和安装包,因为我们的示例中提供了所有必需的 dll 文件。
示例位于 Samples/IoCPluginSample 文件夹下的 IoCPluginSample.sln 解决方案中。
在打开项目之前,您应该取消阻止 Prism dll 文件(它们很可能被阻止,因为您是从互联网下载的)。要取消阻止它们,请转到包含它们的 ExternalPackages/Prism 文件夹,右键单击每个文件,选择“属性”选项,然后单击“取消阻止”按钮。
此示例的目的是展示如何通过使用 Prism 和 MEF 来轻松地在同一接口的不同实现之间进行切换。
接口 INumberChurner 定义在 GenericInfrastructure 项目下
[InheritedExport(typeof(INumberChurner))]
public interface INumberChurner
{
    int GetInt();
}
它只有一个方法 GetInt(),该方法返回一个整数。TestAndMockupUtils 文件夹下的两个不同项目 SampleMockup1 和 SampleMockup2。它们提供了 INumberChurner 的两个不同实现——类 Number1Churner 和 Number2Churner。
Number1Churner 的 GetInt() 方法始终返回 1,而 Number2Churner 的 GetInt() 方法始终返回 2。
INumberChurner 声明上方的 InheritedExport(typeof(INumberChurner)) MEF 属性确保实现 INumberChurner 的类是 MEF 导出,具有与 typeof(INumberChurner) 提供的 MEF ID 相同的 MEF ID,换句话说,可以被 MEF 替换。
MEF 允许您通过 MEF ID 从 MEF 容器中获取实现。因此,拥有一个在应用程序各处获取 MEF 容器引用的便捷方法非常重要。为了提供这样的引用,我们在 GenericInfrastructure 项目下创建了一个静态类 TheAppIoCContainer。该类包含 TheCompositionContainer 属性,该属性引用应用程序中的 MEF 容器。此属性通过 AppBootstrapperBase 类设置为 MEF 容器的引用。
public abstract class AppBootstrapperBase : MefBootstrapper
{
    // called when the application is initialized
    protected override System.ComponentModel.Composition.Hosting.CompositionContainer CreateContainer()
    {
        CompositionContainer theContainer = base.CreateContainer();

        // set the static reference to the MEF container
        TheAppIoCContainer.TheCompositionContainer = theContainer;

        return theContainer;
    }
}
现在,让我们将注意力转向 IoCPluginSample 项目(应用程序的主项目)。
IoCPluginSample 项目下的 TheBootstrapper 类继承自 GenericInfrastructure.AppBootstrapperBase 类。
public class TheBootstrapper : AppBootstrapperBase
{
    protected override void InitializeShell()
    {
        base.InitializeShell();

        Application.Current.MainWindow = this.Shell as Window;

        Application.Current.MainWindow.Show();
    }

    protected override DependencyObject CreateShell()
    {
        return Container.GetExportedValue();
    }

    protected override void ConfigureAggregateCatalog()
    {
        base.ConfigureAggregateCatalog();
        AggregateCatalog.Catalogs.Add(new AssemblyCatalog(this.GetType().Assembly));

        // you can swap between SampleMockup1 and SampleMockup2 implementations
        // of common interaces by changing the commented out line below
        AggregateCatalog.Catalogs.Add(new AssemblyCatalog(typeof(Number1Churner).Assembly));
        //AggregateCatalog.Catalogs.Add(new AssemblyCatalog(typeof(Number2Churner).Assembly));
    }
}
ConfigureAggregateCatalog 方法是我们用来在 SampleMockups1 和 SampleMockup2 项目的实现之间切换的方法——为了选择一个实现而不是另一个,您只需要保留相应的 AggregateCatalog.Catalogs.Add(...) 行未注释,并注释掉另一行。
MainWindow 类定义了一个名为 TheNumber 的整数属性,该属性由相应的 NumberChurner 设置。
[Export]
public partial class MainWindow : Window
{
    public MainWindow()
    {
        // get the number churner provide by MEF
        INumberChurner numberChurner =
            TheAppIoCContainer.TheCompositionContainer.GetExportedValue();

        // set TheNumber property
        TheNumber = numberChurner.GetInt();


        InitializeComponent();
    }

    public int TheNumber
    {
        get;
        private set;
    }
}
MainWindow.xaml 显示 MainWindow 类的 TheNumber 属性。
<Grid>
    <TextBlock Text="{Binding Path=TheNumber,
                              RelativeSource={RelativeSource AncestorType=Window}}"
               HorizontalAlignment="Center"
               VerticalAlignment="Center"
               FontSize="80"/>
</Grid>
当我们运行应用程序时,它将在白色窗口的中间显示数字 1。

但是,如果我们更改 TheBootstrapper 类的 ConfigureAggregateCatalog() 方法,使其第二个 AggregateCatalog.Catalogs.Add(...) 行未注释。
//AggregateCatalog.Catalogs.Add(new AssemblyCatalog(typeof(Number1Churner).Assembly));
AggregateCatalog.Catalogs.Add(new AssemblyCatalog(typeof(Number2Churner).Assembly));
应用程序将显示数字 2。
请注意,如果我们有更多的方法在我们的接口中,或者不同的接口,以及提供这些接口不同实现的各种程序集,我们仍然可以通过更改 TheBootstrapper.ConfigureAggregateCatalog() 方法中一行注释来改变这些不同的实现。
在我们继续之前,我建议对上面的代码进行一些小的改进。TheBootstrapper 类将不得不成为每个示例的启动项目的一部分(我们将无法重用它)。将大部分功能分解到超类是有意义的。特别是,我们可以分解 InitializeShell() 和 CreateShell() 函数。我们已经在 GenericInfrastructure 项目下有了自己的超类 AppBootstrapperBase。我们不希望使用这个类来定义 InitializeShell() 和 CreateShell() 函数,因为它将要求为 GenericInfrastructure 项目添加对某些 WPF 特定 dll 的依赖,而我们希望能够将其功能用于纯粹的非可视项目。因此,我们添加了一个项目 IoCPluginUtils 并在那里定义了一个派生自 AppBootstrapperBase 的类 AppBootstrapper。AppBootstrapper 将提供所有连接功能,以便各个示例引导程序只需定义 ConfigureAggregateCatalog() 方法。
public class AppBootstrapper<T> : AppBootstrapperBase where T : Window
{
    protected override void InitializeShell()
    {
        base.InitializeShell();
        Application.Current.MainWindow = this.Shell as Window;

        Application.Current.MainWindow.Show();
    }

    protected override DependencyObject CreateShell()
    {
        return Container.GetExportedValue<T>();
    }

    protected override void ConfigureAggregateCatalog()
    {
        base.ConfigureAggregateCatalog();

        AggregateCatalog.Catalogs.Add(new AssemblyCatalog(typeof(T).Assembly));
    }
}
并且主项目的 TheBootstrapper 类变得非常简单
public class TheBootstrapper : AppBootstrapper<MainWindow>
{
    protected override void ConfigureAggregateCatalog()
    {
        base.ConfigureAggregateCatalog();

        // you can swap between SampleMockup1 and SampleMockup2 implementations
        // of common interaces by changing the commented out line below
        AggregateCatalog.Catalogs.Add(new AssemblyCatalog(typeof(Number1Churner).Assembly));
        //AggregateCatalog.Catalogs.Add(new AssemblyCatalog(typeof(Number2Churner).Assembly));
    }
}
这就是我们从 Prism 的 IoC 功能中需要的所有。
事件聚合
事件聚合的用途
事件聚合允许应用程序的不同部分相互通信,而无需了解彼此,从而实现更好的关注点分离。一部分通过 EventAggregator 发布消息,另一部分(或多部分)可以注册该类型消息的处理程序,以便在消息到达时,处理程序被触发。
大多数 WPF 框架都提供自己的事件聚合功能。这里我们将使用 Prism 事件聚合器。
事件聚合滥用反模式
与 IoC 一样,事件聚合也应谨慎使用。当人们采用事件聚合时,他们倾向于将其用于应用程序中的几乎所有通信。这会导致复杂的意大利面条式代码,难以扩展、调试和理解。
我建议仅将事件聚合用于应用程序中较大实体之间的通信,特别是组件之间的通信,而每个组件内部的通信应以不同方式处理。我们将在下面详细讨论这一点。
事件聚合示例
Prism 事件聚合示例位于 EventAggregatorSample 文件夹下的 EventAggregatorSample.sln 解决方案中。主项目名称与示例相同,为 EventAggregatorSample。
尽管我在上面建议仅在组件级别或更高级别使用事件聚合,但在这里,为了简单起见,我将演示如何将事件聚合用于同一窗口内不同控件之间的通信;组件间通信将在本文稍后进行解释。
尝试运行项目,您将看到以下内容:

如果您按下“发布时间戳”按钮,什么也不会发生,因为事件订阅尚未发生。
但是,如果您勾选“订阅/取消订阅”复选框,然后再次尝试按按钮,您将看到时间戳发布在窗口的右侧。

现在,让我们描述一下代码。
在 GenericInfrastructure 项目下,我创建了一个名为 EventAggregatorSingleton 的类。它是 Prism 事件聚合器功能的包装器。它是静态的,因此它简化了对事件聚合器的访问(我从未听说过在应用程序中使用多个事件聚合器,所以我们没有损失任何通用性)。该类包含用于发布消息、订阅消息和取消订阅消息的几个非常简单的方法。
public static class EventAggregatorSingleton
{
    // a global reference to the event aggregator
    static IEventAggregator _eventAggregator = null;
    private static IEventAggregator TheEventAggregator
    {
        get
        {
            if (_eventAggregator == null)
            {
                if (TheAppIoCContainer.TheCompositionContainer == null)
                    return null;

                _eventAggregator =
                    TheAppIoCContainer.TheCompositionContainer.GetExportedValue<IEventAggregator>();
            }
            return _eventAggregator;
        }
    }

    // utility method for getting the prism aggregation event.
    private static PubSubEvent<T> GetPrismAggregationEvent<T>()
    {
        PubSubEvent<T> prismAggregationEvent =
            TheEventAggregator.GetEvent<PubSubEvent<T>>();

        return prismAggregationEvent;
    }

    // publishing method
    public static void Publish<T>(T eventAggregatorMessage)
    {
        GetPrismAggregationEvent<T>().Publish(eventAggregatorMessage);
    }

    // subscribing method
    public static PrismUnsubscriber Subscribe<T>
    (
        Action<T> action,
        Predicate<T> filter = null,
        ThreadOption threadOption = ThreadOption.PublisherThread,
        bool keepSubscriberReferenceAlive = true
    )
    {
        PubSubEvent<T> prismAggregationEvent = GetPrismAggregationEvent<T>();

        SubscriptionToken subscriptionToken =
            prismAggregationEvent.Subscribe
            (
                action,
                threadOption,
                keepSubscriberReferenceAlive,
                filter
            );

        PrismUnsubscriber result =
            new PrismUnsubscriber(prismAggregationEvent, subscriptionToken);

        return result;
    }

    // unsubscribe by token
    public static void Unsubscribe<T>(this SubscriptionToken token)
    {
        PubSubEvent<T> prismAggregationEvent = GetPrismAggregationEvent<T>();

        prismAggregationEvent.Unsubscribe(token);
    }

    // unsubscribe by callback
    public static void Unsubscribe<T>(Action<T> action)
    {
        PubSubEvent<T> prismAggregationEvent = GetPrismAggregationEvent<T>();

        prismAggregationEvent.Unsubscribe(action);
    }
}
您可以看到,发布/订阅 Prism 事件是通过消息的 C# 类型完成的。如果您订阅了某种特定类型,您将收到该 C# 类型的所有已发布消息。但是,Subscribe(...) 函数有一个过滤参数,该参数允许将订阅限制在满足过滤条件的那些消息。
大多数示例特定功能位于应用程序的主项目:EventAggregatorSample 项目中的 MainWindow.xaml 和 MainWindow.xaml.cs 文件。该项目引用了 MS Expression Blend SDK 的两个 dll 文件 - Microsoft.Expression.Interactions.dll 和 System.Windows.Interactivity.dll。它们位于 ExternalPackages/ExpressionBlendSDK 文件夹下。您需要以与取消阻止 prism dlls 相同的方式取消阻止这些文件。顺便说一句,这些文件就像整个 MS Expression Blend SDK(与 Expression Blend 本身不同)一样,是免费使用和重新分发的。
我们使用 MS Expression Blend SDK 的功能来从 XAML 调用 C# 函数。要了解更多关于 MS Expression Blend SDK 的信息,您可以阅读例如 MVVM Pattern Made Simple 的部分内容。
让我们首先看看 MainWindow.xaml.cs 文件。它定义了 TheDateTimeCollection 作为 ObservableCollection。此集合由 OnTypeStampMessageArrived(DateTime timeStamp) 方法提供的订阅回调进行填充。
PublishTimeStamp() 方法通过事件聚合器发布当前时间戳。
IsSubscribed 布尔属性允许在订阅和取消订阅状态之间切换。当属性更改为 true 时调用订阅,当更改为 false 时调用取消订阅。
这是 MainWindow.xaml.cs 文件的代码:
[Export]
public partial class MainWindow : Window, INotifyPropertyChanged
{
    #region INotifyPropertyChanged Members
    public event PropertyChangedEventHandler PropertyChanged;
    #endregion

    protected void OnPropChanged(string propertyName)
    {
        if (this.PropertyChanged != null)
        {
            this.PropertyChanged(this, new PropertyChangedEventArgs(propertyName));
        }
    }

    public MainWindow()
    {
        TheDateTimeCollection = new ObservableCollection<DateTime>();

        InitializeComponent();
    }

    // accumulates the timestamps
    public ObservableCollection<DateTime> TheDateTimeCollection { get; private set; }

    // publishes the current timestamp view Prism event aggregator
    public void PublishTimeStamp()
    {
        DateTime timestampToPublish = DateTime.Now;
        EventAggregatorSingleton.Publish<DateTime>(timestampToPublish);
    }


    PrismUnsubscriber _subscriptionToken = null;

    bool _isSubscribed = false;
    // this property toggles IsSubscribed state of the application
    // when IsSubscribed=false, the published timestamps are not added
    // while when it is true, they are added to TheDateTimeCollection
    // collection
    public bool IsSubscribed
    {
        get
        {
            return _isSubscribed;
        }

        set
        {
            if (_isSubscribed == value)
                return;

            _isSubscribed = value;

            if (_isSubscribed)
            {
                // subscribe to DateTime timestamp messages
                _subscriptionToken = EventAggregatorSingleton.Subscribe<DateTime>(OnTimeStampMessageArrived);
            }
            else
            {
                // unsubscribe from the DateTime timestamp messages
                if (_subscriptionToken != null)
                {
                    _subscriptionToken.Unsubscribe();
                    _subscriptionToken = null;
                }
            }

            // notify the UI that IsSubscribed property has changed
            OnPropChanged("IsSubscribed");
        }
    }

    // this is the timestamp subscription callback,
    // called when each new timestamp arrives in case
    // the subscription is on.
    private void OnTimeStampMessageArrived(DateTime timeStamp)
    {
        TheDateTimeCollection.Add(timeStamp);
    }
}
MainWindow.xaml 文件创建了用于使用 MainWindow.xaml.cs 文件中定义的功能的 UI 元素。
<Window x:Class="EventAggregatorSample.MainWindow"
        xmlns="http://schemas.microsoft.com/winfx/2006/xaml/presentation"
        xmlns:x="http://schemas.microsoft.com/winfx/2006/xaml"
        xmlns:i="http://schemas.microsoft.com/expression/2010/interactivity"
        xmlns:ei="http://schemas.microsoft.com/expression/2010/interactions"
        Title="MainWindow" Height="350" Width="525">
    <Grid>
        <Grid.RowDefinitions>
            <RowDefinition Height="*" />
            <RowDefinition Height="Auto" />
        </Grid.RowDefinitions>
        <Grid>
            <Grid.ColumnDefinitions>
                <ColumnDefinition Width="*" />
                <ColumnDefinition Width="*" />
            </Grid.ColumnDefinitions>

            <!-- button that triggers publishing the timestamp -->
            <Button Width="120"
                    Height="25"
                    HorizontalAlignment="Center"
                    VerticalAlignment="Center"
                    Content="Publish Time Stamp">
                <i:Interaction.Triggers>
                    <!-- Call PublishTimeStamp() method of the MainWindow class when the button is clicked -->
                    <i:EventTrigger EventName="Click">
                        <ei:CallMethodAction MethodName="PublishTimeStamp"
                                             TargetObject="{Binding RelativeSource={RelativeSource AncestorType=Window}}" />
                    </i:EventTrigger>
                </i:Interaction.Triggers>
            </Button>

            <StackPanel Grid.Column="1"
                        Margin="10">
                <TextBlock Text="Display Published Timestamps" />

                <!-- ListView that receives the published timestamps-->
                <ListView Margin="0,20,0,20"
                          ItemsSource="{Binding Path=TheDateTimeCollection,
                                                RelativeSource={RelativeSource AncestorType=Window}}"/>
            </StackPanel>
        </Grid>

        <!-- CheckBox that controls whether the subscription
             to TimeStamp events is on or off-->
        <CheckBox Grid.Row="1"
                  Content="Subscribe/Unsubscribe"
                  Margin="10,5,10,30"
                  HorizontalAlignment="Center"
                  VerticalAlignment="Center"
                  IsChecked="{Binding Path=IsSubscribed, RelativeSource={RelativeSource AncestorType=Window}}"/>
    </Grid>
</Window>
组件和组件组装模式
组件
每个组件都有自己的 ViewModel 和用于从后端/服务层获取数据的自己的配置。组件还应提供一种与与其他组件通信的机制,最好是不知道其他组件的类型——因此事件聚合概念非常适合组件之间的通信。WPFWidgetizer 中的组件是 WPF ContentControl 类的后代。每个组件通常包含一些更细粒度的 WPF Control。
组件组装模式
为了让多个组件在应用程序中显示并协同工作,它们应该被组装成一些更大的实体。通常,这样的实体被称为“视图”(Views)(不要与 MVVM 模式的视图混淆)。然而,在本文中,为了避免与 MVVM 模式的视图混淆,我们将它们称为“组件组装”(Widget Assemblies)。
组件组装的目的是定义其中组件的相互位置和通信。
很多时候,组件组装是在 C#/XAML 中实现的。它们可以被定义为包含组件的普通 WPF 控件。组件组装实现甚至可以包含一个 ViewModel,该 ViewModel 将包含各个组件的 ViewModel 并协调它们的行为。然而,这种方法存在一些缺点:
- 它增加了应用程序的复杂性。每个组件组装都会产生 XAML/C# 视图文件以及一个 ViewModel 文件。
- 它降低了应用程序的灵活性/可配置性——因为 C# 功能通常很难通过配置文件来模仿。
- 它降低了应用程序的统一性——C# 是一种非常强大的语言——将其用于组件之间的通信可能会导致项目中的不同开发人员采用各种不同的解决方案。
为了改进架构和开发速度,组件组装功能应该尽可能通用。本文提出的解决方案只有一个组件组装类,但有多种样式可以指定组件的相互位置。使用第三方组件停靠功能,例如来自 Teleric 或 DevExpress 的功能,可以通过将组件组装定义为可以通过运行时修改的配置文件来进一步提高解决方案的通用性。这种方法(尽管超出了本文的范围)将允许创建动态组件组装,用户可以自行组合。这将带来无与伦比的灵活性,能够通过组合各种组件几乎实时地创建视图。
代码结构
在这里,我们描述了 WPFWidgetizer 框架和示例项目的存放位置以及它们之间的关系。
以下所有示例都展示了如何为一家虚构的书店显示各种信息的代码,因此代码可以分为通用和书店特定的功能。
WPFWidgetizer 代码的文件结构鸟瞰图由下图给出:

“ExternalPackages”文件夹包含我们使用的第三方组件的 dll 文件:Prism 和 Expression Blend SDK。
“GenericFramework”文件夹包含通用功能,这些功能不仅可用于构建书店应用程序,还可用于任何应用程序。这些功能可以作为 dll 文件分发,对应于“GenericFramework”文件夹中的各个项目。
以下是所有“GenericFramework”项目的简要描述(按从通用到具体的顺序排列):
GenericInfrastructure是一个包含非常通用的非可视实用程序的项目,这些实用程序可用于任何项目,并且不了解组件 ViewModel 或组件。它包含 Prism 的事件聚合和 IoC 功能的一些基本通用包装器。它可以扩展,例如,包含一些用于字符串操作等的通用扩展方法。UIControls项目包含通用的 UI 控件和 UI 样式,这些控件和样式不了解组件或组件 ViewModel。IoCPluginUtils仅包含上面描述的通用引导程序类AppBootstrapper。RecordVMs项目包含与从数据库/服务层传入的各个行对应的通用非可视代码和基类(我们假设从数据库传入的数据是此类行的集合)。WidgetVM项目为组件的 ViewModel 提供通用的基类和实用非可视类。WidgetsAndAssemblies项目为组件本身提供基类和实用 UI 类及样式。
“BookStoreSpecificFramework”文件夹包含特定于我们的书店相关屏幕开发的各个项目。
BookStoreInfrastructure包含书店特定的枚举和非可视辅助类。BookStoreRecordVMs包含用于表示来自数据库或服务层的数据行的 ViewModel 类。BookStoreWidgetVMs包含书店特定的组件 ViewModel。BookStoreWidgets包含书店相关组件的 UI 类和样式。
“TestAndMockupUtils”文件夹包含用于测试和模拟的项目。例如,它有一个项目 MockupServiceLayer,该项目模拟来自数据库/服务层的数据。
“Samples”文件夹包含各种示例的解决方案和主项目(其中两个 IoCPluginSample 和 EventAggregatorSample 已在上面描述)。
这是项目依赖关系的图表(箭头指向依赖目标项目):

在上图以及下面的讨论中,为简洁起见,我省略了项目名称的命名空间前缀,例如,完整项目名称是 WPFWidgetizer.BookStoreSpecificFramework.BookStoreInfrastructure,而在图片中,它仅显示为 BookStoreInfrastructure。
请注意,BookStore Specific Framework(右侧)下的项目依赖于 Generic Framework(左侧)中的相应项目。
每个项目都依赖于 GenericInfrastructure 项目,而 MainApplication 依赖于所有其他项目(尽管我们没有显示从 GenericInfrastructure 到 MainApplication 的所有箭头——否则图片会变得混乱)。
没有名为 MainApplication 的项目——图片上的 MainApplication 框对应于我们的任何示例应用程序项目。
MockupServiceLayer 包含 IBookStoreDataServiceAccessor 的实现(该接口定义在 BookStoreInfrastructure 项目中)。主项目的 TheBootstrapper 类选择 MockupDataAccessor 类(来自 MockupServiceLayer 项目)作为 IBookStoreDataServiceAccessor 接口的实现。
MockupServiceLayer 包含返回 BookStoreRecordVMs 项目中项目集合的功能。这就是为什么我们需要将 Record VM 与 Widget VM 项目分开——(模拟或真实)数据服务层依赖于 Record VM 项目(它应该知道如何填充和返回包含 Record VM 对象的集合),而 Widget VM 项目应该依赖于数据服务层(它应该知道如何调用其 API)。
模式和示例
示例代码位置
所有示例都位于“WPFWidgetizer\Samples”文件夹下。
单个组件示例
重要提示
我们将使用此示例来详细概述 WPFWidgetizer 框架的大部分内容;因此,您应该仔细阅读本节,甚至可以在调试器中尝试相应的代码。
运行示例
SingleWidgetSample 项目展示了如何创建组件并将其加载数据。
当您启动应用程序时,您会看到一个空白窗口,底部有一个“从服务器加载数据”按钮。

按下按钮后,几秒钟内您将看到以下屏幕:

最后,在所有数据加载完成后,我们将看到窗口中的一个数据网格:

现在,让我们看一下代码。
主项目代码
这是 MainWindow.xaml 文件中定义组件和加载按钮的代码:
<Grid>
    <Grid.RowDefinitions>
        <RowDefinition Height="*" />
        <RowDefinition Height="Auto" />
    </Grid.RowDefinitions>
    <Grid>
        <bookStoreWidgets:BookOrdersWidget x:Name="TheBookOrdersWidget" />
    </Grid>

    <Button x:Name="LoadDataButton"
            Content="Load Data from Server"
            Width="200"
            Height="25"
            Margin="0,10"
            Grid.Row="1"/>
</Grid>
所有样式都通过文件顶部的 ResourceDictionary.MergeDictionary 语句进行连接。
<Window.Resources>
    <ResourceDictionary>
        <ResourceDictionary.MergedDictionaries>
            <ResourceDictionary Source="/WPFWidgetizer.GenericFramework.UIControls;Component/Themes/DataGridControlStyles.xaml" />
            <ResourceDictionary Source="/WPFWidgetizer.BookStoreSpecificFramework.BookStoreWidgets;Component/Themes/BookWidgetStylesReferences.xaml" />
        </ResourceDictionary.MergedDictionaries>
    </ResourceDictionary>
</Window.Resources>
代码隐藏文件 MainWindow.xaml.cs 具有以下 LoadDataButton 的 Click 事件处理程序:
async void LoadDataButton_Click(object sender, RoutedEventArgs e)
{
    await TheBookOrdersWidget.LoadData();
}
ViewModel 类层次结构
在进一步深入之前,让我们快速看一下 ViewModel 类层次结构:

层次结构中的一些类具有泛型类型参数,为了使其更具可读性,我在图表中省略了它们。
我们在示例中处理的类位于层次结构的底部,但我们将从顶部开始描述 ViewModel 类。
WidgetCommunicationsBase是一个提供通过 Prism 的EventAggregator进行组件间通信的一些连接的类。我们稍后将详细讨论它。WidgetBaseVM提供了定义各种组件状态(Loading、Loaded或Exception)的功能。其LoadData()方法负责更改组件状态。它还调用LoadDataImpl()方法,该方法负责从真实或模拟数据服务中获取数据。LoadDataImpl()在WidgetBaseVM中被定义为抽象方法,应该在其子类之一中进行重写。WidgetWithItemsCollectionVM<RecordType>是一个表示包含记录集合的组件的 ViewModel。它包含ItemsSource属性来保存集合。LoadDataImpl()函数在此类中定义,调用抽象函数GetData从服务层获取记录并填充ItemsSource属性。WidgetWithHighlightableItemsCollectionVM<RecordType>除了提供WidgetWithItemsCollectionVM<RecordType>类提供的功能外,还允许将某些行标记为“高亮显示”,稍后将详细介绍。BookStoreWidgetWithHighlightableItemsCollectionVM<RecordType>提供了GetData()方法的实现(在超类中声明为抽象)。它还定义了获取服务器数据所需的书店特定TheServiceRequestType和TheInputParams属性。BookOrdersWidgetVM和BookReviewsWidgetVM是BookStoreWidgetWithHighlightableItemsCollectionVM<RecordType>的实现,它们指定了具体的RecordType并在其构造函数中设置了一些属性。
ViewModel 功能和数据获取功能概述
现在,让我们看看组件的 LoadData() 方法的实现。这应该能让你很好地了解数据是如何加载到单个组件中的。
LoadData() 方法由 WidtgetWithContext<WidgetVMType> 类实现,该类位于 WPFWidgetizer.GenericFramework.WidgetsAndAssemblies 项目和命名空间内。这个方法所做的就是调用组件 ViewModel 上相应的 LoadData() 方法。
public override async Task LoadData()
{
    await TheVM.LoadData();
}
ViewModel 的 LoadData() 方法由 WPFWidgetizer.GenericFramework.WidgetVMs 项目(和命名空间)的 WidgetVM 类实现。
// loads data, e.g. from the server while controlling the
// state of the widget
public async Task LoadData()
{
    // set the widget state to be 'Loading'
    // while the widget's data is being loaded
    this.TheLoadingState = WidgetLoadingState.Loading;

    try
    {
        // load the data
        await LoadDataImpl();

        // if loading the data did not throw an exception
        // set the state of the widget to 'Loaded'
        this.TheLoadingState = WidgetLoadingState.Loaded;
    }
    catch(Exception e)
    {
        // if an exception was thrown while the data is loaded
        // set the widget's state to 'Exception'
        // and set the LastDataLoadingException to hold
        // the corresponding exception.
        this.TheLoadingState = WidgetLoadingState.Exception;
        this.LastDataLoadingException = e;
    }
}
正如注释中所解释的,LoadData() 方法在数据加载过程中控制组件的状态。组件状态由组件 ViewModel 的 TheLoadingState 属性定义。它是一个定义在 WPFWidgetizer.GenericFramework.WidgetVMs 项目(命名空间)下的 WidgetLoadingState 类型的枚举。
为了实际获取数据(来自真实或模拟服务器/服务),LoadData() 调用抽象方法 LoadDataImpl()。该方法在 WidgetBadgeVM 类的某个子类中被重写。
对于本示例,我们使用 BookOrdersWidget。它派生自 WidgetWithHighlightableDataGrid<BookOrdersWidgetVM, BookOrderRecordVM> 类。后者的泛型类型参数分别指定了整个组件的 ViewModel 以及组件网格内每行的 ViewModel。
public class BookOrdersWidget :
    WidgetWithHighlightableDataGrid<BookOrdersWidgetVM, BookOrderRecordVM>
{
}
因此,组件的 ViewModel 类型是 BookOrdersWidgetVM,它派生自 BookStoreWidgetWithHighlightableItemsCollectionVM<BookOrderRecordVM> 类。
public class BookOrdersWidgetVM :
    BookStoreWidgetWithHighlightableItemsCollectionVM<BookOrderRecordVM<
{
    public BookOrdersWidgetVM()
    {
        this.TheServiceRequestType = BookStoreDataServiceRequestType.BookOrder;
        PropertyNameToHightlightOn = "BookCode";
    }
}
BookStoreWidgetWithHighlightableItemsCollectionVM<RecordType> 又派生自 WidgetWithHighlightableItemsCollectionVM<RecordType> 类。
WidgetWithHighlightableItemsCollectionVM<RecordType> 提供了一些用于行高亮的连接,稍后将进行讨论。但此时,我们感兴趣的是它的基类(超类)WidgetWithItemsCollection<RecordType>,它定义了用于保存组件记录集合的 ItemsSource 属性。它还提供了一个 LoadDataImpl() 方法的实现,该方法调用另一个抽象函数 GetItemsSource() 来从真实或模拟数据服务层检索组件的记录。
public abstract class WidgetWithItemsCollectionVM<RecordType> :
    WidgetBaseVM
    where RecordType : IRecordVM
{
    /// <summary>
    /// holds the Widget's records;
    /// </summary>
    #region ItemsSource Property
    private IEnumerable<RecordType> _itemsSourcee;
    public IEnumerable<RecordType> ItemsSource
    {
        get
        {
            return this._itemsSourcee;
        }
        set
        {
            if (this._itemsSourcee == value)
            {
                return;
            }

            this._itemsSourcee = value;
            this.OnPropertyChanged("ItemsSource");
        }
    }
    #endregion ItemsSource Property

    // should be overridden to return a collection of
    // data records from the data service.
    protected abstract Task<IEnumerable<RecordType>> GetItemsSource();

    public async override Task LoadDataImpl()
    {
        // set the ItemsSource property to contain the Widget's records
        // obtained by GetItemsSource() function from the
        // data service layer
        ItemsSource = await GetItemsSource();
    }
}
GetItemsSource() 方法的实现位于我们之前讨论过的 ViewModel 类——BookStoreWidgetWithHighlightableItemsCollectionVM<RecordType>。这是所有包含数据网格的书店组件的基类。代码如下:
protected async override Task<IEnumerable<RecordType>> GetItemsSource()
{
    IEnumerable<RecordType> result =
        await BookStoreDataServiceAccessorSingleton.
                 TheDataServiceAccessor.
                 LoadServiceData<RecordType>
    (
        this.TheServiceRequestType,
        this.TheInputParams
    );

    return result;
}
我们通过调用其 LoadServiceData(...) 方法并传递组件的 TheServiceRequestType 和 TheInputParams 参数来联系数据访问器单例。
TheServiceRequestType 通常对应于我们要调用的服务的名称(例如,它可以是数据库存储过程的名称),而 TheInputParams 属性只是一个名称-值对的容器,用于指定我们要传递给该服务的参数。
这两个参数都在同一个类 BookStoreWidgetWithHighlightableItemsCollectionVM<RecordType> 中定义。请注意,然而,我们可能需要这些参数来处理任何书店相关的请求,而不仅仅是那些“高亮项目集合”的请求。我们可以将这两个属性分解到一个单独的超类中,但由于 C# 中缺乏多重继承,我们将难以将它们附加到我们的类,因为它已经派生自 WidgetWithHighlightableItemsCollectionVM<RecordType>。由于这个问题,我们被迫在所有不派生自我们类的书店 ViewModel 中重新实现这些属性。我们做了其次好的选择,并将这两个属性分解为 IBookStoreWidget 接口,以便我们可以以统一的方式使用各种书店 ViewModel 类。我们的 BookStoreWidgetWithHighlightableItemsCollectionVM<RecordType> 类实现了这个接口,并为这两个属性提供了实现。
让我们回到 GetItemsSource() 函数的实现:
protected async override Task<IEnumerable<RecordType>> GetItemsSource()
{
    IEnumerable<RecordType> result =
        await BookStoreDataServiceAccessorSingleton.
                TheDataServiceAccessor.
                LoadServiceData<RecordType>
                (
                    this.TheServiceRequestType,
                    this.TheInputParams
                );

    return result;
}
它使用定义在 IGenericDataServiceAccessor<DataServiceRequestTypeEnum> 接口中的 LoadServiceData<RecordType>(...) 方法。
public interface IGenericDataServiceAccessor<DataServiceRequestTypeEnum>
    where DataServiceRequestTypeEnum : struct, IConvertible
{
    Task<IEnumerable<T>> LoadServiceData<T>
    (
        DataServiceRequestTypeEnum serviceRequestType,
        ServiceRequestInputParams inputParams
    );
}
书店特定的数据服务访问器 IBookStoreDataServiceAccessor 继承自 IGenericDataServiceAccessor<DataServiceRequestTypeEnum> 接口并且是 MEFable 的。
[InheritedExport(typeof(IBookStoreDataServiceAccessor))]
public interface IBookStoreDataServiceAccessor : IGenericDataServiceAccessor<BookStoreDataServiceRequestType>
{

}
GenericDataServiceAccessorSingleton<DataServiceAccessor, DataServiceRequestTypeEnum> 类从 MEF 容器中提取 DataServiceAccessor 类型的实现。
public static DataServiceAccessor TheDataServiceAccessor
{
    get
    {
        if (TheAppIoCContainer.TheCompositionContainer == null)
            return null;

        DataServiceAccessor result =
            TheAppIoCContainer.
                TheCompositionContainer.
                GetExportedValue<DataServiceAccessor>();

        return result;
    }
}
BookStoreDataServiceAccessorSingleton 类调用 GenericDataServiceAccessorSingleton<DataServiceAccessor, DataServiceRequestTypeEnum> 的功能来返回 IBookStoreDataServiceAccessor 接口的当前实现。
主项目的 TheBootstrapper 类负责引导 IBookStoreDataServiceAccessor 接口的正确实现(在我们的例子中是 WPFWidgetizer.TestAndMockupUtils.MockupServiceLayer 项目(命名空间)中的 MockupDataAccessor 类)。
public class TheBootstrapper : AppBootstrapper
{
    protected override void ConfigureAggregateCatalog()
    {
        base.ConfigureAggregateCatalog();

        // add MockupDataAccessor implementation
        // If there is a real servce layer accessor implemented
        // it can be swapped with the mockup one simply by
        // replacing this one line with a reference to the real
        // data service.
        AggregateCatalog.Catalogs.Add(new AssemblyCatalog(typeof(MockupDataAccessor).Assembly));
    }
}
这是实际被调用的 MockupDataAccessor 类的实现:
public class MockupDataAccessor : IBookStoreDataServiceAccessor
{
    public async Task<IEnumerable<T>> LoadServiceData<T>
    (
        BookStoreDataServiceRequestType serviceRequestType,
        ServiceRequestInputParams inputParams
    )
    {
        //throw new Exception("This is an exception for testing the widget error messages");

        switch(serviceRequestType)
        {
            case BookStoreDataServiceRequestType.BookOrder:
                // delay to give impression of a roundtrip to the server
                await Task.Delay(2000);
                return new MockBookOrderRecords() as IEnumerable<T>;
            case BookStoreDataServiceRequestType.BookReview:
                // delay to give impression of a roundtrip to the server
                await Task.Delay(3000);
                return new MockBookReviewRecords() as IEnumerable<T>;
            case BookStoreDataServiceRequestType.Book:
                return new MockBooks() as IEnumerable<T>;
            default:
                return null;
        }
    }
}
当我们从 BookOrdersWidgetVM 调用它时,我们将 ServiceRequestType 参数传递为 BookStoreDataServiceRequestType.BookOrder;相应地,它返回 MockBookOrderRecords 集合。
UI 组件类层次结构
我们对 ViewModel 进行了很好的回顾,现在让我们看一下 UI 类和 XAML 代码。
我们将首先展示组件 UI 类的类层次结构图,并简要概述其中的每个类。

这里是此层次结构中 UI 类的简要描述(更详细的解释将在下面提供):
WidgetBase类提供与 ViewModel 的通信连接。它具有用于定义组件头的几个属性。它的 XAML 样式/模板负责显示不同组件状态(“加载”、“已加载”或“异常”)的不同屏幕,并显示组件的标题。WidgetWithContext<WidgetVMType>在组件的构造函数中创建一个WidgetVMType类型的 ViewModel 对象,并将组件的Content属性设置为该对象。它还提供调用 ViewModel 上同名方法的LoadData()方法。WidgetWithHighlightableDataGrid<WidgetVMType, RecordType>提供一个附加属性,允许指定数据网格列的集合。BookOrdersWidget和BookReviewsWidget只是WidgetWithHighlightableDataGrid<WidgetVMType, RecordType>的具体实现,其中WidgetVMType和RecordType泛型参数设置为具体类型。
UI 组件代码和样式
现在,我们将继续描述 WPFWidgetizer 的功能如何被我们的示例使用。
如上所述,我们使用 BookOrdersWidget 来显示返回的条目。此类继承自 WidgetWithHighlightableDataGrid<BookOrdersWidgetVM, BookOrderRecordVM> 类,该类又继承自 WidgetWithContext<WidgetVMType>。后者类提供了一种初始化组件 ViewModel 的方法。它扩展了 WidgetBase 类,该类派生自 WPF 的 ContentControl 类。
如上所示,WidgetBase 是层次结构的顶层类。它派生自 WPF 的 ContentControl。它的 Content 属性设置为组件的 ViewModel,而它的 ContentTemplate(在 XAML 中)设置为组件的 DataTemplate。它提供了一些 UI 操作连接(稍后将解释)。它还具有依赖项属性 WidgetCaption 和 ShowWidgetHeader,它们定义了应该在组件标题中显示什么以及是否显示组件标题。
该类最重要的依赖项属性是 WidgetDataContentTemplate。该依赖项属性的值通常在派生类的样式中提供。WidgetDataContentTemplate 定义了成功加载到组件中的数据的实际表示。
WidgetBase 的样式定义在 WPFWidgetizer.GenericFramework.WidgetsAndAssemblies 项目的 Themes/WidgetStyles.xaml 文件中。它将组件的 ContentTemplate 属性设置为以下值:
<DataTemplate>
    <Grid x:Name="TopLevelWidgetContentContainerPanel">
        <Grid.RowDefinitions>
            <RowDefinition Height="Auto" />
            <RowDefinition Height="*" />
        </Grid.RowDefinitions>

        <!-- Widget Header -->
        <Border x:Name="HeaderBorder"
                HorizontalAlignment="Stretch"
                VerticalAlignment="Stretch"
                BorderBrush="Black"
                BorderThickness="1"
                Height="30"
                Visibility="{Binding Path=ShowWidgetHeader,
                                     Converter={StaticResource TheBooleanToVisibilityConverter},
                                     RelativeSource={RelativeSource AncestorType=widgets:WidgetBase}}">
            <TextBlock x:Name="WidgetCaption"
                       Text="{Binding Path=WidgetCaption,
                                      RelativeSource={RelativeSource AncestorType=widgets:WidgetBase}}"
                       FontSize="15"
                       HorizontalAlignment="Left"
                       VerticalAlignment="Bottom"
                       Margin="10,0,0,3"/>
        </Border>

        <!-- Widget Content-->
        <Grid x:Name="WidgetContentPanel"
              Grid.Row="1">

            <!-- TheWidgetContent control displays when
                 data is successfully loaded into the widget -->
            <ContentControl x:Name="TheWidgetContent"
                            Content="{Binding}"
                            ContentTemplate="{Binding Path=WidgetDataContentTemplate,
                                                      RelativeSource={RelativeSource AncestorType=widgets:WidgetBase}}"
                            VerticalAlignment="Stretch"
                            HorizontalAlignment="Stretch"
                            Visibility="Collapsed"/>

            <!-- ErrorDisplayPanel displays when
                 data loading resulted in an exception -->
            <Grid x:Name="ErrorDisplayPanel"
                  Visibility="Collapsed">
                <TextBlock HorizontalAlignment="Center"
                           VerticalAlignment="Center"
                           Foreground="Red"
                           FontSize="30"
                           TextWrapping="WrapWithOverflow"
                           Text="{Binding Path=LastDataLoadingException.Message}"
                           Margin="20"/>
            </Grid>

            <!-- LoadingPanel displays while
                 the data is being fetched from the server/service -->
            <Grid x:Name="LoadingPanel"
                  Visibility="Collapsed">
                <TextBlock Text="Please wait while the data is loading"
                           Foreground="Black"
                           FontSize="30"
                           Margin="20"
                           TextWrapping="WrapWithOverflow"
                           HorizontalAlignment="Center"
                           VerticalAlignment="Center"/>
            </Grid>
        </Grid>
    </Grid>
    <DataTemplate.Triggers>
        <!-- TheWidgetContent becomes visible after the
             data is successfully loaded into the widget
             (Widget property TheLoadingState is set to 'Loaded')-->
        <DataTrigger Binding="{Binding Path=TheLoadingState}"
                     Value="Loaded">
            <Setter TargetName="TheWidgetContent"
                    Property="Visibility"
                    Value="Visible" />
        </DataTrigger>

        <!-- LoadingPanel becomes visible while the data
             is being fetched from the server
             (corresponding to the 'Loading' state
              of the Widget) -->
        <DataTrigger Binding="{Binding Path=TheLoadingState}"
                     Value="Loading">
            <Setter TargetName="LoadingPanel"
                    Property="Visibility"
                    Value="Visible" />
        </DataTrigger>

        <!-- ErrorDisplayPanel becomes visible after
             data loading resulted in an exception
             (Widget state is 'Exception') -->
        <DataTrigger Binding="{Binding Path=TheLoadingState}"
                     Value="Exception">
            <Setter TargetName="ErrorDisplayPanel"
                    Property="Visibility"
                    Value="Visible" />
        </DataTrigger>
    </DataTemplate.Triggers>
</DataTemplate>
HeaderBorder 元素定义了组件的标题。它的可见性和文本分别由组件的 ShowWidgetHeader 和 WidgetCaption 依赖项属性控制。
在组件的主体(由 WidgetContentPanel Grid 定义)中有三个不同的部分:TheWidgetContent ContentControl、ErrorDisplayPanel Grid 和 LoadingPanel Grid。它们永远不会同时显示,但每个部分对应一个组件状态(由组件的 TheLoadingState 属性定义)。
- 当组件状态为
Loaded时——表示服务器/服务调用成功返回数据——TheWidgetContent会被显示。TheWidgetContent的Content属性绑定到组件的 ViewModel,而其ContentTemplate绑定到在组件级别提供的WidgetDataContentTemplate属性。使用此属性,我们可以选择组件数据的DataTemplate。 - 当数据加载导致异常时(组件状态为
Exception),将显示ErrorDisplayPanel。 - 当数据正在加载时——组件状态为
Loading——将显示LoadingPanel。此面板显示我们上面看到的“请稍候,数据正在加载”消息。
在运行上述示例时,我们已经展示了组件的 Loading 和 Loaded 状态。测试 Exception 状态也很容易。我们必须转到 MockupDataAccessor 类,并取消注释上面引发异常的 switch 语句。
//throw new Exception("This is an exception for testing the widget error messages");
重新运行应用程序并单击“加载数据”按钮后,我们将得到以下屏幕:

现在,我们理解了组件状态的机制(由 WidgetBase 类和相应的样式/模板提供),让我们来讨论在数据加载成功的情况下如何显示组件的数据内容。
这是 BookOrdersWidget 类的代码:
public class BookOrdersWidget :
    WidgetWithHighlightableDataGrid<BookOrdersWidgetVM, BookOrderRecordVM>
{
}
正如您所见——它只是 WidgetWithHighlightableDataGrid 类的实现,其中组件的 ViewModel 为 BookOrdersWidgetVM,行(记录)ViewModel 为 BookOrderRecordVM。
WidgetWithHighlightableDataGrid<WidgetVMType, RecordType> 只有一个有趣的依赖项属性:GridColumns。
public IEnumerable GridColumns {...}
此属性允许在组件级别指定 GridColumn 集合。
这是位于 WPFWidgetizer.GenericFramework.WidgetsAndAssemblies 项目的 "Themes/WidgetWithHighlightableDataGridStyles.xaml" 文件中的 WidgetWithHighlightableDataGrid 样式的 XAML 代码:
<Style TargetType="widgets:WidgetBase"
       BasedOn="{StaticResource TheBaseWidgetStyle}"
       x:Key="WidgetWithHighlightableGridStyle">
    <Setter Property="WidgetDataContentTemplate">
        <Setter.Value>
            <DataTemplate>
                <uiControls:DataGridControl x:Name="PART_TheDataGrid"
                                          IsReadOnly="True"
                                          ItemsSource="{Binding Path=ItemsSource}"
                                          CanHighlight="{Binding Path=CanHighlight}"
                                          GridColumns="{Binding Path=GridColumns, RelativeSource={RelativeSource AncestorType=widgets:WidgetBase}}">
                    <uiControls:DataGridControl.RowStyle>
                        <Style TargetType="DataGridRow"
                               BasedOn="{StaticResource BaseDataGridRowStyle}">
                            <Setter Property="uiControls:AttachedProperties.IsRowHighlighted"
                                    Value="{Binding Path=IsHighlighted}" />
                        </Style>
                    </uiControls:DataGridControl.RowStyle>
                </uiControls:DataGridControl>
            </DataTemplate>
        </Setter.Value>
    </Setter>
</Style>
请注意,Style 的 TargetType 是 WidgetBase,而不是人们期望的 WidgetWithHighlightableDataGrid<WidgetVMType, RecordType>。这是因为编译后的 XAML 仍然无法处理泛型,所以我们被迫将非泛型超类指定为 TargetType。
我们使用上面解释的组件依赖项属性 WidgetDataContentTemplate 来指定组件数据的数据模板。
在 DataTemplate 内部,您可以看到显示网格的 DataGridControl 对象。DataGridControl 对象的 GridColumns 属性绑定到组件的 GridColumns 属性,因此我们可以在组件级别指定 GridColumns 集合。
DataGridControl 类定义在 WPFWidgetizer.GenericFramework.UIControls 项目下。它扩展了 WPF 的 DataGrid 类,并定义了两个依赖项属性:CanHighlight(控制数据网格的行是否可以高亮显示)和 GridColumns 属性。
我们需要 GridColumns 属性,因为 DataGrid 的内置 Columns 属性是只读的,不能成为 WPF 绑定的目标。我们使用 DataGridControl 的 GridColumn 属性来修改 Columns 集合。作为可读/可写依赖项属性的 GridColumn 可以成为 WPF 绑定的目标。
BookOrdersWidget 的样式定义在 WPFWidgetizer.BookStoreSpecificFramework.BookStoreWidgets 项目下的 "BookOrderWidgetStyles.xaml" 文件中。它基于 WidgetWithHighlightableGridStyle 并定义了我们想在组件中显示的 GridColumns。
<Style TargetType="bookStoreWidgets:BookOrdersWidget"
       BasedOn="{StaticResource WidgetWithHighlightableGridStyle}">
    <Setter Property="GridColumns">
        <Setter.Value>
            <x:Array Type="DataGridColumn">
                <DataGridTextColumn Header="Code"
                                    Binding="{Binding Path=BookCode}" />
                <DataGridTextColumn Header="Title"
                                    Binding="{Binding Path=BookTitle}" />
                <DataGridTextColumn Header="Number Copies Ordered"
                                    Binding="{Binding Path=NumberCopies}" />
                <DataGridTextColumn Header="Order Price"
                                    Binding="{Binding Path=TotalOrderPrice, StringFormat=F2}" />
            </x:Array>
        </Setter.Value>
    </Setter>
</Style>
至此,我们完成了对第一个示例(以及 WPFWidgetizer 大部分代码)的审查。
简单的组件组装,包含两个具有组件间通信的组件示例
示例简介
此示例位于“WPFWidgetizer/Samples/SimpleWidgetAssemblySample”文件夹下的 SimpleWidgetAssemblySample.sln 解决方案中。示例的主项目是 WPFWidgetizer.Samples.SimpleWidgetAssemblySample。
虽然前一个示例的目的是展示包的通用代码结构并演示如何从服务获取数据到组件,但本示例主要集中于描述从组件内部发送操作请求以及组件之间通信的机制。
本示例的另一个目的是展示如何使用 WPFWidgetizer 代码将多个组件安排在同一个组件组装中协同工作。请注意,只有组件的排列需要自定义 XAML 文件——组件之间的通信是通用的,不需要此组件组装的任何特定代码。
运行示例
启动示例后,您将看到以下屏幕:

现在,按“从服务器加载数据”按钮。几秒钟后,您将看到以下内容:
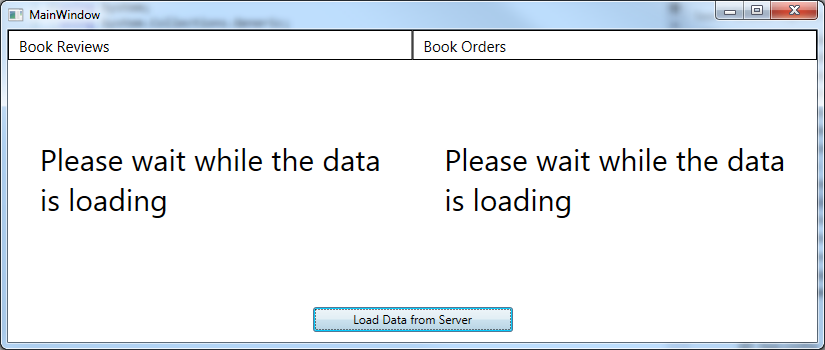
最后,数据加载完成后,您将看到以下内容:

我们并排显示了图书评论表和图书订单表。如果您单击其中一个表中的一行,另一个表中的相应图书行将被高亮显示为粉红色。

单击评论网格中的另一行将导致订单网格中高亮显示的行集发生更改。同样,单击订单网格中的其中一行,将导致评论网格中相应图书的行被高亮显示。
一些架构挑战
实现上述行为带来了一些架构挑战:
- 当单击
DataGridControl中的一行时,消息将从一个组件发送到另一个组件。DataGridControl是来自基本项目UIControls的基本控件,它不应了解组件或组件间消息传递。我们需要某种连接来将发生在组件深层深处的操作带到组件级别,然后再发送相应的消息。 - 如果应用程序中有两个以上的组件怎么办?它们如何知道哪个组件应该与哪个组件通信?我们需要某种组件之间的选择性消息传递。
将控件的 UI 操作带到组件级别
为了解决上面列出的第一个架构挑战,我们在 UIControls 项目下的 UIRoutedEvents 静态类中定义了 UIActionEvent 冒泡路由事件。
public delegate void UIActionEventHandler(object sender, UIActionEventArgs e);

public static class UIRoutedEvents
{
    public static readonly RoutedEvent UIActionEvent =
        EventManager.RegisterRoutedEvent
        (
            "UIAction",
            RoutingStrategy.Bubble,
            typeof(UIActionEventHandler),
            typeof(UIRoutedEvents)
        );
}
当在控件上发生相应的用户操作时,此事件将被触发,并冒泡到组件级别,由组件处理。
处理 UIActionEvent 的 C# 代码是 WidgetBase 实现的一部分。
public WidgetBase()
{
    // add the handler to handle UIActionEvent coming from inside
    // the widget
    this.AddHandler(UIRoutedEvents.UIActionEvent, (UIActionEventHandler) OnUIActionHappened);
}

// widget's View Model should always be of WidgetCommunicationsBase
// class or one of its descendants.
WidgetCommunicationsBase TheWidgetCommunicationsVM
{
    get
    {
        return this.Content as WidgetCommunicationsBase;
    }
}

// UIActionEvent handler
void OnUIActionHappened(object sender, UIActionEventArgs e)
{
    // pass UIActionEventType and the payload object of the
    // UIActionEvent to the widget's View Model to be
    // handled there.
    TheWidgetCommunicationsVM.OnUIAction(e.TheUIActionType, e.Payload);
}
我们在 WidgetBase() 构造函数中将 OnUIActionHappened 处理程序附加到路由事件。在处理程序的代码中,我们只是将事件参数的 TheUIActionType 和 Payload 属性传递给组件的 ViewModel。
让我们看一下 UIActionEvent 的参数。它们由定义在 UIControls 项目中的 UIActionEventArgs 类表示。
public class UIActionEventArgs : RoutedEventArgs
{
    public object Payload { get; set; }
    public UIActionType TheUIActionType { get; set; }
}
Payload 可以是任何对象(在我们的例子中,它被设置为被单击行的 ViewModel)。UIActionType 是定义在 WPFWidgetizer.GenericFramework 项目中的一个枚举,以便 UI 控件和 ViewModel 都可以访问它。目前,此枚举只有两个条目:
public enum UIActionType
{
    Unknown,
    RowClick
}
现在,让我们看一下 WidgetCommunicationsBase 类中的 OnUIAction<T> 方法。顺便说一句,这个类是组件 ViewModel 层次结构中最顶层的类,如上所述,它处理通信。
这是 OnUIAction<T> 的代码:
public void OnUIAction<T>(UIActionType uiActionType, T payload)
{
    // check if we have a handler for the coming uiActionType
    if (!_uiActionHandlers.ContainsKey(uiActionType))
        return; // if no handler - return

    Action<object> handler = _uiActionHandlers[uiActionType];

    // if a handler is found, run it passing the
    // payload as its argument
    handler(payload);
}
字典 _uiActionHandlers 将 UIActionType 映射到类型为 Action<object> 的处理程序委托。
Dictionary> _uiActionHandlers =
    new Dictionary>();
如果从组件传递的 UIActionType 作为键存在于 _uiActionHandlers 字典中,我们就会取出处理程序值并调用它,并将 Payload 作为参数传递给它。
为了设置 UIActionType 和处理程序之间的映射,我们使用 RegisterUIActionHandler<T> 函数。
// set a handler for a UIActionType
public void RegisterUIActionHandler<T>(UIActionType uiActionType, Action<T> handler)
{
    _uiActionHandlers[uiActionType] = (obj) => handler((T) obj);
}
在我们的例子中,RowClick UIActionType 的处理程序在 WidgetWithHighlightableItemsCollectionVM 类的构造函数中设置。
public WidgetWithHighlightableItemsCollectionVM()
{
    // register a handler for UIActionType.RowClick
    RegisterUIActionHandler<RecordType>(UIActionType.RowClick, OnItemClicked);

    ...
}

private void OnItemClicked(RecordType item)
{
    this.CanHighlight = false;
    this.Publish<object>(item, WidgetMessageType.Highlight);
}
正如您所看到的,行单击会导致两件事发生:
- ViewModel 上的
CanHighlight属性设置为 false。这是为了从单击了行的网格中删除高亮显示。 - 我们使用从
UIActionEvent收到的数据作为负载,发布类型为WidgetMessageType.Highlight的组件间消息。
为了完成本节,让我们展示触发 UIActionEvent 从控件到组件的机制。它通过 WPFWidgetizer.GenericFramework.UIControls 项目的 "Themes/DataGridControlStyles.xaml" 资源文件中的 ClickRowBehavior 附加到网格行。
<uiControls:ClickRowBehavior x:Key="TheClickRowBehavior" />

<Style TargetType="DataGridRow"
       x:Key="BaseDataGridRowStyle">
    <!-- Set the ClickRowBehavior to fire UIActionEvent routed event
         when a row is clicked on the grid -->
    <Setter Property="uiControls:AttachedProperties.TheBehavior"
            Value="{StaticResource TheClickRowBehavior}" />
    <Style.Triggers>
        <!-- set the widget's background to pink
             if IsRowHighlighted attached property on is true on the row
             and CanHighlight property is  true on the Widget -->
        <MultiDataTrigger>
            <MultiDataTrigger.Conditions>
                <Condition Binding="{Binding Path=(uiControls:AttachedProperties.IsRowHighlighted),
                                             RelativeSource={RelativeSource Self}}"
                           Value="True" />
                <Condition Binding="{Binding Path=CanHighlight,
                                             RelativeSource={RelativeSource AncestorType=uiControls:DataGridControl}}"
                           Value="True" />
            </MultiDataTrigger.Conditions>
            <Setter Property="Background"
                    Value="Pink" />
        </MultiDataTrigger>
    </Style.Triggers>
</Style>
行为已在 WPF 控件模式。(代码重用的 WPF 和 XAML 模式,第 1 部分) 中描述。我们通过 AttachedProperties.TheBehavior 附加属性附加我们的 ClickRowBehavior。当附加到对象时,行为的 Attach(...) 方法会被调用,为对象的事件分配事件处理程序。这是 ClickRowBehavior 类的代码:
public class ClickRowBehavior : IBehavior
{
    public void Attach(FrameworkElement element)
    {
        // on Attach, add a handler to the element's
        // MouseLeftButtonUp event
        element.MouseLeftButtonUp += element_MouseLeftButtonUp;
    }

    void element_MouseLeftButtonUp(object sender, MouseButtonEventArgs e)
    {
        FrameworkElement element = (FrameworkElement) sender;

        // create UIActionEventArgs object
        UIActionEventArgs uiActionEventArgs = new UIActionEventArgs
        {
            TheUIActionType = UIActionType.RowClick,
            RoutedEvent = UIRoutedEvents.UIActionEvent
        };

        uiActionEventArgs.Payload = element.DataContext;

        // fire UIActionEvent to bubble up
        // the visual tree
        element.RaiseEvent(uiActionEventArgs);
    }

    public void Detach(FrameworkElement element)
    {
        // on Detatch, remove a handler from the element's
        // MouseLeftButtonUp event
        element.MouseLeftButtonUp -= element_MouseLeftButtonUp;
    }
}
组件间通信
现在我们将阐明 WPFWidgetizer 在各种组件之间进行通信的机制。
您还记得,我们在上一节中解释了我们的行单击事件将如何导致在组件 ViewModel 上调用 Publish(...) 方法(请参阅 WidgetWithHighlightableItemsCollectionVM 类中的 OnItemClick(...) 函数的代码)。
private void OnItemClicked(RecordType item)
{
    this.CanHighlight = false;
    this.Publish<object>(item, WidgetMessageType.Highlight);
}
让我们看一下位于 WidgetCommunicationsBase 类中的 Publish(...) 函数的实现:
public void Publish<T>
(
    T messagePayload,
    WidgetMessageType messageType,
    CommunicationsScopeType messageScopeType = CommunicationsScopeType.None,
    long targetWidgetID = -1
)
{
    long scopeItemID = -1;

    // if message scope is not None, get the message scope
    // item id from _widgetScopeResolver
    if ( (_widgetScopeResolver != null) &&
         (messageScopeType != CommunicationsScopeType.None))
    {
        scopeItemID = _widgetScopeResolver.GetIDByScopeType(messageScopeType);
    }

    WidgetMessage<T> widgetMessage = new WidgetMessage<T>
    {
        SenderID = this.UniqueID,
        ScopeItemID = scopeItemID,
        TheMessageScopeType = messageScopeType,
        TargetWidgetID = targetWidgetID,
        MessagePayload = messagePayload,
        TheWidgetMessageType = messageType
    };

    EventAggregatorSingleton.Publish<WidgetMessage<T>>(widgetMessage);
}
此函数显示了如何形成组件间消息。
每个组件都有其唯一的 ID,包含在其 UniqueID 属性中(顺便说一句,该属性来自所有组件都实现的 IUniqueIDContainer 接口)。Publish(...) 函数将 WidgetMessage 对象的 SenderID 设置为当前组件的 UniqueID。
WidgetMessage 的 MessagePayload 属性承载消息数据。
WidgetMessage 的 TheWidgetMessageType 属性可用于缩小当前消息的应用范围——每个组件都可以注册以仅接收特定 WidgetMessageType 的消息。WidgetMessageType 是在 WPFWidgetizer.GenericFramework.WidgetVMs 项目中定义的枚举。
public enum WidgetMessageType
{
    Unknown,
    Highlight,
    Navigate
}
WidgetMessage 的传播有两种模式——广播模式和链接模式。这两种模式将在后续文章中使用更相关的示例进行更详细的讨论。这里,我们只提供它们的简要概述。
广播模式将导致 WidgetMessage 传播到组件层次结构中的所有组件(请记住,可能存在包含组件组装和子组件的组件,我们将在后续文章中讨论它们)。对于广播模式,设置在 WidgetMessage 上的 ScopeItemID 属性决定了顶层对象,在该对象下,与发送者共享该对象的组件将从发送组件接收消息。如果 ScopeItemID 为 -1,则消息将传播到应用程序中的所有组件。
在链接模式下,两个组件被链接,发送组件知道目标组件的 UniqueID。在 WidgetMessage 中,我们使用 TargetWidgetID 属性来指定它。
当然,这两种方法可以组合使用,一个组件向同一范围内的目标组件发送消息,假设组件层次结构中的其他范围可能具有相同的 UniqueID。顺便说一下,如果我们序列化并恢复链接信息,这可能会发生。这也将在后续文章中讨论。
对于我们简单的组件组装示例,将 TargetWidgetID 设置为 -1(表示没有链接,所有组件都可以接收消息)是完全足够的。
现在,让我们看看组件间消息的接收端会发生什么。
我们在 WidgetWithHighlightableItemsCollectionVM 类的构造函数中注册我们的组件间消息处理程序。
public WidgetWithHighlightableItemsCollectionVM()
{
    ...

    // register a handler for the Highlight message
    // arriving from a different widget.
    RegisterHandlerForMessageType<object>
    (
        WidgetMessageType.Highlight,
        OnHighlightMessageArrived
    );
}
OnHighlightMessageArrived(...) 方法在收到类型为 WidgetMessageType.Highlight 的 WidgetMessage 时被调用。
private void OnHighlightMessageArrived(object item)
{
    if (ItemsSource == null)
        return;

    // user reflection base extension method ReflectionHelper.GetProp
    object highlightPropValue = item.GetProp(PropertyNameToHightlightOn);

    if (highlightPropValue == null)
        return;

    // set CanHighlight to true, so that
    // the highlighting would show in the grid
    this.CanHighlight = true;

    // for each row set record.IsHighlighted to true
    // if the value of its property whose name is given by
    // PropertyNameToHightlightOn, is the same as that
    // of the incoming item.
    foreach (HighlightableBaseRecord record in this.ItemsSource)
    {
        object recordHighlightPropValue = record.GetProp(PropertyNameToHightlightOn);

        record.IsHighlighted = (recordHighlightPropValue == highlightPropValue);
    }
}
PropertyNameToHightlightOn 包含一个属性名称,我们将其值与网格中的每个记录以及传入项对象中的值进行比较。如果这些值匹配,则高亮显示行,否则取消高亮显示。
我们用来将 OnHighlightMessageArrived(...) 方法与 WidgetMessageType.Highlight 关联的 RegisterHandlerForMessageType 函数定义在 WidgetCommunicationBase 类中。
public void RegisterHandlerForMessageType<T>
(
    WidgetMessageType messageType,
    Action<T> messageHandler
)
{
    // get a subscription token in order to
    // be able to unsubscribe from the message type
    PrismUnsubscriber unsubscriber =
        EventAggregatorSingleton.Subscribe<WidgetMessage<T>>
    (
        (msg) => messageHandler(msg.MessagePayload),
        (msg) => FilterMsg<T>(msg, messageType)
    );

    // add the subscription token to _messageSubscriptions
    // dictionary in order to be able to unsubscribe later
    List<PrismUnsubscriber> subscriptionsTokensForMessageType;
    if (!_messageSubscriptions.TryGetValue(messageType, out subscriptionsTokensForMessageType))
    {
        subscriptionsTokensForMessageType = new List<PrismUnsubscriber>();
        _messageSubscriptions[messageType] = subscriptionsTokensForMessageType;
    }

    subscriptionsTokensForMessageType.Add(unsubscriber);
}
订阅本身发生在函数顶部对 EventAggregatorSingleton.Subscribe(...) 方法的调用中。函数体的其余部分与存储订阅令牌相关,以便将来能够取消订阅。
对 EventAggregatorSingleton.Subscribe(...) 的调用有两个参数。第一个参数是要在满足所有要求的消息到达时调用的消息处理程序。第二个参数是一个谓词,我们用它来过滤掉不满足所有要求的消息。如您所见,我们将 FilterMsg(...) 方法作为第二个参数传递给此 Subscribe 调用。
这是 FilterMsg(...) 函数的代码:
bool FilterMsg<T>(WidgetMessage<T> msg, WidgetMessageType widgetMessageType)
{
    // if the widget is not active
    // it does not accept any messages.
    // return false (do not call the handler).
    if (!IsActive)
        return false;

    // if the message's TheWidgetMessageType is not
    // the same as that of the subscription,
    // return false (do not call the handler).
    if (msg.TheWidgetMessageType != widgetMessageType)
        return false;

    if (msg.TargetWidgetID >= 0)
    {
        // if the TargetWidgetID of the message
        // is value (>=0) and is not equal to the
        // UniqueID of the current widget,
        // return false (do not call the handler).
        if (msg.TargetWidgetID != this.UniqueID)
            return false;
    }

    // if the SenderID of the widget is the same
    // as that of the current widget,
    // return false (do not call the handler).
    // this is because a widget cannot send
    // messages to itself.
    if (msg.SenderID == this.UniqueID)
        return false;

    if ((msg.ScopeItemID != -1) && (msg.TheMessageScopeType != CommunicationsScopeType.None))
    {
        if (_widgetScopeResolver == null)
            return false;

        // if the msg.ScopeItemID is value (not -1) and
        // its scope is not None, check that the current widget
        // belongs to the same scope.
        long scopeID = _widgetScopeResolver.GetIDByScopeType(msg.TheMessageScopeType);

        if (scopeID != msg.ScopeItemID)
            return false;
    }

    return true;
}
该方法在注释中进行了说明。
- 首先,我们检查组件是否处于活动状态,如果不是,则返回 false,并且不会调用处理程序。
- 然后,我们检查消息的
WidgetMessageType和当前处理程序是否匹配。如果不匹配,我们不调用处理程序。 - 消息的
TargetWidgetID为非负数表示我们正在为消息使用链接模式,只有UniqueID与消息匹配的组件才应触发其处理程序。 - 如果消息的
ScopeItemID为非负数且TheMessageScopeType不是 'None',我们确保当前组件属于同一范围(将在后续文章中详细解释)。
BookOrdersWidget 和 BookReviewsWidget 的组件组装
我们示例的组件组装由 WPFWidgetizer.BookStoreSpecificFramework.BookStoreWidgets 项目下的 "Themes/BookReviewsAndOrdersAssemblyStyles.xaml" 文件中的样式/模板定义。
<Style x:Key="TheBookReviewsAndOrdersAssemblyStyle"
       TargetType="widgets:WidgetAssembly">
    <Setter Property="Template">
        <Setter.Value>
            <ControlTemplate TargetType="widgets:WidgetAssembly">
                <Grid x:Name="PART_WidgetAssemblyPanel">
                    <Grid.ColumnDefinitions>
                        <ColumnDefinition Width="*" />
                        <ColumnDefinition Width="*" />
                    </Grid.ColumnDefinitions>

                    <bookStoreWidgets:BookReviewsWidget x:Name="TheBookReviewsWidget"
                                                        WidgetCaption="Book Reviews"
                                                        ShowWidgetHeader="True"/>

                    <bookStoreWidgets:BookOrdersWidget x:Name="TheBookOrdersWidget"
                                                       Grid.Column="1"
                                                       WidgetCaption="Book Orders"
                                                       ShowWidgetHeader="True"/>
                </Grid>
            </ControlTemplate>
        </Setter.Value>
    </Setter>
</Style>
请注意,它的唯一目的是安排这两个组件。它没有任何特定于组件间通信或交互的代码。
WidgetAssembly 类定义在 WPFWidgetizer.GenericFramework.WidgetsAndAssemblies 项目下。
public class WidgetAssembly : Control
{
    Panel _widgetAssemblyPanel = null;

    public string WidgetAssemblyName
    {
        get;
        set;
    }

    public override void OnApplyTemplate()
    {
        base.OnApplyTemplate();

        _widgetAssemblyPanel = this.Template.FindName("PART_WidgetAssemblyPanel", this) as Panel;
    }

    // child widgets of the Widget Assembly
    public IEnumerable<WidgetBase> TheAssemblyWidgets
    {
        get
        {
            List<WidgetBase> result = new List<WidgetBase>();

            foreach (var child in _widgetAssemblyPanel.Children)
            {
                WidgetBase assemblyWidget = child as WidgetBase;

                if (assemblyWidget != null)
                    result.Add(assemblyWidget);
            }

            return result;
        }
    }

    // call the LoadData() method on each one of the
    // child Widgets within the Widget Assembly.
    public async Task LoadData()
    {
        Task[] loadDataTasks = this.TheAssemblyWidgets.Select((widget) => widget.LoadData()).ToArray();

        await Task.WhenAll(loadDataTasks);
    }
}
TheAssemblyWidgets 属性枚举了组件组装的子组件,而 WidgetAssembly 的 LoadData() 方法调用了其所有子组件的 LoadData() 方法。
在主项目 WPFWidgetizer.Samples.SimpleWidgetAssemblySample 中,我们只是将组件组装显示在一个网格面板中。
<Grid>
    <Grid.RowDefinitions>
        <RowDefinition Height="*" />
        <RowDefinition Height="Auto" />
    </Grid.RowDefinitions>
    <Grid>
        <widgets:WidgetAssembly Style="{StaticResource TheBookReviewsAndOrdersAssemblyStyle}"
                                x:Name="TheWidgetAssembly"/>
    </Grid>
    <Button x:Name="LoadDataButton"
            Grid.Row="1"
            Content="Load Data from Server"
            Width="200"
            Height="25"
            Margin="0,10"
            HorizontalAlignment="Center"
            VerticalAlignment="Center"/>
</Grid>
LoadDataButton 的处理程序在 MainWindow.xaml.cs 文件中连接,以调用组件组装上的 LoadData() 方法。
[Export]
public partial class MainWindow : Window
{
    public MainWindow()
    {
        InitializeComponent();

        this.LoadDataButton.Click += LoadDataButton_Click;
    }

    async void LoadDataButton_Click(object sender, RoutedEventArgs e)
    {
        await TheWidgetAssembly.LoadData();
    }
}
结论
在本期文章中,我们介绍了基于 WPFWidgetizer 框架的架构以及组件组装模式。我们解释了如何使用它们来快速构建灵活且可扩展的 WPF 应用程序。
在后续文章中,我们计划涵盖:
- 包含组件组装以及其中包含子组件的组件。
- 基于范围的层次化组件间通信。
- 不同组件组装之间的导航。
- 元素工厂模式。
- ViewModel 层次结构模式。