
在 MVC 中使用通用存储库模式和依赖注入进行 CRUD 操作
4.88/5 (80投票s)
本文介绍在 MVC 中使用通用存储库模式和依赖注入实现 CRUD 操作。
引言
这是我关于使用 Entity Framework Code First 方法在 ASP.NET MVC 中进行 CRUD 操作系列的最后一篇文章。在上一篇文章中,我介绍了《在 MVC 中使用通用存储库模式和工作单元实现 CRUD 操作》。本文将向您介绍如何在应用程序中使用依赖注入来执行 CURD 操作。我们将使用 Ninject Dependency Injector 来实现依赖注入模式。要了解更多关于依赖注入的信息,您可以访问我的技巧文章:《C# 中的构造函数依赖注入模式实现》。
我们学习 MVC 和 Entity Framework 的路线图
- 使用 Code First 方法和 Fluent API 在 Entity Framework 中建立关系。
- Entity Framework 的 Code First 迁移
- 使用 MVC 中的 Entity Framework 5.0 Code First 方法进行 CRUD 操作
- 在 MVC 中使用存储库模式进行 CRUD 操作
- 在 MVC 中使用通用存储库模式和工作单元进行 CRUD 操作
- 在 MVC 中使用通用存储库模式和依赖注入进行 CRUD 操作
依赖注入 (DI)
依赖注入 (DI) 是一种 IoC 的类型,它是一种模式,对象不负责创建自己的依赖项。依赖注入是一种消除对象之间硬编码依赖关系的方法,从而更容易替换对象的依赖项,无论是用于测试(在单元测试中使用模拟对象)还是更改运行时行为。
在理解依赖注入之前,您应该熟悉面向对象编程的两个概念:一种是紧耦合,另一种是松耦合,所以让我们一一来看。
紧耦合
当一个类依赖于一个具体的依赖项时,就说它与该类紧密耦合。紧密耦合的对象依赖于另一个对象;这意味着在紧密耦合的应用程序中更改一个对象通常需要更改许多其他对象。当应用程序很小时,这并不困难,但在企业级应用程序中,进行更改会非常困难。
松耦合
这意味着两个对象是独立的,一个对象可以在不依赖于另一个对象的情况下使用它。这是一种设计目标,旨在减少系统中组件之间的相互依赖性,以降低一个组件中的更改需要对任何其他组件进行更改的风险。
现在简而言之,依赖注入是一种将对象从紧密耦合变为松散耦合的模式。通常,我们在需要对象的类中创建具体类的对象,并将其绑定到依赖类中,但 DI 是一种模式,我们在该高层模块或依赖类之外创建具体类的对象。
依赖注入有三种类型
- 构造函数依赖注入
- Setter 依赖注入
- 接口依赖注入
在本文中,我们将使用构造函数依赖注入。这是面向对象编程中最常用的依赖注入模式。构造函数依赖注入使用参数来注入依赖项,因此通常只有一个参数化构造函数。因此,在这种构造函数依赖项中,对象没有默认构造函数,您需要在创建对象时传递指定值来初始化对象。您可以使用构造函数依赖注入说您的设计是松散耦合的。
依赖注入 (DI) 容器
依赖注入容器是一个框架,用于创建依赖项并在需要时自动注入它们。它根据请求自动创建对象并在需要时注入它们。它帮助我们将应用程序拆分成一组松散耦合、高度内聚的组件,然后以灵活的方式将它们重新组合在一起。通过 DI 容器,我们的代码将更容易编写、重用、测试和修改。在本文中,我们将使用 Niject DI Container。
CRUD 操作应用程序设计
我们在解决方案中创建了四个项目来实现 DIP 和通用存储库模式。它们是
Ioc.Core(类库)Ioc.Data(类库)Ioc.Service(类库)Ioc.Web(Web 应用程序)

在应用程序中定义实体
在本文中,我们使用 Entity Framework Code First Approach,因此 Ioc.Core 项目包含应用程序数据库所需的实体。在此项目中,我们创建了三个实体,一个是 BaseEntity 类,它具有每个实体将继承的公共属性,另外两个是 User 和 UserProfile 实体。让我们分别看一下每个实体。以下是 BaseEntity 类的代码片段。
using System;
namespace Ioc.Core
{
  public abstract class BaseEntity
    {
      public Int64 ID { get; set; }
      public DateTime AddedDate { get; set; }
      public DateTime ModifiedDate { get; set; }
      public string IP { get; set; }
    }
}
User 和 UserProfile 实体之间存在一对一的关系。一个用户只能有一个配置文件。

现在,我们在 Ioc.Core 项目的Data文件夹下创建一个 User 实体,它继承自 BaseEntity 类。以下是 User 实体的代码片段。
using System;
namespace Ioc.Core.Data
{
   public class User : BaseEntity
    {
       public string UserName { get; set; }
       public string Email { get; set; }
       public string Password { get; set; }
       public virtual UserProfile UserProfile { get; set; }
    }
}
现在,我们在 Ioc.Core 项目的Data文件夹下创建一个 UserProfile 实体,它继承自 BaseEntity 类。以下是 UserProfile 实体的代码片段。
using System;
namespace Ioc.Core.Data
{
  public class UserProfile : BaseEntity
    {
      public string FirstName { get; set; }
      public string LastName { get; set; }
      public string Address { get; set; }
      public virtual User User { get; set; }
    }
}
定义上下文类
Ioc.Data 项目包含 DataContext、User 和 UserProfile 实体的Mapping和Repository。ADO.NET Entity Framework Code First 数据访问方法要求我们创建一个继承自 DbContext 类的`数据访问上下文类,因此我们创建一个 IDbContext 接口,该接口由`上下文类 IocDbContext (IocDbContext.cs) 类继承。在此类中,我们重写 OnModelCreating() 方法。当上下文类 (IocDbContext) 的模型已初始化但尚未锁定并用于初始化上下文之前,会调用此方法,以便在模型被锁定之前可以进一步配置模型。首先,创建一个 IDbContext 接口,并提供以下代码片段。
using System.Data.Entity;
using Ioc.Core;
namespace Ioc.Data
{
   public interface IDbContext
    {
        IDbSet<TEntity> Set<TEntity>() where TEntity : BaseEntity;
        int SaveChanges();
    }
}
现在,创建 IocDbContext 类,并提供以下代码片段。
using System;
using System.Collections.Generic;
using System.Data.Entity;
using System.Data.Entity.ModelConfiguration;
using System.Linq;
using System.Reflection;
using System.Text;
using System.Threading.Tasks;
using Ioc.Core;

namespace Ioc.Data
{
    public class IocDbContext : DbContext, IDbContext
    {
        public IocDbContext()
            : base("name=DbConnectionString")
        {
        }

        protected override void OnModelCreating(DbModelBuilder modelBuilder)
        {

            var typesToRegister = Assembly.GetExecutingAssembly().GetTypes()
            .Where(type => !String.IsNullOrEmpty(type.Namespace))
            .Where(type => type.BaseType != null && type.BaseType.IsGenericType &&
            type.BaseType.GetGenericTypeDefinition() == typeof(EntityTypeConfiguration<>));
            foreach (var type in typesToRegister)
            {
                dynamic configurationInstance = Activator.CreateInstance(type);
                modelBuilder.Configurations.Add(configurationInstance);
            }
         base.OnModelCreating(modelBuilder);
        }

        public new IDbSet<TEntity> Set<TEntity>() where TEntity : BaseEntity
        {
            return base.Set<TEntity>();
        }
    }
}
您知道,EF Code First 方法遵循约定优于配置,因此在构造函数中,我们只需传递连接字符串名称,就像App.Config文件一样,它会连接到该服务器。在 OnModelCreating() 方法中,我们使用反射将实体映射到该项目中的配置类。
定义实体的映射
现在,我们为 User 和 UserProfile 实体定义配置,这些配置将在实体创建数据库表时使用。配置定义在类库项目 Ioc.Data 的Mapping文件夹下。现在为实体创建配置类。对于 User 实体,我们创建 UserMap 类;对于 UserProfile 实体,我们创建 UserProfileMap 类。
以下是 UserMap 类的代码片段。
using System.Data.Entity.ModelConfiguration;
using Ioc.Core.Data;

namespace Ioc.Data.Mapping
{
   public class UserMap :EntityTypeConfiguration<User>
    {
       public UserMap()
       {
           //key
           HasKey(t => t.ID);
           //properties
           Property(t => t.UserName).IsRequired();
           Property(t => t.Email).IsRequired();
           Property(t => t.Password).IsRequired();
           Property(t => t.AddedDate).IsRequired();
           Property(t => t.ModifiedDate).IsRequired();
           Property(t => t.IP);
           //table
           ToTable("Users");
       }
    }
}
以下是 UserProfileMap 类的代码片段。
using System.Data.Entity.ModelConfiguration;
using Ioc.Core.Data;

namespace Ioc.Data.Mapping
{
   public class UserProfileMap : EntityTypeConfiguration<UserProfile>
    {
       public UserProfileMap()
       {
           //key
           HasKey(t => t.ID);
           //properties
           Property(t => t.FirstName).IsRequired().HasMaxLength(100).HasColumnType("nvarchar");
           Property(t => t.LastName).HasMaxLength(100).HasColumnType("nvarchar");
           Property(t => t.Address).HasColumnType("nvarchar");
           Property(t => t.AddedDate).IsRequired();
           Property(t => t.ModifiedDate).IsRequired();
           Property(t => t.IP);
           //table
           ToTable("UserProfiles");
           //relation
           HasRequired(t => t.User).WithRequiredDependent(u => u.UserProfile);
       }
    }
}
创建通用存储库
存储库模式旨在创建应用程序的数据访问层和业务逻辑层之间的抽象层。它是一种数据访问模式,可以促进更松散耦合的数据访问方法。我们在一个单独的类或一组类(称为存储库)中创建数据访问逻辑,其职责是持久化应用程序的业务模型。
现在,我们创建一个通用存储库接口和类。此通用存储库具有所有 CRUD 操作方法。此存储库包含一个带有 Context 参数的参数化构造函数,因此当我们创建存储库实例时,我们会传递一个上下文,以便每个实体的所有存储库都具有相同的上下文。我们使用上下文的 saveChanges() 方法。以下是通用存储库接口的代码片段。
using System.Linq;
using Ioc.Core;

namespace Ioc.Data
{
    public interface IRepository<T> where T : BaseEntity
    {
        T GetById(object id);
        void Insert(T entity);
        void Update(T entity);
        void Delete(T entity);
        IQueryable<T> Table { get; }
    }
}
以下是实现 IRepository 的通用存储库类的代码片段。
using System;
using System.Data.Entity;
using System.Data.Entity.Validation;
using System.Linq;
using Ioc.Core;

namespace Ioc.Data
{
   public class Repository<T> : IRepository<T> where T: BaseEntity
    {
        private readonly IDbContext _context;
        private IDbSet<T> _entities;

        public Repository(IDbContext context)
        {
            this._context = context;
        }

        public T GetById(object id)
        {
            return this.Entities.Find(id);
        }

        public void Insert(T entity)
        {
            try
            {
                if (entity == null)
                {
                    throw new ArgumentNullException("entity");
                }
                this.Entities.Add(entity);
                this._context.SaveChanges();
            }
            catch (DbEntityValidationException dbEx)
            {
                var msg = string.Empty;

                foreach (var validationErrors in dbEx.EntityValidationErrors)
                {
                    foreach (var validationError in validationErrors.ValidationErrors)
                    {
                        msg += string.Format("Property: {0} Error: {1}",
                        validationError.PropertyName, validationError.ErrorMessage) + Environment.NewLine;
                    }
                }

                var fail = new Exception(msg, dbEx);
                throw fail;
            }
        }

        public void Update(T entity)
        {
            try
            {
                if (entity == null)
                {
                    throw new ArgumentNullException("entity");
                }
                this._context.SaveChanges();
            }
            catch (DbEntityValidationException dbEx)
            {
                var msg = string.Empty;
                foreach (var validationErrors in dbEx.EntityValidationErrors)
                {
                    foreach (var validationError in validationErrors.ValidationErrors)
                    {
                        msg += Environment.NewLine + string.Format("Property: {0} Error: {1}",
                        validationError.PropertyName, validationError.ErrorMessage);
                    }
                }
                var fail = new Exception(msg, dbEx);
                throw fail;
            }
        }

        public void Delete(T entity)
        {
            try
            {
                if (entity == null)
                {
                    throw new ArgumentNullException("entity");
                }
                this.Entities.Remove(entity);
                this._context.SaveChanges();
            }
            catch (DbEntityValidationException dbEx)
            {
                var msg = string.Empty;

                foreach (var validationErrors in dbEx.EntityValidationErrors)
                {
                    foreach (var validationError in validationErrors.ValidationErrors)
                    {
                        msg += Environment.NewLine + string.Format("Property: {0} Error: {1}",
                        validationError.PropertyName, validationError.ErrorMessage);
                    }
                }
                var fail = new Exception(msg, dbEx);
                throw fail;
            }
        }

        public virtual IQueryable<T> Table
        {
            get
            {
                return this.Entities;
            }
        }

        private IDbSet<T> Entities
        {
            get
            {
                if (_entities == null)
                {
                    _entities = _context.Set<T>();
                }
                return _entities;
            }
        }
    }
}
为用户操作创建服务
为了通过 DI 实现 DIP,我们为用户实体创建一个服务,该服务与 UI 和数据访问逻辑进行通信。由于 DIP 规定高层模块不应依赖于低层模块,因此我们在 Ioc.Service 项目中定义一个 IUsesService 接口,该接口依赖于 UI 执行 CRUD 操作所需的功能。以下代码片段是 IUserService。
using System.Linq;
using Ioc.Core.Data;

namespace Ioc.Service
{
   public interface IUserService
    {
       IQueryable<User> GetUsers();
       User GetUser(long id);
       void InsertUser(User user);
       void UpdateUser(User user);
       void DeleteUser(User user);
    }
}
现在,我们创建一个实现了 IUserService 接口的具体 UserService 类,使用通用存储库对 User 和 UserProfile 实体执行 CRUD 操作。以下代码片段是同一项目中的 UserService 类。
using System.Linq;
using Ioc.Core.Data;
using Ioc.Data;

namespace Ioc.Service
{
public class UserService : IUserService
{
private IRepository<User> userRepository;
private IRepository<UserProfile> userProfileRepository;

public UserService(IRepository<User> userRepository, IRepository<UserProfile> userProfileRepository)
{
this.userRepository = userRepository;
this.userProfileRepository = userProfileRepository;
}

public IQueryable<User> GetUsers()
{
return userRepository.Table;
}

public User GetUser(long id)
{
return userRepository.GetById(id);
}

public void InsertUser(User user)
{
userRepository.Insert(user);
}

public void UpdateUser(User user)
{
userRepository.Update(user);
}

public void DeleteUser(User user)
{
userProfileRepository.Delete(user.UserProfile);
userRepository.Delete(user);
}
}
}
使用 IoC 和 DI 的 MVC 应用程序
在本节中,我们将使用第四个项目 Ioc.Web 来设计用户界面,以便我们可以对 User 和 UserProfile 实体执行 CRUD 操作。
Ninject 依赖注入容器
Ninject 是 .NET 应用程序的轻量级依赖注入框架。它帮助我们将应用程序拆分成一组松散耦合、高度内聚的组件,然后以灵活的方式将它们重新组合在一起。通过使用 Ninject 支持我们的应用程序架构,我们的代码将更容易编写、重用、测试和修改。您可以在 http://www.ninject.org/ 上了解更多信息。

首先,我们需要在我们的 Web 应用程序(换句话说,在 Ioc.Web 项目中)安装 Ninject.MVC4 Nuget 包。

此包还安装了依赖页面,安装后我们的应用程序将具有以下包。
NinjectNinject.MVC4Ninject.Web.CommonNinject.Web.Common.WebHost
安装后,NinjectWebCommon 类将在 Web 应用程序的App_Start文件夹下创建。以下代码片段是该类的内容。
[assembly: WebActivatorEx.PreApplicationStartMethod
    (typeof(Ioc.Web.App_Start.NinjectWebCommon), "Start")]
[assembly: WebActivatorEx.ApplicationShutdownMethodAttribute
    (typeof(Ioc.Web.App_Start.NinjectWebCommon), "Stop")]

namespace Ioc.Web.App_Start
{
    using System;
    using System.Web;
    using Ioc.Core.Data;
    using Ioc.Data;
    using Ioc.Service;
    using Microsoft.Web.Infrastructure.DynamicModuleHelper;
    using Ninject;
    using Ninject.Web.Common;

    public static class NinjectWebCommon
    {
        private static readonly Bootstrapper bootstrapper = new Bootstrapper();

        /// <summary>
        /// Starts the application
        /// </summary>
        public static void Start()
        {
            DynamicModuleUtility.RegisterModule(typeof(OnePerRequestHttpModule));
            DynamicModuleUtility.RegisterModule(typeof(NinjectHttpModule));
            bootstrapper.Initialize(CreateKernel);
        }

        /// <summary>
        /// Stops the application.
        /// </summary>
        public static void Stop()
        {
            bootstrapper.ShutDown();
        }

        /// <summary>
        /// Creates the kernel that will manage your application.
        /// </summary>
        /// <returns>The created kernel.</returns>
        private static IKernel CreateKernel()
        {
            var kernel = new StandardKernel();
            try
            {
                kernel.Bind<Func<IKernel>>().ToMethod(ctx => () => new Bootstrapper().Kernel);
                kernel.Bind<IHttpModule>().To<HttpApplicationInitializationHttpModule>();

                RegisterServices(kernel);
                return kernel;
            }
            catch
            {
                kernel.Dispose();
                throw;
            }
        }

        /// <summary>
        /// Load your modules or register your services here!
        /// </summary>
        /// <param name="kernel">The kernel.</param>
        private static void RegisterServices(IKernel kernel)
        {
            kernel.Bind<IDbContext>().To<IocDbContext>().InRequestScope();
            kernel.Bind(typeof(IRepository<>)).To(typeof(Repository<>)).InRequestScope();
            kernel.Bind<IUserService>().To<UserService>();
        }
    }
}
在上述代码的 RegisterServices() 方法中,我们将接口绑定到具体类。通过此操作,将具体类的对象分配给绑定接口实例。
CRUD 操作模型和控制器
我们的用户界面表单对于 User 和 UserProfile 实体是通用的,因此我们创建一个依赖于模型的模型。我们在Models文件夹下定义 UserModel (UserModel.cs),并提供以下代码片段。
using System;
using System.ComponentModel.DataAnnotations;

namespace Ioc.Web.Models
{
    public class UserModel
    {
        public Int64 ID { get; set; }
        [Display(Name ="First Name")]
        public string FirstName { get; set; }
        [Display(Name="Last Name")]
        public string LastName { get; set; }
        public string Address { get; set; }
        [Display(Name="User Name")]
        public string UserName { get; set; }
        public string Email { get; set; }
        public string Password { get; set; }
        [Display(Name ="Added Date")]
        public DateTime AddedDate { get; set; }
    }
}
我们创建一个控制器来执行这些 CRUD 操作。在应用程序的Controllers文件夹下创建一个 UserController 。此控制器包含每个 CRUD 操作用户界面的所有 ActionResult 方法。我们首先创建一个 IUserInterface 实例,然后控制器的构造函数使用依赖注入来初始化服务。以下是 UserController 的代码片段。
using System;
using System.Collections.Generic;
using System.Linq;
using System.Web.Mvc;
using Ioc.Service;
using Ioc.Web.Models;
using Ioc.Core.Data;

namespace Ioc.Web.Controllers
{
    public class UserController : Controller
    {
        private IUserService userService;

        public UserController(IUserService userService)
        {
            this.userService = userService;
        }

        [HttpGet]
        public ActionResult Index()
        {
            IEnumerable<UserModel> users = userService.GetUsers().Select(u => new UserModel
            {
                FirstName = u.UserProfile.FirstName,
                LastName = u.UserProfile.LastName,
                Email = u.Email,
                Address = u.UserProfile.Address,
                ID = u.ID
            });
            return View(users);
        }

        [HttpGet]
        public ActionResult CreateEditUser(int? id)
        {
            UserModel model = new UserModel();
            if (id.HasValue && id != 0)
            {
                User userEntity = userService.GetUser(id.Value);
                model.FirstName = userEntity.UserProfile.FirstName;
                model.LastName = userEntity.UserProfile.LastName;
                model.Address = userEntity.UserProfile.Address;
                model.Email = userEntity.Email;
                model.UserName = userEntity.UserName;
                model.Password = userEntity.Password;
            }
            return View(model);
        }

        [HttpPost]
        public ActionResult CreateEditUser(UserModel model)
        {
            if (model.ID == 0)
            {
                User userEntity = new User
                {
                    UserName = model.UserName,
                    Email = model.Email,
                    Password = model.Password,
                    AddedDate = DateTime.UtcNow,
                    ModifiedDate = DateTime.UtcNow,
                    IP = Request.UserHostAddress,
                    UserProfile = new UserProfile
                    {
                        FirstName = model.FirstName,
                        LastName = model.LastName,
                        Address = model.Address,
                        AddedDate = DateTime.UtcNow,
                        ModifiedDate = DateTime.UtcNow,
                        IP = Request.UserHostAddress
                    }
                };
                userService.InsertUser(userEntity);
                if (userEntity.ID > 0)
                {
                    return RedirectToAction("index");
                }
            }
            else
            {
                User userEntity = userService.GetUser(model.ID);
                userEntity.UserName = model.UserName;
                userEntity.Email = model.Email;
                userEntity.Password = model.Password;
                userEntity.ModifiedDate = DateTime.UtcNow;
                userEntity.IP = Request.UserHostAddress;
                userEntity.UserProfile.FirstName = model.FirstName;
                userEntity.UserProfile.LastName = model.LastName;
                userEntity.UserProfile.Address = model.Address;
                userEntity.UserProfile.ModifiedDate = DateTime.UtcNow;
                userEntity.UserProfile.IP = Request.UserHostAddress;
                userService.UpdateUser(userEntity);
                if (userEntity.ID > 0)
                {
                    return RedirectToAction("index");
                }

            }
            return View(model);
        }

        public ActionResult DetailUser(int? id)
        {
            UserModel model = new UserModel();
            if (id.HasValue && id != 0)
            {
                User userEntity = userService.GetUser(id.Value);
               // model.ID = userEntity.ID;
                model.FirstName = userEntity.UserProfile.FirstName;
                model.LastName = userEntity.UserProfile.LastName;
                model.Address = userEntity.UserProfile.Address;
                model.Email = userEntity.Email;
                model.AddedDate = userEntity.AddedDate;
                model.UserName = userEntity.UserName;
            }
            return View(model);
        }

        public ActionResult DeleteUser(int id)
        {
            UserModel model = new UserModel();
            if (id != 0)
            {
                User userEntity = userService.GetUser(id);
                model.FirstName = userEntity.UserProfile.FirstName;
                model.LastName = userEntity.UserProfile.LastName;
                model.Address = userEntity.UserProfile.Address;
                model.Email = userEntity.Email;
                model.AddedDate = userEntity.AddedDate;
                model.UserName = userEntity.UserName;
            }
            return View(model);
        }

        [HttpPost]
        public ActionResult DeleteUser(int id, FormCollection collection)
        {
            try
            {
                if ( id != 0)
                {
                    User userEntity = userService.GetUser(id);
                    userService.DeleteUser(userEntity);
                    return RedirectToAction("Index");
                }
                return View();
            }
            catch
            {
                return View();
            }
        }
    }
}
在开始 UI 设计之前,我们先看一下它的构造函数。我们在构造函数的参数中使用 IUserService ,在这里我们注入从依赖注入容器中绑定 IUserService 接口的类对象。

我们现在已经开发了 UserController 来处理 User 和 UserProfile 实体的 CRUD 操作请求。之后,我们开发 CRUD 操作的用户界面。我们为添加和编辑用户、用户列表、用户删除和用户详细信息视图进行了开发。我们逐一来看。
创建/编辑用户视图
我们在视图的User文件夹下创建一个通用的创建和编辑用户视图,例如CreateEditUser.cshtml。现在定义一个创建/编辑用户视图,以下是CreateEditUser.cshtml的代码片段。
@model Ioc.Web.Models.UserModel
@{
    ViewBag.Title = "Create Edit User";
}
<div class="book-example panel panel-primary">
    <div class="panel-heading panel-head">Add / Edit User</div>
    <div class="panel-body">
        @using (Html.BeginForm())
        {
            <div class="form-horizontal">
                <div class="form-group">
                    @Html.LabelFor(model => model.FirstName, new { @class = "col-lg-2 control-label" })
                    <div class="col-lg-9">
                        @Html.TextBoxFor(model => model.FirstName, new { @class = "form-control" })
                    </div>
                </div>
                <div class="form-group">
                    @Html.LabelFor(model => model.LastName, new { @class = "col-lg-2 control-label" })
                    <div class="col-lg-9">
                        @Html.TextBoxFor(model => model.LastName, new { @class = "form-control" })
                    </div>
                </div>
                <div class="form-group">
                    @Html.LabelFor(model => model.Email, new { @class = "col-lg-2 control-label" })
                    <div class="col-lg-9">
                        @Html.TextBoxFor(model => model.Email, new { @class = "form-control" })
                    </div>
                </div>
                <div class="form-group">
                    @Html.LabelFor(model => model.UserName, new { @class = "col-lg-2 control-label" })
                    <div class="col-lg-9">
                        @Html.TextBoxFor(model => model.UserName, new { @class = "form-control" })
                    </div>
                </div>
                 <div class="form-group">
                    @Html.LabelFor(model => model.Password, new { @class = "col-lg-2 control-label" })
                    <div class="col-lg-9">
                        @Html.PasswordFor(model => model.Password,new { @class = "form-control" })
                    </div>
                </div>
                 <div class="form-group">
                    @Html.LabelFor(model => model.Address, new { @class = "col-lg-2 control-label" })
                    <div class="col-lg-9">
                        @Html.TextBoxFor(model => model.Address, new { @class = "form-control" })
                    </div>
                </div>
                <div class="form-group">
                    <div class="col-lg-9"></div>
                    <div class="col-lg-3">
                        @Html.ActionLink("Back to List", "Index", null, new { @class = "btn btn-default" })
                        <button class="btn btn-success" id="Button1" type="submit">
                            Submit
                        </button>
                    </div>
                </div>
            </div>
        }
    </div>
</div>
现在运行应用程序并使用 HttpGet 请求调用 CreateEditUser() 操作方法,然后我们将看到图 1.6 所示的 UI,用于向应用程序添加新用户。

用户列表视图
这是应用程序访问时或入口点执行时的第一个视图。它显示如图 1.7 所示的用户列表。我们在表格格式中显示用户数据,在此视图中,我们创建指向添加新用户、编辑用户、删除用户和用户详细信息的链接。此视图是索引视图,以下是视图User文件夹下index.cshtml的代码片段。
@model IEnumerable<Ioc.Web.Models.UserModel>

<div class="book-example panel panel-primary">
    <div class="panel-heading panel-head">Users Listing</div>
    <div class="panel-body">
        <a id="A1" href="@Url.Action("CreateEditUser")"
        class="btn btn-success">
            <span class="glyphicon glyphicon-plus"></span> User
        </a>

        <table class="table" style="margin: 4px">
            <tr>
                <th>
                    @Html.DisplayName("Name")
                </th>
                <th>
                    @Html.DisplayNameFor(model => model.Email)
                </th>
                <th>
                    @Html.DisplayNameFor(model => model.Address)
                </th>
                <th>Action
                </th>
                <th></th>
            </tr>
            @foreach (var item in Model)
            {
                <tr>
                    <td>
                        @Html.DisplayFor(modelItem => item.FirstName)
                        @Html.DisplayFor(modelItem=>item.LastName)
                    </td>
                    <td>
                        @Html.DisplayFor(modelItem => item.Email)
                    </td>
                    <td>
                        @Html.DisplayFor(modelItem => item.Address)
                    </td>
                    <td>
                        @Html.ActionLink("Edit", "CreateEditUser",
                        new { id = item.ID }, new { @class = "btn btn-success" })
                        @Html.ActionLink("Details", "DetailUser",
                        new { id = item.ID }, new { @class = "btn btn-primary" })
                        @Html.ActionLink("Delete", "DeleteUser",
                        new { id = item.ID }, new { @class = "btn btn-danger" })
                    </td>
                </tr>
            }
        </table>
    </div>
</div>
当我们运行应用程序并使用 HttpGet 请求调用 index() 操作时,我们将看到如图 1.11 所示的所有用户列表 UI。此 UI 具有 CRUD 操作的选项。

如上图所示,用户队列有一个编辑选项。当我们单击“编辑”按钮时,将使用 HttpGet 请求调用 CreateEditUser() 操作方法,并显示如图 1.8 所示的 UI。

现在,我们更改输入字段数据并单击提交按钮,然后使用 HttpPost 请求调用 CreateEditUser() 操作方法,并且该用户数据已成功更新到数据库中。
用户详细信息视图
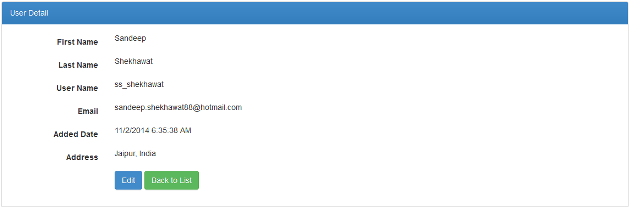
我们创建一个视图,当在用户列表数据中单击详细信息按钮时,该视图显示特定用户的详细信息。我们使用 HttpGet 请求调用 DetailUser() 操作方法,该方法显示“Details”视图,如图 1.9 所示。因此,我们创建了一个 DetailUser 视图,以下是DetailUser.cshtml的代码片段。
 @model Ioc.Web.Models.UserModel

@{
    ViewBag.Title = "User Detail";
}

<div class="book-example panel panel-primary">
    <div class="panel-heading panel-head">User Detail</div>
    <div class="panel-body">
        <div class="form-horizontal">
            <div class="form-group">
                @Html.LabelFor(model => model.FirstName, new { @class = "col-lg-2 control-label" })
                <div class="col-lg-9">
                    @Html.DisplayFor(model => model.FirstName, new { @class = "form-control" })
                </div>
            </div>

            <div class="form-group">
                @Html.LabelFor(model => model.LastName, new { @class = "col-lg-2 control-label" })
                <div class="col-lg-9">
                    @Html.DisplayFor(model => model.LastName, new { @class = "form-control" })
                </div>
            </div>

            <div class="form-group">
                @Html.LabelFor(model => model.UserName, new { @class = "col-lg-2 control-label" })
                <div class="col-lg-9">
                    @Html.DisplayFor(model => model.UserName, new { @class = "form-control" })
                </div>
            </div>

            <div class="form-group">
                @Html.LabelFor(model => model.Email, new { @class = "col-lg-2 control-label" })
                <div class="col-lg-9">
                    @Html.DisplayFor(model => model.Email, new { @class = "form-control" })
                </div>
            </div>

            <div class="form-group">
                @Html.LabelFor(model => model.AddedDate, new { @class = "col-lg-2 control-label" })
                <div class="col-lg-9">
                    @Html.DisplayFor(model => model.AddedDate, new { @class = "form-control" })
                </div>
            </div>

            <div class="form-group">
                @Html.LabelFor(model => model.Address, new { @class = "col-lg-2 control-label" })
                <div class="col-lg-9">
                    @Html.DisplayFor(model => model.Address, new { @class = "form-control" })
                </div>
            </div>

            @using (Html.BeginForm())
            {
                <div class="form-group">
                    <div class="col-lg-2"></div>
                    <div class="col-lg-9">
                        @Html.ActionLink("Edit", "CreateEditUser",
                        new { id = ViewContext.RouteData.Values["id"] },
                        new { @class = "btn btn-primary" })
                        @Html.ActionLink("Back to List", "Index",
                        null, new { @class = "btn btn-success" })
                    </div>
                </div>
            }
        </div>
    </div>
</div>
删除用户
删除用户是本文的最后一个操作。要删除用户,我们遵循单击用户列表数据中存在的“删除”按钮的流程。然后,用户详细信息视图会提示“您确定要删除此项吗?”在单击删除视图中存在的“删除”按钮后,如图 1.10 所示。当我们单击用户列表中的“删除”按钮时,它会发出一个 HttpGet 请求,该请求调用 DeleteUser() 操作方法,该方法显示删除视图,然后单击视图中的“删除”按钮,一个 HttpPost 请求将调用 ConfirmDeleteUser() 操作方法,该方法删除该用户。以下是DeleteUser.cshtml的代码片段。
@model Ioc.Web.Models.UserModel

@{
    ViewBag.Title = "Delete User";
}

<div class="book-example panel panel-primary">
    <div class="panel-heading panel-head">Delete User</div>
    <div class="panel-body">
        <h3>Are you sure you want to delete this?</h3>
        <h1>@ViewBag.ErrorMessage</h1>
        <div class="form-horizontal">
            <div class="form-group">
                @Html.LabelFor(model => model.FirstName, new { @class = "col-lg-2 control-label" })
                <div class="col-lg-9">
                    @Html.DisplayFor(model => model.FirstName, new { @class = "form-control" })
                </div>
            </div>

            <div class="form-group">
                @Html.LabelFor(model => model.LastName, new { @class = "col-lg-2 control-label" })
                <div class="col-lg-9">
                    @Html.DisplayFor(model => model.LastName, new { @class = "form-control" })
                </div>
            </div>

            <div class="form-group">
                @Html.LabelFor(model => model.UserName, new { @class = "col-lg-2 control-label" })
                <div class="col-lg-9">
                    @Html.DisplayFor(model => model.UserName, new { @class = "form-control" })
                </div>
            </div>

            <div class="form-group">
                @Html.LabelFor(model => model.Email, new { @class = "col-lg-2 control-label" })
                <div class="col-lg-9">
                    @Html.DisplayFor(model => model.Address, new { @class = "form-control" })
                </div>
            </div>

            <div class="form-group">
                @Html.LabelFor(model => model.Address, new { @class = "col-lg-2 control-label" })
                <div class="col-lg-9">
                    @Html.DisplayFor(model => model.Address, new { @class = "form-control" })
                </div>
            </div>

            @using (Html.BeginForm())
            {
                <div class="form-group">
                    <div class="col-lg-2"></div>
                    <div class="col-lg-9">
                        <input type="submit" value="Delete" class="btn btn-danger" />
                        @Html.ActionLink("Back to List", "Index", null, new { @class = "btn btn-success" })
                    </div>
                </div>
            }
        </div>
    </div>
</div>

结论
本文介绍了使用依赖注入实现的控制反转。在此应用程序的用户界面设计中,我使用了 Bootstrap CSS 和 JavaScript。您对此文章有什么看法?请提供您的反馈。