
简化 MEF:动态加载 Silverlight .xap
4.94/5 (35投票s)
如何使用托管可扩展性框架(Managed Extensibility Framework)以视图模型样式(View Model Style)动态加载 Silverlight .XAP

MEF 简化版:使用托管可扩展性框架(Managed Extensibility Framework)动态加载 Silverlight .XAP
实时示例: http://silverlight.adefwebserver.com/dynamicMEF
关于 托管可扩展性框架 (MEF) 的文档描述其目的为“……简化可扩展应用程序的创建”。这是一个非常宽泛的陈述。这就像将核物理描述为“物理学领域中研究原子核的组成和相互作用的学科”。在某些方面,MEF 对编程的强大作用就像核物理对科学的作用一样。
然而,对于“普通人”来说,核物理之所以重要,仅仅是因为它能在你按开关时点亮灯。对于 MEF,我们将用它来简单地加载一个包含 Silverlight 应用程序的 .xap 文件。相信我,它能做的远不止这些,但 MEF 目前的状态就像几年前的 Visual State Manager 一样,功能强大但难以使用,所以你可能会在实现其其他功能之前,等待更高级的工具出现。
一个快速简单的胜利——献给那些难以理解 MEF 的朋友

你可能听说过 MEF 及其伟大之处。然而,你可能会觉得它有些令人困惑且难以理解。不要害怕。本文就是为你准备的!我们的目标是让你获得一个快速简单的胜利。你将能够理解它。你将能得到一些可以使用的东西,并且你可以告诉你同事:“MEF?是的,我正在使用它,非常好。”
朋友们的帮助——Glenn Block 和 Davide Zordan
本文涵盖了 Glenn Block 和 Davide Zordan 的资料和代码。在读完本文后,你一定要阅读他们的文章,因为他们深入探讨了 MEF 的更多功能。本文的区别在于,我们将一步步地进行讲解,并且我们会对所有内容使用 视图模型样式(View Model Style)。
如果你是第一次接触视图模型样式(View Model Style),建议你阅读 Silverlight View Model Style : An (Overly) Simplified Explanation 以获得入门介绍。
应用程序
首先,让我们一步步地看看完成后的应用程序。
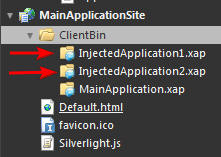
首先,我们将两个 Silverlight 应用程序添加到主 Silverlight 项目的 Web 项目的 **ClientBin** 目录中。

当你启动主 Silverlight 项目时,你可以从下拉列表中选择一个 Silverlight .xap 文件,然后点击加载按钮。
该 .xap 文件将被动态加载。
创建“注入式” Silverlight 应用程序

我们将首先创建两个 Silverlight 应用程序。它们将各自生成一个 **.XAP** 文件,该文件将被放置在主 Silverlight 项目的 **ClientBin** 目录中。主 Silverlight 项目随后将动态加载它们并显示它们。

打开 **Microsoft Expression Blend 4**,然后选择 **文件** > **新建项目**(我们使用 **Expression Blend** 是因为它提供了易于创建 **视图模型** 样式控件的模板),当然,所有这些代码也可以在 **Visual Studio** 中工作(我实际上最初是用 **Visual Studio** 编写所有代码的)。

创建一个名为 **InjectedApplication1** 的新 **Silverlight 应用程序**。

在 **项目** 窗口中,右键单击 **引用**,然后选择 **添加引用…**。

导航到
..\Program Files\Microsoft SDKs\Silverlight\v4.0\Libraries\Client\
添加对以下项的引用
- System.ComponentModel.Composition.dll
- System.ComponentModel.Composition.Initialization.dll
(你需要这些引用,以便我们可以向类添加 MEF 属性,从而使应用程序能够被 MEF 识别)。
其他说明
- 只有当你的 Silverlight 应用程序(部分程序集)使用 CompositionInitializer 时,才需要引用 System.ComponentModel.Composition.Initialization.dll。
- 对于部分程序集,你应该将 MEF 引用(和其他共享引用)设置为 CopyLocal = false。
- CopyLocal = false 将减小 XAP 的大小,同时避免重复。

删除 **MainPage.xaml** 页面。

选择 **文件** > **新建项…**。

创建一个名为 **MainPage.xaml** 的带视图模型的用户控件。

打开 **MainPageModel.cs** 文件。
用以下代码替换所有代码:
using System;
using System.Collections.Generic;
using System.Text;
using System.Windows.Data;
using System.ComponentModel;

namespace InjectedApplication1
{
    public class MainPageModel : INotifyPropertyChanged
    {
        public MainPageModel()
        {
            Hello = "Hello From InjectedApplication1";
        }

        #region Hello
        private String _Hello;
        public String Hello
        {
            get { return _Hello; }
            private set
            {
                if (Hello == value)
                {
                    return;
                }

                _Hello = value;
                this.NotifyPropertyChanged("Hello");
            }
        }
        #endregion

        #region INotifyPropertyChanged
        public event PropertyChangedEventHandler PropertyChanged;

        private void NotifyPropertyChanged(String info)
        {
            if (PropertyChanged != null)
            {
                PropertyChanged(this, new PropertyChangedEventArgs(info));
            }
        }
        #endregion
    }
}

打开 **MainPage.xaml.cs**。
用以下代码替换所有代码:
using System.ComponentModel.Composition;
using System.Windows.Controls;

namespace InjectedApplication1
{
    [Export(typeof(UserControl))]
    public partial class MainPage : UserControl
    {
        public MainPage()
        {
            this.InitializeComponent();
        }
    }
}
(注意,我们正在向类添加“[Export(typeof(UserControl))]”属性,以便 MEF 可以识别它)。

打开 **MainPage.xaml**。

在 **对象和时间线** 窗口中单击 **UserControl**。

在 **属性** 中,将 **布局** 的宽度和高度设置为200。

单击 **DataContext** 旁边的新建按钮。

选择 **MainPageModel**,然后单击确定。

- 单击数据选项卡。
- 在数据上下文下,单击并拖动 **Hello: (String)** 到设计表面。
(注意,如果数据上下文为空,请生成项目,关闭 **MainPage.xaml** 并重新打开它)。

文本将显示出来。

在项目选项卡中,选择生成项目。

在你的计算机上的文件管理器中,当你查看
...\InjectedApplication1\InjectedApplication1\Bin\Debug
你会看到
InjectedApplication1.xap
稍后,你将把它拖放到主 Silverlight 应用程序的 **ClientBin** 目录中,以便动态注入。
重复此过程,创建一个名为 **InjectedApplication2** 的另一个 Silverlight 应用程序。
(注意:你可以从以下链接下载 .xap 文件:InjectedApplicationXAPs.zip)

你也可以按 F5 来生成并运行项目。它本质上是一个正常的 Silverlight 项目,只添加了少量的引用、using 语句和属性。
主 Silverlight 应用程序

现在,我们准备创建将使用 MEF 来动态注入我们刚刚创建的两个 Silverlight 应用程序的主 Silverlight 应用程序。

创建一个名为 **MainApplication** 的新 **Silverlight 应用程序 + 网站**。

添加对以下项的引用
- System.ComponentModel.Composition.dll
- System.ComponentModel.Composition.Initialization.dll
- System.Windows.Interactivity
(注意:从 ..\Program Files\Microsoft SDKs\Expression\Blend\Silverlight\v4.0\Libraries\ 获取 System.Windows.Interactivity.dll)。
(注意:System.Windows.Interactivity.dll 用于使行为(稍后使用)生效。它不是 MEF 的一部分)。

删除 **MainPage.xaml** 页面。
创建一个名为 **MainPage.xaml** 的带视图模型的用户控件。

添加一个新文件夹并命名为 **HelperClasses**。
ICommand 支持

向 **HelperClasses** 文件夹添加一个名为 **DelegateCommand.cs** 的类。
用以下代码替换所有代码:
using System.Windows.Input;
using System;

namespace MainApplication
{
    // From http://johnpapa.net/silverlight/5-simple-steps-to-commanding-in-silverlight/
    public class DelegateCommand : ICommand
    {
        Func<object, bool> canExecute;
        Action<object> executeAction;
        bool canExecuteCache;

        public DelegateCommand(Action<object> executeAction, Func<object, bool> canExecute)
        {
            this.executeAction = executeAction;
            this.canExecute = canExecute;
        }

        #region ICommand Members

        public bool CanExecute(object parameter)
        {
            bool temp = canExecute(parameter);

            if (canExecuteCache != temp)
            {
                canExecuteCache = temp;
                if (CanExecuteChanged != null)
                {
                    CanExecuteChanged(this, new EventArgs());
                }
            }

            return canExecuteCache;
        }

        public event EventHandler CanExecuteChanged;

        public void Execute(object parameter)
        {
            executeAction(parameter);
        }

        #endregion
    }
}
这个类使我们能够轻松调用 ICommands。你可以在以下位置找到有关此类的更多信息:http://johnpapa.net/silverlight/5-simple-steps-to-commanding-in-silverlight/。
部署目录服务(复杂内容!)

现在我们开始处理“复杂内容”。我们将创建一个类,该类将按需实际加载 .xap。我们将创建一个接口来定义其方法:**AddXap** 和 **RemoveXap**,然后我们将实现该类(为了简化,我们将两者放在同一个文件中;通常情况下,你会将接口放在单独的文件中)。
向 **HelperClasses** 文件夹添加一个名为 **DeploymentCatalogService.cs** 的类。
用以下代码替换所有代码:
using System;
using System.Collections.Generic;
using System.ComponentModel.Composition;
using System.ComponentModel.Composition.Hosting;
using System.ComponentModel;

namespace MainApplication
{
    // A type from which to derive the contract name that is used to export the
    // type or member marked with this attribute,
    public interface IDeploymentCatalogService
    {
        // The class that will implement this interface will implement these two methods
        void AddXap(string uri, Action<AsyncCompletedEventArgs> completedAction = null);
        void RemoveXap(string uri);
    }

    [Export(typeof(IDeploymentCatalogService))]
    public class DeploymentCatalogService : IDeploymentCatalogService
    {
        private static AggregateCatalog _aggregateCatalog;
        Dictionary<string, DeploymentCatalog> _catalogs;

        public DeploymentCatalogService()
        {
            _catalogs = new Dictionary<string, DeploymentCatalog>();
        }

        public static void Initialize()
        {
            _aggregateCatalog = new AggregateCatalog();
            _aggregateCatalog.Catalogs.Add(new DeploymentCatalog());
            CompositionHost.Initialize(_aggregateCatalog);
        }

        public void AddXap(string uri, Action<AsyncCompletedEventArgs> completedAction = null)
        {
            // Add a .xap to the catalog
            DeploymentCatalog catalog;
            if (!_catalogs.TryGetValue(uri, out catalog))
            {
                catalog = new DeploymentCatalog(uri);

                if (completedAction != null)
                {
                    catalog.DownloadCompleted += (s, e) => completedAction(e);
                }
                else
                {
                    catalog.DownloadCompleted += catalog_DownloadCompleted;
                }

                catalog.DownloadAsync();
                _catalogs[uri] = catalog;
                _aggregateCatalog.Catalogs.Add(catalog);
            }
        }

        void catalog_DownloadCompleted(object sender, AsyncCompletedEventArgs e)
        {
            // Chekcks for errors loading the .xap
            if (e.Error != null)
            {
                throw e.Error;
            }
        }

        public void RemoveXap(string uri)
        {
            // Remove a .xap from the catalog
            DeploymentCatalog catalog;
            if (_catalogs.TryGetValue(uri, out catalog))
            {
                _aggregateCatalog.Catalogs.Remove(catalog);
                _catalogs.Remove(uri);
            }
        }
    }
}
是的,我们可以深入探讨“它如何工作”的细节,但这已在上面的链接中涵盖。如果你想知道“它做什么”,它会将请求的 .xap 加载到一个“目录”中。我们接下来将要介绍的代码会将 .xap 从目录中取出并加载到主 Silverlight 应用程序中。
使用 MEF 动态下载 Silverlight 应用程序

我们现在将创建视图模型。它基本上执行上面图示中的功能。

打开 **MainPageModel.cs**,用以下代码替换所有代码:
using System;
using System.Collections.Generic;
using System.Text;
using System.Windows.Data;
using System.ComponentModel;
using System.Windows.Input;
using System.ComponentModel.Composition;
using System.Windows.Controls;
using System.Linq;
using System.Collections.ObjectModel;

namespace MainApplication
{
    public class MainPageModel : INotifyPropertyChanged, IPartImportsSatisfiedNotification
    {
        private string strSelectedXAP = "";
        public MainPageModel()
        {
            // Set the command properties
            LoadXAPCommand = new DelegateCommand(LoadXAP, CanLoadXAP);
            SetMEFPanelCommand = new DelegateCommand(SetMEFPanel, CanSetMEFPanel);

            // The following line prevents Expression Blend
            // from showing an error when in design mode
            if (!DesignerProperties.IsInDesignTool)
            {
                // This call causes DeploymentCatalogService() to be called
                CompositionInitializer.SatisfyImports(this);
            }

        }

        #region Commanding
        public ICommand LoadXAPCommand { get; set; }

        public void LoadXAP(object param)
        {
            // Get the .xap selected
            ComboBoxItem objComboBoxItem = (ComboBoxItem)param;
            strSelectedXAP = objComboBoxItem.Content.ToString();

            // Have MEF load the .xap
            CatalogService.AddXap(strSelectedXAP);

            // If the .xap is already loaded we need to call this method
            // because OnImportsSatisfied() will not fire
            LoadSelectedModule();
        }

        private bool CanLoadXAP(object param)
        {
            return true;
        }

        public ICommand SetMEFPanelCommand { get; set; }
        public void SetMEFPanel(object param)
        {
            MefPanel = (Panel)param;
        }

        private bool CanSetMEFPanel(object param)
        {
            // Must be a Panel
            return ((param as Panel) != null);
        }
        #endregion

        // Specifies that a property, field, or parameter value should be provided by
        // the System.ComponentModel.Composition.Hosting.CompositionContainer.
        [Import]
        public IDeploymentCatalogService CatalogService { get; set; }

        // Specifies that a property, field, or parameter should be populated with all
        // matching exports by the System.ComponentModel.Composition.Hosting.CompositionContainer.
        [ImportMany(AllowRecomposition = true)]
        public Lazy<UserControl>[] MEFModuleList { get; set; }

        #region IPartImportsSatisfiedNotification Members
        // This fires when a .xap has been loaded
        // If the .xap has already been loaded this will not fire
        public void OnImportsSatisfied()
        {
            LoadSelectedModule();
        }
        #endregion

        #region LoadSelectedModule
        private void LoadSelectedModule()
        {
            // Ensure that we have a Panel to add the .xap to
            if (MefPanel != null)
            {
                // Create a name for the .xap without the ".xap" part
                string strRevisedSelectedXAPName = strSelectedXAP.Replace(".xap", ".");

                // Determine if the .xap is already loaded
                var SelectedMEFModuleInPanel = (from Module in MefPanel.Children.Cast<UserControl>()
                                                where Module.ToString().Contains(strRevisedSelectedXAPName)
                                                select Module).FirstOrDefault();

                // If the .xap is not loaded
                if (SelectedMEFModuleInPanel == null)
                {
                    // Clear the panel
                    MefPanel.Children.Clear();

                    // Get the selected .xap
                    var SelectedMEFModule = (from Module in MEFModuleList.ToList()
                                             where Module.Value.ToString().Contains(strRevisedSelectedXAPName)
                                             select Module).FirstOrDefault();

                    // If the .xap is found
                    if (SelectedMEFModule != null)
                    {
                        // Add the .xap to the main page
                        MefPanel.Children.Add(SelectedMEFModule.Value);
                    }
                }
            }
        }
        #endregion

        #region MefPanel
        private Panel _MefPanel;
        public Panel MefPanel
        {
            get { return _MefPanel; }
            private set
            {
                if (MefPanel == value)
                {
                    return;
                }

                _MefPanel = value;
                this.NotifyPropertyChanged("MefPanel");
            }
        }
        #endregion

        #region INotifyPropertyChanged
        public event PropertyChangedEventHandler PropertyChanged;

        private void NotifyPropertyChanged(String info)
        {
            if (PropertyChanged != null)
            {
                PropertyChanged(this, new PropertyChangedEventArgs(info));
            }
        }
        #endregion
    }
}

上面图示展示了视图模型的类视图。
我们已经达到了“复杂内容”的顶峰。接下来的内容就比较简单了。本文末尾的链接将完整解释上面的代码如何工作。一般的解释包含在代码注释中。
视图(UI)

打开 **MainPage.xaml**。

切换到 **XAML 视图**。
用以下代码替换所有代码:
<UserControl
xmlns="http://schemas.microsoft.com/winfx/2006/xaml/presentation"
xmlns:x="http://schemas.microsoft.com/winfx/2006/xaml"
xmlns:local="clr-namespace:MainApplication"
xmlns:i="http://schemas.microsoft.com/expression/2010/interactivity"
x:Class="MainApplication.MainPage"
UseLayoutRounding="True"
Width="640" Height="480">
<UserControl.Resources>
<local:MainPageModel x:Key="MainPageModelDataSource" />
</UserControl.Resources>
<Grid x:Name="LayoutRoot" DataContext="{Binding Source={StaticResource MainPageModelDataSource}}">
<TextBlock HorizontalAlignment="Left" Height="40" Margin="8,8,0,0" TextWrapping="Wrap" Text="Main Page"
VerticalAlignment="Top" Width="168" FontSize="32" Foreground="#FFC82929"/>
<Button Content="Load" HorizontalAlignment="Right" Height="24" Margin="0,24,144,0"
VerticalAlignment="Top" Width="96" />
<StackPanel x:Name="MEFContent" Margin="12,56,16,16"/>
<ComboBox x:Name="comboBox" VerticalAlignment="Top" Margin="192,28,256,0" SelectedIndex="0">
<ComboBoxItem Content="InjectedApplication1.xap"/>
<ComboBoxItem Content="InjectedApplication2.xap"/>
</ComboBox>
</Grid>
</UserControl>

切换回设计视图,你将看到 UI。
连接起来!——面板
我们需要通过注册堆积面板(StackPanel)作为注入 Silverlight 应用程序的位置,以及加载按钮来加载 Silverlight 应用程序,来连接视图和视图模型。

获取一个InvokeCommandAction行为。

将其拖放到对象和时间线窗口中的LayoutRoot上。

在行为的属性中:
- 选择Loaded作为EventName(这意味着该行为将在应用程序启动时运行)。
- 单击常用属性下的Command旁边的数据绑定图标。

选择 **SetMEFPanelCommand**,然后单击确定。

为CommandParameter选择高级选项(现在我们需要明确指定要将 Silverlight 应用程序放置在哪个 Panel 元素内)。

选择数据绑定...。

在Element Property选项卡中选择MEFContentStackPanel,然后单击确定。
连接起来!——加载按钮

将一个InvokeCommandAction行为拖放到[Button]上。

在行为的属性中:
- 选择Click作为EventName(当点击加载按钮时,该行为将运行)。
- 单击常用属性下的Command旁边的数据绑定图标。

绑定到 **LoadXAPCommand**。

为CommandParameter选择高级选项,然后选择Element Property Binding...。

在对象和时间线窗口中单击comboBox。

在comboBox 的属性下拉列表中选择SelectedItem,然后单击确定。

上面的图示显示了现在连接的内容。
还有一件事——初始化DeploymentCatalogService

打开 **App.xaml.cs** 文件。
将 Application_Startup 方法更改为:
    private void Application_Startup(object sender, StartupEventArgs e)
    {
        DeploymentCatalogService.Initialize();
        this.RootVisual = new MainPage();
    }
我们需要添加“DeploymentCatalogService.Initialize()”代码来初始化DeploymentCatalogService,使其能够工作。
添加 Silverlight 应用程序

当你在项目窗口中查看网站项目时,你只会看到 MainApplication.xap 文件在 **ClientBin** 目录中。
将 InjectedApplication1.xap 和 InjectedApplication2.xap 文件拖放到该目录中。
按 F5 来生成并运行应用程序。
你将能够动态加载每个应用程序。
为什么要使用 MEF 来动态加载 Silverlight 应用程序?
还有其他方法可以动态加载 Silverlight .xap。我有一个项目(Introducing SilverlightDesktop.net)可以做到这一点。我遇到的问题是处理项目依赖项。例如,如果你从 Silverlight Control Toolkit 中使用控件,它将无法正常工作。MEF 可以解析任何依赖项。这一点在使用视图模型样式(View Model Style)时非常重要。设计师可以添加许多自定义行为和其他依赖项。
这是一个使用 MEF 的例子,它比使用替代方法(提供相同强大的功能)需要更少的代码。MEF 的难点在于将正确的属性放在正确的位置并正确设置它们的值。希望本教程提供了一个有用的示例。
MEF 还有更多功能
MEF 的功能远不止于此,这个简单的例子几乎是对该技术的一种轻视。然而,我完全预计 Microsoft 会创建更多工具和示例代码,以使它在未来更容易实现其其他功能。
特别感谢 Glenn Block 对本文的帮助。
延伸阅读
- MEF 已登陆 Silverlight 4。我们秉承可扩展性的名义而来
http://codebetter.com/blogs/glenn.block/archive/2009/11/29/mef-has-landed-in-silverlight-4-we-come-in-the-name-of-extensibility.aspx - 构建 Hello MEF——第四部分——DeploymentCatalog
http://codebetter.com/blogs/glenn.block/archive/2010/03/07/building-hello-mef-part-iv-deploymentcatalog.aspx - Silverlight 4、MEF 和 MVVM:MEFModules、动态 XAP 加载和导航应用程序
http://blog.answermyquery.com/2010/04/silverlight-4-mef-and-mvvm-mefmodules-dynamic-xap-loading-and-navigation-applications/