
使用 Windows Azure 的电器自动化 - 一个 IoT 项目
随时随地控制家用电器。
目的
从世界任何地方控制家用电器
硬件和软件要求
- 迷你电脑 - 我们可以使用 Arduino 板 / Raspberry Pi / Minix neo z64 迷你电脑
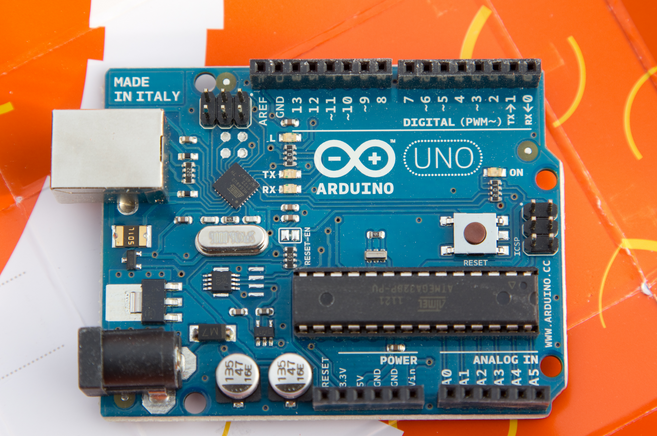 照片 由 Nick Hubbard / CC BY
 图片来源:Minix.com.hk
 - 兼容 Insteon 的家庭自动化设备
- Insteon 2413U 或 2413S 模块
- Insteon 2635-222 开/关模块
 图片来源:tech69.net
- 扬声器
- Azure 云托管订阅
- 互联网连接
- Visual Studio 2010
引言
在本文中,我们将通过 ASP.NET MVC 创建的一个小型 API 工具集,探讨通过 HTTP 远程控制家用电器。此外,我们还将使用 SignalR(托管的 Windows 服务)将当前设备状态实时推送到客户端。
我们将通过 Windows 服务控制以下家用电器
1. **风扇** - 开/关,风速调节
2. **灯** - 开/关
3. **空调** - 开/关,温度控制
4. **扬声器** – 开/关,播放/暂停/停止歌曲
计划

我们将创建一个 Windows 服务来控制 Insteon 设备,然后构建一个 SignalR Web 服务来与 Windows 服务交互,最后构建一个移动应用程序来向 Web 服务发送命令,以便我们可以从网络上的任何地方控制设备。
第一部分 构建用于控制 Insteon 设备的 Windows 服务
第二部分 构建用于从 ASP.NET MVC 和 SignalR 向 Windows 服务发送命令的远程控制服务
第三部分 构建用于与 Web API 服务交互的移动 Web 应用程序
实施
首先,我们将只实现灯的开/关控制
第一部分 构建用于控制 Insteon 设备的 Windows 服务
1. 在 Visual Studio 中创建一个新的 .NET 4.0 控制台应用程序项目,并使用 NuGet 包管理器为其添加 TopShelf 的引用(使用 TopShelf,我们可以轻松构建可调试的 Windows 服务)。


2. 添加对 FluentDwelling API dll 文件的引用。通过编程方式与 Insteon 硬件设备交互很容易,因为互联网上的一些伟大灵魂已经创建了 API 结构。我偶然发现了一个名为 FluentDwelling 的优秀项目。
http://soapboxautomation.com/products/fluentdwelling/
3. 我们将在 Windows 服务中托管 SignalR 客户端。
在 NuGet 包管理器控制台中键入以下命令
Install-Package Microsoft.AspNet.SignalR.Client -Version 1.2.2
4. 向 Windows 服务项目添加一个名为 "InsteonService.cs" 的新类。
using System;
using System.Collections.Generic;
using System.Configuration;
using System.Linq;
using System.Text;
using Microsoft.AspNet.SignalR.Client;
using SoapBox.FluentDwelling;
using Topshelf;

namespace IoT.WindowsService
{
    public class InsteonService : ServiceControl
    {
        private static string ServiceUri;
        private static Connection connection;

        //Insteon related
        private static Plm plm = new Plm("COM4");

        public bool Start(HostControl hostControl)
        {
            ServiceUri = ConfigurationManager.AppSettings["ServiceUri"];

            connection = new Connection(ServiceUri, "name=Client");
            connection.Received += connection_Received;
            connection.StateChanged += connection_StateChanged;
            Console.WriteLine("Connecting...");
            connection.Start().Wait();
            string inputMsg;
            while (!string.IsNullOrEmpty(inputMsg = Console.ReadLine()))
            {
                connection.Send(inputMsg).Wait();
            }
            connection.Stop();

            return true;
        }

        static void connection_StateChanged(StateChange state)
        {
            if (state.NewState == ConnectionState.Connected)
            {
                Console.WriteLine("Connected.");
            }
        }
        static void connection_Received(string data)
        {
            //Parse the commands
            //Format:
            //Name,Command,DeviceName(optional),Port(optional)
            string[] command = data.Split(new char[] { ',' }, StringSplitOptions.RemoveEmptyEntries);
            if (command.Length > 0)
                if (command[0].Equals("Server", StringComparison.InvariantCultureIgnoreCase))
                {
                    string commandName = command[1].ToLower();
                    if (command.Length > 2)
                    {
                        string deviceid = command[2];
                        switch (commandName)
                        {
                            case "turnoff":
                                {
                                    plm.Network.X10
                                            .House("A")
                                            .Unit(2)
                                            .Command(X10Command.Off);
                                }
                                break;
                            case "turnon":
                                {
                                    plm.Network.X10
                                            .House("A")
                                            .Unit(2)
                                            .Command(X10Command.On);
                                }
                                break;
                        }
                    }
                    else
                    {
                        switch (commandName)
                        {
                            case "getlist"://not tested
                                {
                                    var database = plm.GetAllLinkDatabase();
                                    string devices = "";
                                    if (!plm.Error)
                                    {
                                        foreach (var record in database.Records)
                                        {
                                            devices += record.DeviceId.ToString();
                                        }
                                    }
                                    else
                                    {
                                        devices += "Error";
                                    }

                                    connection.Send(devices).Wait();
                                }
                                break;
                        }
                    }
                }
        }

        public bool Stop(HostControl hostControl)
        {
            if (connection.State == ConnectionState.Connected)
                connection.Stop();
            return true;
        }
    }
}
5. 在 "Program.cs" 中编写以下代码。
using System;
using System.Collections.Generic;
using System.Linq;
using System.Text;
using Topshelf;
using Topshelf.HostConfigurators;
using Topshelf.ServiceConfigurators;

namespace IoT.WindowsService
{
    class Program
    {
        static void Main(string[] args)
        {
            var host = HostFactory.New(ConfigureHost);
            host.Run();
        }

        private static void ConfigureHost(HostConfigurator x)
        {
            x.Service(ConfigureService);
            x.SetDisplayName("Insteon Service");
            x.SetDescription("Insteon Controller Service");
            x.SetInstanceName("Insteon");
            x.SetServiceName("Insteon");
            x.StartAutomatically();
            x.RunAsPrompt();
        }

        private static void ConfigureService(ServiceConfigurator sc)
        {
            sc.ConstructUsing(() => new InsteonService());

            // the start and stop methods for the service
            sc.WhenStarted((s, hostControl) => s.Start(hostControl));
            sc.WhenStopped((s, hostControl) => s.Stop(hostControl));
        }
    }
}
6. 最后,在 "App.config" 文件的 "AppSettings" 部分,我们需要添加以下代码行。
<add key="ServiceUri" value="http://insteoniot.azurewebsites.net/echo"/>
第二部分 构建用于从 ASP.NET MVC 和 SignalR 向 Windows 服务发送命令的远程控制服务。
1. 我们将在 asp.net mvc4 Web 应用程序中托管 SignalR 服务。
2. 在 Visual Studio 中创建一个新的 asp.net MVC4 项目。


3. 使用包管理器控制台在项目中安装 SignalR 服务器。
Install-Package Microsoft.AspNet.SignalR -Version 1.2.2
4. 在项目中创建一个名为 "SignalR" 的新文件夹,并向项目中添加一个名为 "MyConnection.cs" 的类。
using System;
using System.Collections.Generic;
using System.Linq;
using System.Threading.Tasks;
using System.Web;
using Microsoft.AspNet.SignalR;

namespace IoT.Mobile.SignalR
{
    public class MyConnection : PersistentConnection
    {
        protected override Task OnConnected(IRequest request, string connectionId)
        {
            return Connection.Broadcast(string.Empty);
        }
        protected override Task OnReceived(IRequest request, string connectionId, string data)
        {
            // Broadcast data to all clients
            string msg = string.Format(
                "{0},{1}", request.QueryString["name"], data);
            return Connection.Broadcast(msg);
        }
    }
}
上面的类只是将接收到的所有消息广播给客户端。
第三部分 构建用于与 Web API 服务交互的移动 Web 应用程序。
1. 在先前创建的 MVC4 Web 应用程序中,我们将创建一个名为 "HomeController" 的控制器,然后添加一个名为 "Index.cshtml" 的视图。

视图 "Index.cshtml" 包含用于打开和关闭灯的单选按钮以及用于调用 SignalR 服务的代码。
@{
    ViewBag.Title = "Control Home - IoT Azure";
}
<table class="ui-widget ui-widget-content">
    <tr>
    <td colspan="2" class="ui-widget-header">@ViewBag.Title</td>
    <tr>
        <td style="padding:10px">
            Lights:
        </td>
        <td style="padding:10px">
            <div id="radio">
                <input type="radio" class="radio" id="radio1" name="radio"><label for="radio1">On</label>
                <input type="radio" class="radio" id="radio2" name="radio" checked="checked"><label for="radio2">Off</label>
            </div>
        </td>
    </tr>
</table>
<br/>
<br/>
Debug info:
<ul id="messages"></ul>
@section scripts
{
    <script type="text/javascript">
        function htmlEncode(value) {
            return $("<div/>").text(value).html();
        }

        function addMsg(msg) {
            if (msg != "") {
                $("#messages").append("<li>" + htmlEncode(msg) + "</li>");
            }
        }

        $(function() {
            var connection = $.connection("/echo", "name=Server", true);;

            connection.received(function(data) {
                addMsg(data);
            });
            connection.error(function(err) {
                addMsg("Error: " + err);
            });

            addMsg("Connecting...");
            connection.start(function() {
                addMsg("Connected.");
            });

            //UI
            $("#radio").buttonset();
            $('#radio').change(function () {
                var $this = $('.radio:checked');

                if ($this.attr("id")=="radio1") {
                    connection.send("turnon,com4");
                } else {
                    connection.send("turnoff,com4");
                }
            });
        });
    </script>

}
硬件/软件设置
1. 使用 USB 线将 Insteon 2413U 与 Minix neo z64 Windows 迷你电脑连接。
2. 使用命令行在 Minix Neo z64 Windows 迷你电脑上安装 Windows 服务。
IoT.WindowsService.exe install
3. 使用 Windows Azure 云托管在云中托管移动应用程序。
4. 该网站已发布在:http://insteoniot.azurewebsites.net
参考
1. FluentDwelling:http://soapboxautomation.com/products/fluentdwelling/
2. SignalR 教程:https://codeproject.org.cn/Articles/633378/ASP-NET-SignalR-Basis-Step-by-Step-Part
3. Minix Neo Z64:http://www.minix.com.hk/Products/MINIX-NEO-Z64-WIN-PC.html
4. Insteon 2413U:http://www.amazon.com/Insteon-2413U-PowerLinc-Dual-Band-Interface/dp/B002XA8XNQ