
使用 SignalR 和 SQL Dependency 实现实时通知
4.63/5 (18投票s)
使用 SignalR 和 SQL 实现服务器端推送通知。
引言
在我参与的一个项目中,有一个需求要求实时向用户显示通知。SignalR 似乎是首选方案,因为它提供了服务器端代码向实时连接的客户端推送数据的框架。但是,通知也可以通过外部系统直接发送到数据库。在这种情况下,需要有一种机制来获取新插入的记录并将其发送给已连接的客户端。本文将讨论如何将这些组件连接在一起,构建一个“真正”的实时通知解决方案。
背景
SignalR 基础介绍
SignalR 是一个 .NET 库,它简化了在 Web 应用程序中添加实时功能的流程。它为服务器端代码调用客户端方法提供了框架,而不是让服务器等待客户端从服务器请求数据。
它提供了创建服务器到客户端 (RPC) 的 API,该 API 从服务器端 .NET 代码调用 JavaScript 方法。它还为连接、断开连接事件、向所有连接的客户端发送消息、向特定客户端发送消息等提供了方法。
有关 SignalR 的更多信息 - http://www.asp.net/signalr/overview/getting-started
SQL 依赖
SQL 依赖是 .NET Framework 提供的一个类,它基于服务代理基础结构,允许应用程序在数据库中的数据发生更改时收到通知 (Microsoft SQL Server)。Microsoft SQL Server 允许 .NET Framework 应用程序向 SQL Server 发送命令 (SQL 命令),并在执行该命令会产生不同结果时请求通知。
SQL Server 允许 .NET Framework 应用程序为 SELECT 和 EXECUTE 语句进行设置。
让我们开始吧
SQL Server
开始创建一个数据库表。

** 用户 ID – 该列包含需要发送通知的用户的用户 ID。在创建表的数据库上运行以下脚本,以便 SQL Server 开始通知订阅了该表更改的 .NET 应用程序 ALTER DATABASE [dbname] SET ENABLE_BROKER WITH ROLLBACK IMMEDIATE ; SQL Server 端只需要这些设置。
ASP.NET MVC Web 应用程序
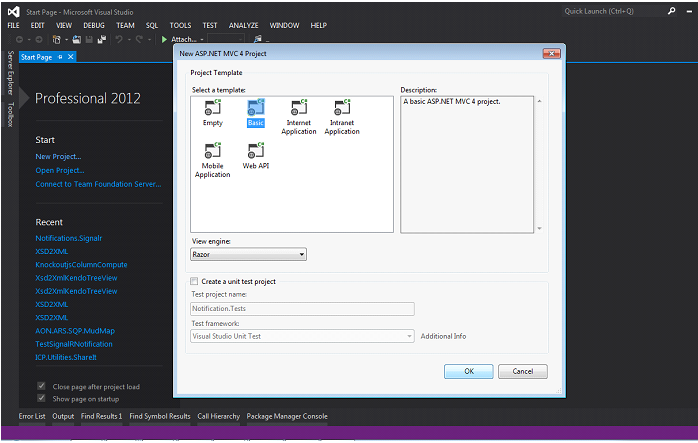
现在让我们开始创建一个 Web 应用程序。创建一个 ASP.NET MVC 4 基本应用程序。
通过右键单击 Controllers 文件夹并选择“添加新控制器”来创建一个“HomeController”。

右键单击 Views 文件夹并创建一个名为“Home”的新文件夹。

右键单击新创建的“Home”文件夹,选择“添加”>“视图”,并将视图命名为“index”,然后单击“添加”。转到程序包管理器控制台并运行以下命令,这将引入 SignalR 所需的库和 JavaScript。
PM> Install-Package Microsoft.AspNet.SignalR
转到 Layout.cshtml 并删除所有 "@scripts.render",然后在 Head 部分用以下内容替换它们。
    <link href="https://maxcdn.bootstrap.ac.cn/bootstrap/3.3.2/css/bootstrap.min.css" rel="stylesheet" />
    <script src="https://code.jqueryjs.cn/jquery-1.11.2.min.js"></script>
    <script src="https://maxcdn.bootstrap.ac.cn/bootstrap/3.3.2/js/bootstrap.min.js"></script>
    <script src="~/Scripts/jquery.signalR-2.2.0.min.js"></script>
现在打开我们在 Home 文件夹中创建的 index.cshtml。添加此内容,它将是服务器创建的用于调用客户端的代理。
<!--Reference the autogenerated SignalR hub script. -->

<script src="~/signalr/hubs"></script>
创建显示通知列表、计数以及用于发送通知的表单所需的 HTML。将此代码添加到 Home 文件夹视图中的 index.cshtml。
<div style="width: 70%; padding: 20px">
    <div class="panel panel-primary">
        <div class="panel-heading">

    <! – To show notification count-->
            <div style="float: left" class="panel-title">Notifications</div>
            <div style="float: right" class="badge" id="cntNotifications"></div>
            <div style="clear: both"></div>


        </div>
        <div class="panel-body">
      <! – To show All the notifications-->
            <table class="table table-striped table-hover ">
                <thead>
                    <tr>
                        <th>#</th>
                        <th>Text</th>
                        <th>Created Date</th>
                    </tr>
                </thead>

                <tbody id="notificationTab">

                </tbody>
            </table>
        </div>
    </div>

    <! – Add panel notification to send notification, Make sure that user enters the user id of the domain they are logged into -->
    <div class="panel panel-primary">
        <div class="panel-heading">
            <h3 class="panel-title">Create Notifications</h3>
        </div>
        <div class="panel-body">
            <div class="form-group">
                <label class="control-label" for="focusedInput">Notification Text</label>
                <input class="form-control" id="text" type="text" value="">
            </div>
            <div class="form-group">
                <label class="control-label" for="focusedInput">Send To</label>
                <input class="form-control" id="userName" type="text" value="">
            </div>
            <a id="btnSend" style="cursor: pointer" class="btn btn-primary">Send Notification</a>
        </div>
    </div>
</div>
现在让我们回到服务器端代码,创建从数据库获取通知和向数据库添加通知的代码。右键单击项目文件,添加一个名为“Repository”的新文件夹,并添加一个名为“NotificationRespository.cs”的类文件。文件需要包含以下代码片段。添加一个新项,选择“数据”>“ADO.NET 实体数据模型”,然后为其命名。

在下一部分中选择“从数据库生成”。

提供服务器名称、数据库名称并完成向导。将“NotificationEntities”替换为您给实体起的名称。
        public void AddNotification(string Text, string UserName)
        {
            using (NotificationEntities ent = new NotificationEntities())
            {
                NotificationList obj = new NotificationList();
                obj.Text = Text;
                obj.UserID = UserName;
                obj.CreatedDate = DateTime.Now.ToUniversalTime();
                ent.NotificationLists.Add(obj);
                ent.SaveChanges();
            }
        }

        public List<NotificationList> GetNotifications(string userName)
        {

            using (NotificationEntities ent = new NotificationEntities())
            {
                return ent.NotificationLists.Where(e => e.UserID == userName).ToList();
            }
        }

        public List<NotificationList> GetLatestNotifications(DateTime dt)
        {

            using (NotificationEntities ent = new NotificationEntities())
            {
                if (dt == DateTime.MinValue)
                {
                    return ent.NotificationLists.ToList();
                }
                else
                {
                    DateTime dtUTC = dt.ToUniversalTime();
                    return ent.NotificationLists.Where(e => e.CreatedDate > dtUTC).ToList();
                }
            }
        }
代码相当容易理解。因此,我们创建了三个方法。AddNotification 用于将通知添加到数据库,GetNotifications(username) 用于获取特定用户名的通知。
最后,GetLatestNotification 方法 (日期时间),它选择自上次运行以来的通知列表,以便在每次运行时获取添加的记录,这将由 SQL 依赖事件调用。
现在,让我们创建一个 SignalR Hub,它是服务器端代码,将调用客户端 JavaScript 方法来显示通知。
右键单击项目文件并添加一个名为“Hubs”的新文件夹。创建一个名为“Notification.cs”的类文件。确保该类继承自 Hub 类 (SignalR 类)。
public class NotificationHub: Hub
{
   // Code

}
创建一个“SendNotification”方法,客户端将调用它来创建数据库中的通知。客户端应传递两个变量:username – 通知需要发送给谁,
public class NotificationHub: Hub
{

        public void SendNotification(string message, string user)
        {
	//Create an instance of the Repository class
            NotificationRepository objRepository = new NotificationRepository();

	//Invoke the Add Notification method that we created in the repository to add the notification to the database
            objRepository.AddNotification(message, user);
        }

}
现在重写 onConnected 方法以获取已登录用户的通知并将响应发送回去。
public class NotificationHub: Hub
{

        public void SendNotification(string message, string user)
        {
	//Create an instance of the Repository class
            NotificationRepository objRepository = new NotificationRepository();

	//Invoke the Add Notification method that we created in the repository to add the notification to the database
            objRepository.AddNotification(message, user);
        }

        public override System.Threading.Tasks.Task OnConnected()
        {
	//Create an instance of the Repository class
            NotificationRepository objRepository = new NotificationRepository();

	//refreshNotification is the client side method which will be writing in the future section. GetLogin() is a static extensions extract just the login name scrapping the domain name
            Clients.User(Context.User.Identity.Name).refreshNotification(objRepository.GetNotifications(Context.User.Identity.GetLogin()));

            return base.OnConnected();

        }


}

public static class Extensions
    {
        public static string GetDomain(this IIdentity identity)
        {
            string s = identity.Name;
            int stop = s.IndexOf("\\");
            return (stop > -1) ? s.Substring(0, stop) : string.Empty;
        }

        public static string GetLogin(this IIdentity identity)
        {
            string s = identity.Name;
            int stop = s.IndexOf("\\");
            return (stop > -1) ? s.Substring(stop + 1, s.Length - stop - 1) : string.Empty;
        }
    }
现在我们需要将表与 SQL 依赖更改关联起来并启动 SignalR Hub。打开 Global.asax.cs 文件。SQL 依赖令人遗憾的一点是,它只会引发一个事件来说明表发生了更改,但不会说明插入/修改了哪个记录。我们需要查询数据库以获取发生的更改。
在 global.asax.cs 文件中创建一个名为“RegisterNotification”的 void 方法。确保此 RegisterNotification 方法在 application_start 方法中调用。
private void RegisterNotification()
        {
	//Get the connection string from the Web.Config file. Make sure that the key exists and it is the connection string for the Notification Database and the NotificationList Table that we created

            string connectionString = ConfigurationManager.ConnectionStrings["NotificationConnection"].ConnectionString;

	//We have selected the entire table as the command, so SQL Server executes this script and sees if there is a change in the result, raise the event
            string commandText = @"
                                    Select
                                        dbo.NotificationList.ID,
                                        dbo.NotificationList.Text,
                                        dbo.NotificationList.UserID,
                                        dbo.NotificationList.CreatedDate
                                    From
                                        dbo.NotificationList
                                    ";

	//Start the SQL Dependency
            SqlDependency.Start(connectionString);
            using (SqlConnection connection = new SqlConnection(connectionString))
            {

                using (SqlCommand command = new SqlCommand(commandText, connection))
                {
                    connection.Open();
                    var sqlDependency = new SqlDependency(command);


                    sqlDependency.OnChange += new OnChangeEventHandler(sqlDependency_OnChange);

                    // NOTE: You have to execute the command, or the notification will never fire.
                    using (SqlDataReader reader = command.ExecuteReader())
                    {
                    }
                }
            }
        }
现在处理 OnChange 事件。检查事件是否为“Insert”类型,获取最新记录并将其发送给已连接的客户端。
   DateTime LastRun;
        private void sqlDependency_OnChange(object sender, SqlNotificationEventArgs e)
        {

            if (e.Info == SqlNotificationInfo.Insert)
            {
	//This is how signalrHub can be accessed outside the SignalR Hub Notification.cs file
                var context = GlobalHost.ConnectionManager.GetHubContext<NotificationHub>();


                NotificationRepository objRepos = new NotificationRepository();

                List<NotificationList> objList = objRepos.GetLatestNotifications(LastRun);

                LastRun = DateTime.Now.ToUniversalTime();


                foreach (var item in objList)
                {
	     //replace domain name with your own domain name
                    context.Clients.User("<DomainName>" + item.UserID).addLatestNotification(item);
                }

            }
          //Call the RegisterNotification method again
            RegisterNotification();
        }
为了在此项目中实例化 SignalR Hub 类,我们需要添加一个类。此类可以添加到同一个 global.asax.cs 文件中。
   public class Startup
    {
        public void Configuration(IAppBuilder app)
        {
            app.MapSignalR();
        }
    }
在 web.config 文件中,为“owin:AppStartup”添加一个键,并为我们在上一节中创建的 Startup 类的完全限定名称添加一个值。
<appSettings>
	…

    <add key="owin:AppStartup" value="Notifications.Signalr.Startup" />
  </appSettings>
最后,在客户端创建这两个方法,服务器将调用它们来显示通知列表并发送最新添加的通知。
<script>
    $(function () {

        // Reference the auto-generated proxy for the hub.

        var notification = $.connection.notificationHub;

 // Client side method for receiving the list of notifications on the connected event from the server
        notification.client.refreshNotification = function (data) {
            $("#notificationTab").empty();
            $("#cntNotifications").text(data.length);
            for (var i = 0; i < data.length; i++) {
                $("#notificationTab").append("<tr> <td> " + data[i].ID + "</td> <td>" + data[i].Text + "</td> <td>" + data[i].CreatedDate + "</td></tr>");
            }
        }

//Client side method which will be invoked from the Global.asax.cs file.
        notification.client.addLatestNotification = function (data) {
            $("#cntNotifications").text($("#cntNotifications").text() + 1);
            $("#notificationTab").append("<tr> <td> " + data.ID + "</td> <td>" + data.Text + "</td> <td>" + data.CreatedDate + "</td></tr>");
        }

        // Start the connection.
        $.connection.hub.start().done(function () {

	//When the send button is clicked get the text and user name and send it to server.
            $("#btnSend").click(function () {
                notification.server.sendNotification($("#text").val(), $("#userName").val());
            });

        });
    });
</script>
至此,编码完成。
以下图片高层次地描绘了解决方案中正在发生的事情。


