
C# 中简单可重用的仅数字文本框(V2)(附带分步指南和初学者解释)
4.43/5 (5投票s)
本文介绍了如何创建一个可重用的仅数字文本框,该文本框*永远*只包含数字。您甚至可以切换它是否应包含负数!
引言
几周前,我在这里发布了一个仅数字文本框的概念。这个想法不错,但设计并非完美无缺。现在,我决定弥补我的错误并重新设计。我将一步一步地向您展示如何设置一个可重用的控件。
背景
此解决方案将在激活 `TextChanged` 事件后检查 `Textbox.Text` 属性的所有字符。这可能会比其他解决方案占用稍多的资源(尤其是在您的 `Textbox` 包含大量文本时),但可以确保文本始终干净且随时可供处理,即使粘贴了多个字符。
我使用一个带有文本框的 `UserControl` 来使此控件可以在您的所有项目中都可用。
使用代码(初学者分步指南)
这是初学者友好指南。如果您更有经验,只是在寻找代码,请向下滚动到“使用代码(面向有经验者)”。
首先,我们将创建一个新的 `UserControl`,以便以后可以在其他项目中使用此文本框。
然后,`UserControl` 将包含用户可以与之交互的文本框。
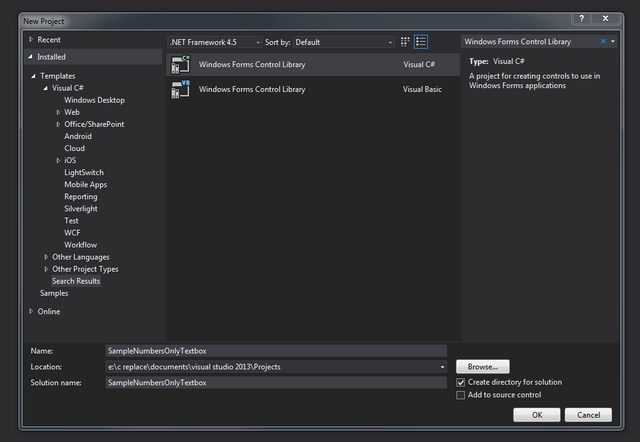
在 Visual Studio 中,创建一个新项目。确保已选择“模板”,然后搜索“Windows Forms 控件库”并选择 Visual C# 预设。为您的控件命名,然后单击“确定”。
现在您进入了设计器。单击空白区域,然后在属性中将您的控件重命名为“NumTextBox”之类的名称。之后,按 F7 一次进入代码。
为此,您需要以下 using 指令
using System;
using System.Collections.Generic;
using System.ComponentModel;
using System.Windows.Forms;
using System.Windows.Forms.Design;
现在,我们需要添加一个额外的引用。在解决方案资源管理器中,右键单击“引用”并选择“添加引用”。确保在左侧选择“程序集” -> “Framework”,然后搜索 `System.Design`。选中它前面的复选框,然后点击“确定”。
尺寸
现在,我们需要做一些技术性工作。在 `public partial class [your control's name] : UserControl` 的上方,添加此内容
[Designer(typeof(CustomSizeDesigner))]
然后,在您的类下方但仍在命名空间内,添加另一个内部类
internal class CustomSizeDesigner : ControlDesigner
{
    CustomSizeDesigner()
    {
        base.AutoResizeHandles = true;
    }

    public override SelectionRules SelectionRules
    {
        get
        {
            return SelectionRules.LeftSizeable | SelectionRules.RightSizeable | SelectionRules.Moveable;
        }
    }
}
再多一步:在您的类中,添加以下方法
protected override void SetBoundsCore(int x, int y, int width, int height, BoundsSpecified specified)
{
    height = 22;
    base.SetBoundsCore(x, y, width, height, specified);
}
这些内容将确保我们的 `UserControl` 始终具有 22 的 `Height`(像文本框一样),因此它不会覆盖其他任何内容。您现在可以折叠 `internal class`,因为我们不需要再次编辑它。
为了完成这个,我们需要再做一件事。`TextBox` 还没有缩放其 `Width`,所以我们要添加这个。回到设计器,选择空白区域,然后在属性窗口中,单击小闪电图标。在下面的列表中,搜索 `ControlAdded` 并双击它。VS 将生成一个新函数并显示给您。在函数头中,请确保将 `ControlEventArgs e` 更改为 `EventArgs e`。现在,写下以下内容
originalTextBox.Width = this.Width;
originalTextBox.Height = 22;
`originalTextBox` 将被标红,但我们稍后会解决这个问题。这基本上是为了确保我们的 `TextBox` 的大小正确。为了确保 `TextBox` 在运行时 `UserControl` 缩放时也能缩放,请返回设计器,再次单击空白区域和闪电图标,搜索 `Resize`,选择其右侧的字段,单击小箭头并选择 `[your control's name]_ControlAdded`,就完成了。
实际的 TextBox
现在我们有了框架,我们将添加我们控件的核心部分:用户可以与之交互的 `TextBox`。在您的类顶部,声明两个新变量
private bool acceptsNegative;
private TextBox originalTextBox = new TextBox();
第一个 `bool` 将决定您的 `TextBox` 是否允许在数字前面带有减号。第二个变量将是我们的 `TextBox`。
接下来,我们将添加一个 `AcceptsNegative` 属性,它允许我们在 `TextBox` 中允许或禁止负数。将以下代码添加到您的类中
[Description("Determines if the textbox will accept negative numbers."),Category("Input")]
public bool AcceptsNegative
{
    get { return acceptsNegative; }
    set { acceptsNegative = value; }
}
`[Description]` 标签添加了一些将在设计器中显示的信息,而 `get` 和 `set` 语句用于读取和更改上面的 `acceptsNegative` bool。
现在,我们需要为我们 `TextBox` 的 `Text` 属性做同样的事情,以便稍后可以在代码中访问它
[Description("The Text of the textbox"),Category("Data")]
public string Text
{
    get { return originalTextBox.Text; }
  set { originalTextBox.Text = value; }
}
这只是将我们 `TextBox` 的 `Text` 属性“转发”到我们 `UserControl` 的一个属性。
下一步是实际将我们的 `TextBox` 添加到 `UserControl` 中。查找以下构造函数(它是自动生成的)
public NumTextBox()
{
    InitializeComponent();
}
当您的控件被添加到您以后可能使用的窗体时,将调用此构造函数。所以这是引入我们的 `TextBox` 的绝佳场所。只需添加以下两行
originalTextBox.TextChanged += originalTextBox_TextChanged;
this.Controls.Add(originalTextBox);
第一行将添加一个 `EventHandler`,该 `EventHandler` 将在您更改 `TextBox` 中的文本后立即调用 `originalTextBox_TextChanged` 方法。我们还没有创建 `originalTextBox_TextChanged` 方法,所以它将被标红,但您可以忽略它。第二行将 `TextBox` 添加到我们的控件中,因此稍后会显示出来。现在只剩最后一步了:创建实际使我们的 `TextBox` 成为仅数字 `TextBox` 的方法。
如果 VS 还没有为您完成,请创建 `originalTextBox_TextChanged` 函数并填充如下内容
void originalTextBox_TextChanged(object sender, EventArgs e)
{
    string text = originalTextBox.Text;
    int selectionIndex = originalTextBox.SelectionStart;
    List<char> invalidTokens = new List<char>();

    foreach (char c in text)
    {
        if (!Char.IsNumber(c))
        {
            if (!invalidTokens.Contains(c))
                invalidTokens.Add(c);
        }
    }

    if (invalidTokens.Count > 0)
    {
        foreach (char c in invalidTokens)
        {
            if (c == '-' && acceptsNegative)
            {
                int index;
                while (true)
                {
                    index = text.LastIndexOf(c);
                    if (index == 0 || index == -1)
                        break;
                    else
                        text = text.Remove(index, 1);
                }
            }
            else
                text = text.Replace(c.ToString(), string.Empty);
        }

        originalTextBox.TextChanged -= originalTextBox_TextChanged;
        originalTextBox.Text = text;
        originalTextBox.TextChanged += originalTextBox_TextChanged;

        if (originalTextBox.Text.Length > selectionIndex)
            originalTextBox.SelectionStart = selectionIndex;
        else
            originalTextBox.SelectionStart = originalTextBox.Text.Length;
    }
}
工作原理
我们将一步一步地介绍。首先,我们将 `TextBox` 的 `Text` 保存到一个名为 `text` 的新 `string` 中。然后,我们保存文本编辑光标的位置。最后但同样重要的是,我们创建一个名为 `invalidTokens` 的新 `List
循环完成后,我们检查是否有任何无效字符被添加到我们的 `List
完成删除所有无效字符后,我们的 `string` 现在是干净的,我们可以将其放入我们的 `TextBox` 中。首先,我们删除 `EventHandler`,这样函数就不会调用自身(以节省一些资源),然后我们将 `TextBox` 的 `Text` 属性设置为我们清理过的 `string`,之后,我们再次添加 `EventHandler`,这样下次 `Text` 属性更改时,它将再次被清理。
最后一步是正确放置光标。首先,我们检查 `Text` 是否长于光标所在的位置(您懂我的意思)。如果是,我们将光标放置在它之前的位置。如果不是,`Text` 现在比以前短了,光标会“超出” `Text`(并引发错误),所以我们只将其放在末尾,这是最接近原始位置的位置。
使用代码(面向有经验者)
创建一个自定义 `UserControl` 并添加 `System.Design` 作为引用。确保根据您的 `UserControl` 的名称编辑类名。
这是代码
using System;
using System.Collections.Generic;
using System.ComponentModel;
using System.Windows.Forms;
using System.Windows.Forms.Design;

namespace SampleNumbersOnlyTextbox
{
    [Designer(typeof(CustomSizeDesigner))]
    public partial class NumTextBox: UserControl
    {
        private bool acceptsNegative;
        private TextBox originalTextBox = new TextBox();

        public NumTextBox()
        {
            InitializeComponent();
            originalTextBox.TextChanged += originalTextBox_TextChanged;
            this.Controls.Add(originalTextBox);
        }

        void originalTextBox_TextChanged(object sender, EventArgs e)
        {
            string text = originalTextBox.Text;
            int selectionIndex = originalTextBox.SelectionStart;
            List<char> invalidTokens = new List<char>();

            foreach (char c in text)
            {
                if (!Char.IsNumber(c))
                {
                    if (!invalidTokens.Contains(c))
                        invalidTokens.Add(c);
                }
            }

            if (invalidTokens.Count > 0)
            {
                foreach (char c in invalidTokens)
                {
                    if (c == '-' && acceptsNegative)
                    {
                        int index;
                        while (true)
                        {
                            index = text.LastIndexOf(c);
                            if (index == 0 || index == -1)
                                break;
                            else
                                text = text.Remove(index, 1);
                        }
                    }
                    else
                        text = text.Replace(c.ToString(), string.Empty);
                }

                originalTextBox.TextChanged -= originalTextBox_TextChanged;
                originalTextBox.Text = text;
                originalTextBox.TextChanged += originalTextBox_TextChanged;

                if (originalTextBox.Text.Length > selectionIndex)
                    originalTextBox.SelectionStart = selectionIndex;
                else
                    originalTextBox.SelectionStart = originalTextBox.Text.Length;
            }
        }

        [Description("Determines if the textbox will accept negative numbers."), Category("Input")]
        public bool AcceptsNegative
        {
            get { return acceptsNegative; }
            set { acceptsNegative = value; }
        }

        [Description("The Text of the textbox"),Category("Data")]
    public string Text
    {
      get { return originalTextBox.Text; }
      set { originalTextBox.Text = value; }
    }

        protected override void SetBoundsCore(int x, int y, int width, int height, BoundsSpecified specified)
        {
            height = 22;
            base.SetBoundsCore(x, y, width, height, specified);
        }

        private void NumTextBox_ControlAdded(object sender, EventArgs e)
        {
            originalTextBox.Width = this.Width;
            originalTextBox.Height = 22;
        }
    }

    internal class CustomSizeDesigner : ControlDesigner
    {
        CustomSizeDesigner()
        {
            base.AutoResizeHandles = true;
        }

        public override SelectionRules SelectionRules
        {
            get
            {
                return SelectionRules.LeftSizeable | SelectionRules.RightSizeable | SelectionRules.Moveable;
            }
        }
    }
}
自定义 NumTextBox
当然,您可能希望编辑例如 `NumTextBox` 的外观或功能。只要它是一个普通 `TextBox` 的属性,您就可以轻松地添加一个选项来编辑 `NumTextBox` 的任何属性。我在这里以 `BorderStyle` 属性为例。
您只需要在(您的类中)创建一个新的属性,像这样,并将 `get` 和 `set` 设置为文本框
[Description("Sets the BorderStyle of your TextBox"),Category("Appearence")]
public BorderStyle TextBoxBorderStyle
{
    get { return originalTextBox.BorderStyle; }
   set { originalTextBox.BorderStyle = value }
}
在设计器中,这现在将显示为您的 `UserControl` 的属性,您也可以在运行时编辑此属性。您可以为 `TextBox` 的每个属性执行此操作。
将 NumTextBox 包含在 WinForms 应用程序中
现在您的 `UserControl` 已完成,您可以尝试一下,方法是单击“启动”按钮(调试时不要忘记将 `AcceptsNegative` 设置为 `true` 以便能够输入负数)。如果您想将 `NumTextBox` 包含到其他项目中,例如您的 `WinForms` 应用程序,我们需要将其包含在那里。我们将使用 `.dll 文件`,这样您就不需要在每次想使用 `UserControl` 时都导入整个项目。
首先,请在 `Release` 模式而非 `Debug` 模式下运行您的 `UserControl` 一次。只需按“启动”然后关闭它。
现在,在解决方案资源管理器中,右键单击您的解决方案(它被称为 `Solution '[your solution's name]'`),然后选择“在文件资源管理器中打开文件夹”。然后打开最顶层的文件夹,导航到 `bin` -> `Release`,然后将 `.dll 文件` 复制到剪贴板。然后您可以将其粘贴到任何地方,例如放在桌面上或您的 .dll 集合中(如果您有一个)。
现在您可以关闭解决方案并打开任何其他 `WinForms` 项目。转到 `Toolbox`,在任何地方右键单击并选择“选择项...”。等待列表加载,单击“浏览...”,选择您的 `.dll`,然后完成时点击“确定”。现在您将在工具箱中拥有 `NumTextBox`,您可以将其轻松地拖到您的窗体上并使用它。
玩得开心!
注意:我发布了现成的示例项目。欢迎下载并在任何地方使用。