
使用 ng-template、ngTemplateOutlet 和 ngTemplateOutletContext 构建 Angular 可重用组件
0/5 (0投票)
学习如何创建可重用组件
引言
最近,我在项目中遇到一个有趣但非常常见的问题,促使我写了这篇文章。
问题是这样的:我有一个可重用的数据表*dumb* 组件,我想在我的应用程序中共享它,并且要求可以从它的父组件进行配置。也就是说,父组件可以配置其行的模板,并决定每个单元格的 HTML 应该是什么样子。事实证明,Angular 作为一个很棒的框架,已经为我们提供了正确的工具,使用这些工具我们可以轻松地解决这类问题。
有哪些工具? 😕

嗯,ng-template、ngTemplateOutlet 和 ngTemplateOutletContext 是帮助我创建可重用组件的工具。 我将使用这些工具来演示该组件。
目标
目标是创建一个可以在整个应用程序中共享并由父组件高度配置的可重用组件。

步骤
创建 DataTable 组件
首先,创建一个将在各种组件中共享的共享组件。
DataTable 组件将接受三个输入:一个用于绑定标题,一个用于绑定行数据,一个用于获取每一列的模板。接受 TemplateRef 数组的那个很重要。因为它将被用于配置父组件的每一列的样式和模板。
让我们来看看 DataTable 的组件类。
import { Component, Input, TemplateRef } from '@angular/core';

@Component({
    selector: 'app-data-table',
    templateUrl: './data-table.component.html',
    styleUrls: ['./data-table.component.scss']
})
export class DataTableComponent{

    @Input() rowData : any[];
    @Input() colsTemplate: TemplateRef<any>[];
    @Input() headings: string[];
}
这里没有什么特别的,只是一些虚拟的输入属性。
接下来,创建一个模板来绑定这些属性。
<table class="table">
    <tr>
        <th *ngFor="let heading of headings">
            {{heading}}
        </th>
    </tr>
    <tr *ngFor="let row of rowData">
        <td *ngFor="let col of colsTemplate">
            <ng-template [ngTemplateOutlet]="col" [ngTemplateOutletContext]="{data:row}">
            </ng-template>
        </td>
    </tr>
</table>
此模板是真正魔力发生的地方。 ngTemplateOutlet 用于绑定模板,该模板将由父组件传递/配置。 ngTemplateOutletContext 用于将行数据的作用域绑定到父组件指定的模板。
😅这就是制作共享组件所需的全部内容。接下来,让我们看看如何在父组件中使用此组件。
创建 Employee 组件
现在,创建一个组件,该组件将向 DataTable 组件提供所有必需的输入。
import { Component, OnInit, ViewChild, TemplateRef } from '@angular/core';

@Component({
    selector: 'app-employees',
    templateUrl: './employees.component.html',
    styleUrls: ['./employees.component.scss']
})
export class EmployeesComponent implements OnInit {

    employees = [
        {
            id: 1,
            name: 'Scott',
            designation: 'Dev',
            exp: 4
        },
        {
            id: 2,
            name: 'Billy',
            designation: 'QA',
            exp: 3
        },
        {
            id: 3,
            name: 'Frank',
            designation: 'Lead',
            exp: 8
        },
        {
            id: 4,
            name: 'Alan',
            designation: 'Manager',
            exp: 10
        },
    ];

    headings = [
        'Id',
        'Name',
        'Designation',
        'Experience'
    ];

    @ViewChild('id', { static: true }) id;
    @ViewChild('name', { static: true }) name;
    @ViewChild('des', { static: true }) des;
    @ViewChild('exp', { static: true }) exp;

    cols: TemplateRef<any>[] = [];

    ngOnInit(): void {
        this.cols.push(this.id, this.name, this.des, this.exp);
    }
}
为了简单起见,要显示的数据是硬编码的。这里需要注意的重要一点是,有一个 TemplateRef 数组,并且有四个不同的模板引用被推送到该数组中。看到模板 HTML 后,整个大图将变得清晰。
<h3 class="text-center text-secondary">Employees</h3>

<app-data-table [rowData]="employees"
[colsTemplate]="cols" [headings]="headings">
</app-data-table>

<ng-template #id let-data="data">
    <span class="badge badge-dark">{{data.id}}</span>
</ng-template>

<ng-template #name let-data="data">
    <span class="badge badge-success">{{data.name}}</span>
</ng-template>

<ng-template #des let-data="data">{{data.designation}}</ng-template>
<ng-template #exp let-data="data">
    <div class="progress">
        <div class="progress-bar bg-info" role="progressbar"
        [ngStyle]="{'width' : data.exp*10 + '%'}" aria-valuemin="0"
            aria-valuemax="10">{{data.exp}} years</div>
    </div>
</ng-template>
嗯,这里有四个不同的 ng-template 用于定义不同列的模板('Id'、'Name'、'Designation'、'Experience')。这些模板在组件类中被引用并存储在一个数组中,并作为输入传递给 DataTable 的 colsTemplate 属性。 let-data 是将由 DataTable 本身传递的上下文。因此,创建每一列样式的全部控制权仍然由 employee 组件拥有,而 DataTable 组件正在执行在数据表中呈现列的工作。
让我们看看另一个组件(地址),它也将使用相同的 DataTable 组件,但这次地址组件将根据其要求定义列的模板。
创建 Address 组件
这次不需要在组件中声明 TemplateRef 数组,它将直接从 HTML 模板传递到 DataTable 的输入属性。
import { Component } from '@angular/core';

@Component({
    selector: 'app-address',
    templateUrl: './address.component.html',
    styleUrls: ['./address.component.scss']
})
export class AddressComponent {

    addresses = [
        {
            name: 'Scott',
            country: 'Germany'
        },
        {
            name: 'Billy',
            country: 'Mexico'
        },
        {
            name: 'Frank',
            country: 'Canada'
        },
        {
            name: 'Alan',
            country: 'Sweden'
        }
    ]

    headings = [
        'Name',
        'Country'
    ];
}
此组件几乎不包含任何内容,除了标题和数据。
<h3 class="text-center text-secondary">Address</h3>

<div class="d-flex justify-content-center">
    <div class="w-50 text-center">
        <app-data-table [rowData]="addresses" [colsTemplate]="[name,country]"
                        [headings]="headings">
        </app-data-table>
    </div>
</div>

<ng-template #name let-data="data">
    <div class="border-primary text-primary">{{data.name}}</div>
</ng-template>
<ng-template #country let-data="data">
    <span>🏠 {{data.country}}</span>
</ng-template>
这不是很酷吗😃?为两列声明了两个 ng-template,并且直接传递给 colsTemplate 输入属性。
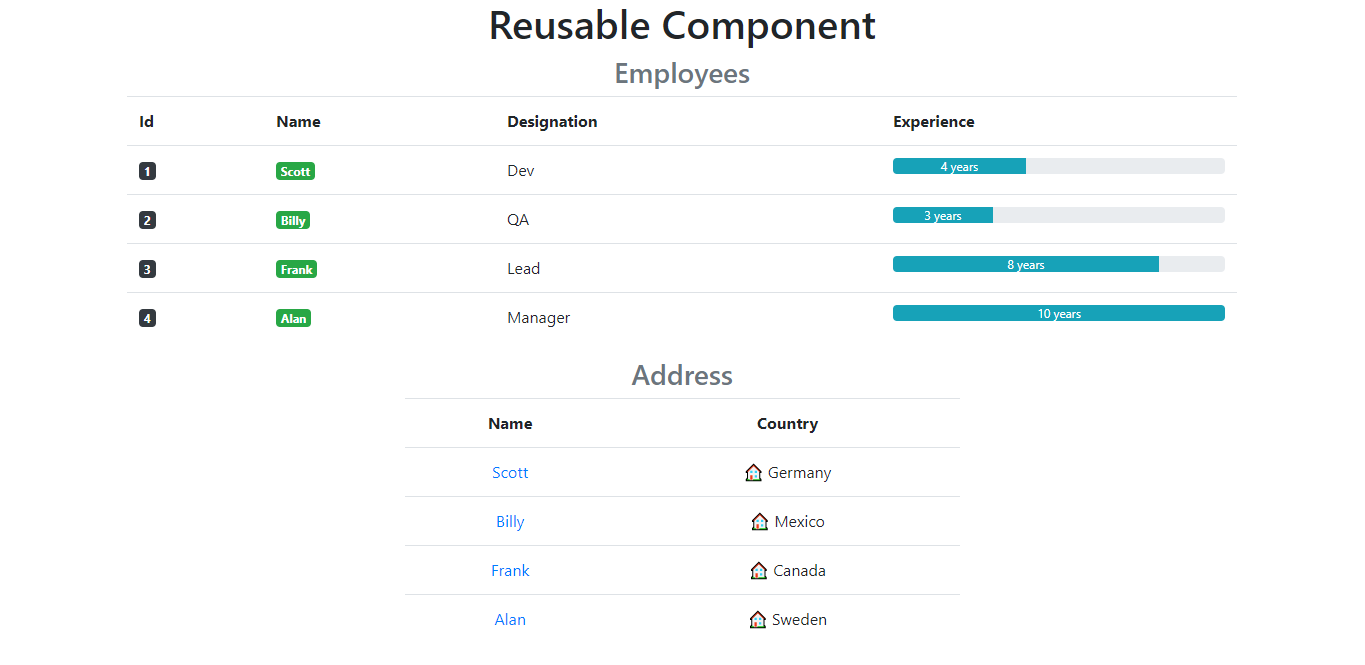
应用程序
让我们看看最终产品是什么样子
源代码
如果您喜欢,可以在 GitHub 上浏览完整的源代码。
祝您编码愉快! 😃
历史
- 2020 年 10 月 13 日:初始版本