
Silverlight 4 OData 分页(使用 RX 扩展)
5.00/5 (6投票s)
Silverlight 4 OData 分页配合 RX 扩展的示例。

Silverlight 4, OData 分页, RX 扩展, 使用 ViewModel
实时示例
本文接续 使用 oData 和 RX 扩展的简单 Silverlight 4 示例 一文的结尾。本文实现了分页功能。它还展示了 Dave Sexton (http://davesexton.com) 创建的一些精巧的RX 扩展代码。然而,令人有些讽刺的是,Dave Sexton 对这段代码并不满意(尽管我认为它完美到可以装裱)。
Dave Sexton 对代码不满的原因是,他认为有更具扩展性的替代写法。他在 此链接 的帖子中提供了替代版本的示例,并进行了详细解释。我写这篇文章的目标是使用“ViewModel 风格”,以最少的代码量实现分页。虽然上一篇文章中的代码可用,但 Dave Sexton 的代码大大减少了代码量,并将 ViewModel 调用 Model 的过程简化为一行代码。
如果您不熟悉ViewModel 风格,建议您阅读 Silverlight ViewModel 风格:一个(过度)简化的解释 以获得入门介绍。
使用 OData 和 RX 扩展的简单 Silverlight 4 示例
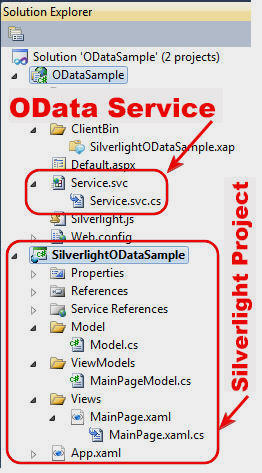
我们从 使用 OData 和 RX 扩展的简单 Silverlight 4 示例 中创建的项目开始。该教程解释了如何创建 OData 服务以及注册 RX 扩展的程序集。
命令
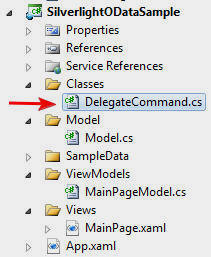
由于我们将启用分页,因此需要从 View(UI)在 ViewModel 中引发一个事件。我们通过命令(Commanding)来实现这一点。为了支持命令,我们将 _DelegateCommand.cs_ 文件添加到项目中。John Papa 在这篇博文中介绍了该文件的使用:http://johnpapa.net/silverlight/5-simple-steps-to-commanding-in-silverlight/。
模型

在 使用 oData 和 RX 扩展的简单 Silverlight 4 示例 教程中,我们创建了一个连接到 OData 服务的 Model。我们将打开它,并用以下代码替换所有代码。
using System;
using System.Collections.ObjectModel;
using System.Data.Services.Client;
using System.Linq;
using SilverlightODataSample.wsSampleCustomerData;

namespace SilverlightODataSample
{
    public class Model
    {
        public static ObservableCollection<customerrecord>
               GetCustomers(int intPage, int intRecordsPerPage)
        {
            // Adapted from code by Dave Sexton http://davesexton.com/
            // From: http://social.msdn.microsoft.com/Forums/
            //     en-US/rx/thread/5b12668e-680f-436d-82e6-ebf1e0be66f5/

            // Collection to hold the final results
            var collection = new ObservableCollection<customerrecord>();

            // Create a URI to the service
            var uri = new Uri(GetBaseAddress(), UriKind.RelativeOrAbsolute);

            // Set-up call to OData WCF Service
            var sds = new SampleDataSource(uri);

            // Compute the CurrentPage
            int CurrentPage = ((intPage * intRecordsPerPage) - intRecordsPerPage);

            // Create the query
            var query = (from data in sds.SampleCustomerData
                         select data).Skip(CurrentPage).Take(intRecordsPerPage);

            // A collection to hold the results that the oData Service will return
            var results = new DataServiceCollection<customerrecord>();

            // A variable to represent the Iobservable event
            var whenLoaded =
              Observable.FromEvent<loadcompletedeventargs>(results, "LoadCompleted");

            // Subscribe to the Event "LoadCompleted" with "disposable" (IObvervable)
            var disposable = whenLoaded.Subscribe(value =>
            {
                // If we have an error, report it
                if (value.EventArgs.Error != null)
                {
                    throw value.EventArgs.Error;
                }
                else
                {
                    // results contains the values
                    foreach (var item in results)
                    {
                        // Add each element from results
                        // to the final collection
                        collection.Add(item);
                    }
                }
            });

            // This actually calls the OData WCF Service
            // And kicks everything off
            results.LoadAsync(query);

            // Return the final collection
            return collection;
        }

        #region GetBaseAddress
        private static string GetBaseAddress()
        {
            // This gets the address of the webservice by
            // getting the AbsoluteUri and then stripping out the
            // name of the .xap file
            string strXapFile = @"/ClientBin/SilverlightODataSample.xap";
            string strBaseWebAddress =
                App.Current.Host.Source.AbsoluteUri.Replace(strXapFile, "");
            return string.Format(@"{0}/{1}", strBaseWebAddress, @"Service.svc");
        }
        #endregion
    }
}
ViewModel

我们还将修改 ViewModel。首先,让我们看看从 ViewModel 调用 Model 所需的代码有多么简单。
#region GetCustomers
private void GetCustomers()
{
    // Fill the colCustomerRecord collection
    colCustomerRecord = Model.GetCustomers(CurrentPage, RecordsPerPage);
}
#endregion
DataGrid(或任何可以容纳 Designer 决定使用的集合的 UI 元素)将使用 colCustomerRecord 作为其源。
#region CustomerRecord
private ObservableCollection<customerrecord> _colCustomerRecord
    = new ObservableCollection<customerrecord>();
public ObservableCollection<customerrecord> colCustomerRecord
{
    get { return _colCustomerRecord; }
    private set
    {
        if (colCustomerRecord == value)
        {
            return;
        }

        _colCustomerRecord = value;
        this.NotifyPropertyChanged("colCustomerRecord");
    }
}
#endregion
此集合是一个 ObservableCollection,因此每当发生更改时,它都会自动更新绑定到它的 UI 元素。
GetCustomers 方法需要请求的页码和每页记录数。我们在 ViewModel 中创建属性来保存这些值。
#region CurrentPage
private int _CurrentPage = 1;
public int CurrentPage
{
    get
    {
        return this._CurrentPage;
    }
    set
    {
        this._CurrentPage = value;
        this.NotifyPropertyChanged("CurrentPage");
    }
}
#endregion

#region RecordsPerPage
private int _RecordsPerPage = 10;
public int RecordsPerPage
{
    get
    {
        return this._RecordsPerPage;
    }
    set
    {
        this._RecordsPerPage = value;
        this.NotifyPropertyChanged("RecordsPerPage");
    }
}
#endregion
接下来,我们创建 ICommand 以允许 View 来回翻页。
#region PreviousPageCommand
public ICommand PreviousPageCommand { get; set; }
public void PreviousPage(object param)
{
    CurrentPage--;
    GetCustomers();
}

private bool CanPreviousPage(object param)
{
    // Must not already be on the first page
    return (CurrentPage > 1);
}
#endregion

#region NextPageCommand
public ICommand NextPageCommand { get; set; }
public void NextPage(object param)
{
    CurrentPage++;
    GetCustomers();
}

private bool CanNextPage(object param)
{
    // There must be records to move to the next page
    return (colCustomerRecord.Count > 0);
}
#endregion
我们还创建了一个 ICommand 来允许设置每页记录数。
#region SetRecordsPerPageCommand
public ICommand SetRecordsPerPageCommand { get; set; }
public void SetRecordsPerPage(object param)
{
    ContentControl Element = (ContentControl)param;
    RecordsPerPage = Convert.ToInt32(Element.Content);
    GetCustomers();
}

private bool CanSetRecordsPerPage(object param)
{
    return (param != null);
}
#endregion
我们实现 INotifyPropertyChanged 以支持属性更改时的自动通知。例如,以便在当前页等属性更改时自动更新 UI。
在这个示例中,它实际上不是必需的,因为唯一绑定到该属性的控件是实际更改该值的控件。但是,如果我们有一个显示当前页的文本框,我们将需要实现这一点来实现自动更新通知。
#region INotifyPropertyChanged
// This is a supporting method to raise a notification for any
// Element that is subscribed to a Property that implements
// NotifyPropertyChanged
public event PropertyChangedEventHandler PropertyChanged;

private void NotifyPropertyChanged(String info)
{
    if (PropertyChanged != null)
    {
        PropertyChanged(this, new PropertyChangedEventArgs(info));
    }
}
#endregion
最后,这是 ViewModel 的构造函数。它设置了 ICommand 并调用 GetCustomers 来加载第一页。
public MainPageModel()
{
    // Set the command properties
    PreviousPageCommand =
      new DelegateCommand(PreviousPage, CanPreviousPage);
    NextPageCommand = new DelegateCommand(NextPage, CanNextPage);
    SetRecordsPerPageCommand =
      new DelegateCommand(SetRecordsPerPage, CanSetRecordsPerPage);

    // Get the Customers
    GetCustomers();
}
创建视图 (View)

我们通过重新创建 View 来完成示例。

在上一篇文章中,它只是加载了第一页。

现在我们添加分页按钮和一个组合框以允许选择每页的记录数。上图显示了各个部分的连接关系。
注意:对于图表,我启用了设计时示例数据。您可以在此文章中了解如何实现:Silverlight MVVM:在使用 Web 服务时在 Expression Blend 中启用设计时数据。
创建 View 的步骤在:使用 oData 和 RX 扩展的简单 Silverlight 4 示例 中已经介绍。但是,按钮和组合框是新的,所以让我们一步步地看看 Designer 将如何实现它们。
分页按钮

使用Expression Blend 4+,我们首先将两个按钮拖到页面上。

接下来,我们将一个 InvokeCommandAction 行为(Behavior)拖到每个按钮上。

在每个行为的属性中,我们将 EventName 选择为 Click,然后点击 Command 旁边的“高级选项”框。

我们选择“数据绑定...”

然后绑定到相应的命令。
组合框

我们也将一个 InvokeCommandAction 行为拖到组合框上。

在行为的属性中,我们将 EventName 设置为 SelectionChanged。

我们将 Command 绑定到 SetRecordsPerPageCommand。

但是,在这种情况下,我们还需要传递选择的记录数,所以我们点击 CommandParameter 旁边的“高级选项”框。

然后我们将 CommandParameter 绑定到 SelectedValue。
“ViewModel 风格”,简单 - 代码量不多
希望您觉得这个示例简单易懂。“ViewModel 风格”可以用于您 100% 的 Silverlight 项目。使用 ViewModel 所需的代码量与仅仅使用代码隐藏(code-behind)所需代码量大致相同。使用 ViewModel 而非代码隐藏的原因是,您可以让完全不懂编程的 Designer 来设计您的 UI。您可能会发现这一点对于制作专业的应用程序至关重要。它也是可测试的,请参见:单元测试 Silverlight ViewModel 风格的模态弹出窗口。
如果您需要更复杂的架构,可以通过添加额外的抽象来实现 MVVM。例如,您不会直接从 Model 调用 OData 服务,而是创建一个“服务类”来实际调用服务并填充 Model。然而,View 不需要做任何更改。