
使用 MapFiles 在 Hadoop Map-Reduce 中实现 Join
3.00/5 (1投票)
在 Map 阶段使用 MapFiles 的 Hadoop Map-Reduce 应用程序中实现 Join
背景
在我之前的文章 在 Hadoop Map-Reduce 中实现 Join 中,我介绍了在 Hadoop 中连接不同来源数据的概念,并提出了在 Map 阶段和 Reduce 阶段执行 Join 的技术。
这一次,我将讨论一种在 Map 阶段进行 Join 的替代技术:使用 MapFiles 进行 Join。在 Map 阶段进行 Join 速度更快,并且使用 MapFiles 克服了在 Map-Reduce 应用程序的 Map 阶段使用 Cache 文件进行 Join 的局限性。
Sequence Files 和 MapFiles
MapFiles 是 Hadoop 中一种支持对存储在 Sequence File 中的数据进行随机访问的 Sequence Files 类型。在继续深入之前,我将解释 Sequence Files。
Hadoop 中的 Sequence Files 直接读写到对象(而不是需要逐行读入 Text,然后在 Mapper 类中填充 Class 实例)。Sequence Files 使用 SequenceFileInputFormat 写入,并使用 SequenceFileOutputFormat 读取。Sequence Files 以二进制格式存储,并且存储在 Sequence Files 中的记录每隔几条记录就有同步标记,因此 Sequence Files 也是可分割的。除此之外,Sequence Files 支持记录级压缩和块级压缩。后者在每个压缩块之间都有同步标记。请查看 此链接 了解更多关于 Sequence Files 的细节。
现在回到 MapFile。
MapFile 有两个部分:
1. 数据 (Data)
Data 文件是实际的 Sequence File,包含键值对形式的数据,并按键排序。Data 文件按键排序的事实由 MapFile.Writer 确保,当使用越序的键调用 MapFile.Writer.append 方法时,它会抛出 IOException。
2. 索引 (Index)
Index 文件是一个较小的 Sequence File,其中包含 Data 文件中部分(或全部)键,按排序顺序排列,并带有键在 Data 文件中数据位置的字节偏移量。这个 Index 文件用于查找数据。
当执行查找时,会查找 Index 文件中的键。如果找到键,则使用字节偏移量从 Data 文件中提取数据;如果未找到确切的键,则使用前一个键(键已排序)的偏移量跳转到 Data 文件中该偏移量,然后顺序遍历找到键,并返回其对应的值。
Index 文件中的键的数量是可配置的,可以使用 setIndexInterval() 方法设置,该方法指定 Index 文件中每个键之间要跳过的键的数量。但是,应谨慎操作,因为值非常小可能会导致 Index 文件过大,这不利于 Map 阶段的 Join。
为了使用 MapFiles,键类应该继承自 WritableComparable 以支持键的排序。
MapFiles 也可以作为 Map-Reduce 程序的输入,使用 SequenceFileInputFormat,该格式会忽略 Index 文件并顺序读取 Data 文件。
请访问 此页面 了解更多关于 MapFiles 的信息。
在 Map 阶段进行 Join 的优势
此时,讨论在 Map-Reduce 应用程序的 Map 阶段而不是 Reduce 阶段进行 Join 的优缺点很重要。其缺点是需要 Join 的文件必须足够小才能放入内存,但使用 MapFiles 克服了这一限制,因为 MapFiles 是可分割的,可以压缩,并且取决于 IndexInterval 的值,它们相对较小。
在 Map 阶段进行 Join 更快,因为它跳过了耗时的排序和 Shuffle 阶段以及 Reduce 阶段。对于仅 Join 所提供数据的作业,如果它们是仅 Map 作业,速度会更快。
此外,由于 MapFiles 是 Sequence Files 的一种,如前所述是可压缩的,这进一步减小了其大小,使其成为 Cache 文件在需要 Join 的数据量相对较大时的合适替代品。这使得即使数据文件较大,也能获得 Map 阶段 Join 的优势。此外,由于 MapFiles 是已排序的,键的查找速度非常快,这一事实使得 MapFiles 非常适合快速 Join 数据。
本示例中实现的场景
我将使用上一篇文章中相同的数据文件,即 Microsoft 的 Adventure Works 数据。用于创建 Adventure Works Database 的 .csv 文件以及脚本文件可以从 此链接 下载。
下载 Adventure Works 2012 OLTP 脚本。在本示例中,使用了 .csv 文件 SalesOrderDetail.csv 和 Products.csv。
Join 操作是在 SalesOrderDetail 数据和 Products 数据之间进行的,并且对于 SalesOrderDetail.csv 文件中的每一条记录,都会输出 Product 名称。这可以看作是以下 SQL 代码:
SELECT SalesOrderId, OrderQty, Product.Name, LineTotal
FROM SalesOrderDetail join Products on SalesOrderDetail.ProductId = Products.ProductId
从上面的 SQL 代码可以看出,本示例中的作业是一个仅 Map 作业。
初始项目设置
我将使用 Eclipse 和 Maven 来创建 Hadoop Map-Reduce 项目。在 Eclipse 中设置 Maven 插件的过程超出了本文的范围。
- 打开 Eclipse,选择 New Project,然后选择 Maven Project。点击 Next。
- 选中复选框。Create a Simple Project.
- 给项目命名。我将使用以下名称:
Group Id: com.example.mapfileexample Artifact Id: MapFileExample Name: MapFileExample - 添加 Hadoop 依赖项。在 Eclipse 中,在项目结构(通常在左侧)中,选择 pom.xml 文件,在 Dependencies 选项卡中,选择 Add 按钮 并输入以下值:
Group Id: org.apache.hadoop Artifact id: hadoop-client Version: 2.5.1 - 创建名为
Driver的类,这是此应用程序的主类。将以下代码粘贴到类中:import java.io.BufferedReader; import java.io.File; import java.io.FileInputStream; import java.io.IOException; import java.io.InputStreamReader; import org.apache.hadoop.conf.Configuration; import org.apache.hadoop.conf.Configured; import org.apache.hadoop.fs.Path; import org.apache.hadoop.io.IntWritable; import org.apache.hadoop.io.MapFile; import org.apache.hadoop.io.SequenceFile; import org.apache.hadoop.io.Text; import org.apache.hadoop.io.MapFile.Writer.Option; import org.apache.hadoop.util.Tool; import org.apache.hadoop.util.ToolRunner; public class Driver extends Configured implements Tool { public int run(String[] allArgs) throws Exception { return 0; } public static void main(String[] args) throws Exception { Configuration conf = new Configuration(); int output = ToolRunner.run(new Driver(), args); } }
创建和填充 MapFile 的代码
可以使用 MapFile.Writer 创建 MapFile。在本示例中,我将使用 FileInputStream 逐行读取 Products.csv 文件,并将其输出到 MapFile,其中 ProductId(第一列)作为键,Name(第二列)作为值。请注意,创建 MapFile 的这部分不在 map-reduce 范围之内,但 MapFile 可以是 MapReduce 作业的输出。
执行此操作的函数是:
private static void CreateMapFile(Configuration conf, String inputFilePath,
String outputFilePath, int keyIndex, int valueIndex) throws IOException {
    Path outputLocation = new Path(outputFilePath);

    Option keyClass = (Option)MapFile.Writer.keyClass(IntWritable.class);
    SequenceFile.Writer.Option valueClass = MapFile.Writer.valueClass(Text.class);
    MapFile.Writer.setIndexInterval(conf, 1);
    MapFile.Writer writer = new MapFile.Writer(conf, outputLocation, keyClass, valueClass);

    File file = new File(inputFilePath);
    FileInputStream fis = new FileInputStream(file);
    BufferedReader br = new BufferedReader(new InputStreamReader(fis));
    String line;
    br.readLine();
    int i = 0;
    while ((line = br.readLine()) != null){
        String[] lineItems = line.split("\\t");
        IntWritable key = new IntWritable(Integer.parseInt(lineItems[keyIndex]));
        Text value = new Text(lineItems[valueIndex]);
        writer.append(key, value);
        i++;
    }
    br.close();
    writer.close();
}
从代码可以看出,该函数接受输入文件路径,并读取 Products.csv 文件,其中值以制表符分隔。我们将 IndexInterval 设置为 1,因为这是一个小文件,并且我们可以拥有大量键在 Index 文件中。
MapFile.Writer 构造函数接受 Configuration 实例、文件要创建的位置,以及用 org.apache.hadoop.io.SequenceFile.Writer.Option 实例包装的键类和值类。请注意,在语句中
Option keyClass = (Option)MapFile.Writer.keyClass(IntWritable.class);
Option 类是 org.apache.hadoop.io.SequenceFile.Writer.Option,它继承自 org.apache.hadoop.io.SequenceFile.Writer.Option 类。
这里,MapFile 的键是 IntWritable 的实例,值是 Text 的实例。接下来,创建 BufferedReader 并逐行读取文件。每行按 Tab (\t) 字符分割,并将第一列作为 key,第二列(名称列)作为 value。最后一步是调用 MapFile.Writer.append 方法将键和值追加到 MapFile。
CreateMapFile 函数可以从 main 调用,如下所示:
createMapFile(conf, "/home/hduser/Desktop/sales_data/Product.csv",
"/home/hduser/Desktop/sales_data/ProductMapFile/", 0, 1);
请注意,此函数不是 Map 阶段的一部分,在作业执行期间不使用。应单独调用此方法来创建 MapFile,尽管我将其保留在 Driver 类中,但保留在此处并非必需。
在扩展 Map 类之前,最后一步是在注释掉对 ToolRunner.run 方法的调用后运行程序,并在 main 方法中调用上述调用。请记住将源文件和目标文件路径替换为您计算机上的实际路径。
运行文件后,打开目标文件夹以查看创建的 Index 和 Data 文件(MapFile 的一部分)。

Mapper (映射器)
在 Mapper 中,读取创建的 Map 文件,并使用 Product Ids 进行查找以获取 Product Names。这些 Product Names 然后从 map 函数输出。名为 MapFileExampleMapper 的 Mapper 类的代码如下:
public static class MapFileExampleMapper extends Mapper<LongWritable, Text, NullWritable, Text>
{
    private MapFile.Reader reader = null;

    public void setup(Context context) throws IOException{
        Configuration conf = context.getConfiguration();
        FileSystem fs = FileSystem.get(conf);
        Path dir = new Path(context.getCacheFiles()[0]);
        this.reader = new MapFile.Reader(fs, dir.toString(), conf);
    }

    private Text findKey(IntWritable key) throws IOException{
        Text value = new Text();
        this.reader.get(key, value);
        return value;
    }

    public void map(LongWritable key, Text value, Context context)
                    throws IOException, InterruptedException{
        String[] values = value.toString().split("\\t");
        IntWritable productId = new IntWritable(Integer.parseInt(values[4]));
        Text productName = findKey(productId);

        context.write(NullWritable.get(), new Text(values[0] + "," +
                      values[3] +  ", " + productName.toString() + " , " + values[8]));
    }

    public void cleanup(Context context) throws IOException{
        reader.close();
    }
}
在 Mapper 类的 setup 方法中检索 Configuration 中设置的 MapFile 位置。setup 方法为每个 Map 任务调用一次。在这里,使用 MapFile.Reader 实例读取 MapFile,该实例提供 get 方法来检索键对应的值。
接下来,在 Mapper 类 map 方法的每次调用中,将 Product Id(SalesOrderDetail.csv 文件中的第四列)传递给 findKey 方法,该方法使用 MapFile.Reader.get 方法搜索每个传递键的对应值。检索到的 Products 名称将成为 Mapper 类的输出的一部分。
run 方法
下一步是 run 方法,它将 reducers 的数量设置为零,因为这是一个仅 Map 作业。如果您之前从 main 调用了 CreateMapFile 方法,也请不要忘记将其删除。
run 方法的代码如下:
public int run(String[] allArgs) throws Exception {
    Job job = Job.getInstance(getConf());
    job.setJarByClass(Driver.class);

    job.setMapperClass(MapFileExampleMapper.class);
    job.setMapOutputKeyClass(NullWritable.class);
    job.setMapOutputValueClass(Text.class);

    job.setInputFormatClass(TextInputFormat.class);
    job.setOutputFormatClass(TextOutputFormat.class);

    String[] args = new GenericOptionsParser(getConf(), allArgs).getRemainingArgs();
    FileInputFormat.setInputPaths(job, new Path(args[0]));
    FileOutputFormat.setOutputPath(job, new Path(args[2]));
    URI[] cacheFileURI = { new URI(args[1]) };
    job.setCacheFiles(cacheFileURI);

    job.setNumReduceTasks(0);

    boolean result = job.waitForCompletion(true);

    if (result)    {
        return 1;
    } else {
        return 0;
    }
}
它将传入的 MapFile 的路径设置为 cache 文件,该文件在 Mapper 类中使用。最后,是时候编译并运行作业了。
在本地模式下运行作业
从 Eclipse 中在本地模式下运行作业:
- 构建项目,然后右键单击 Package Explorer 中的项目,选择 Run as → Run Configurations。
- 右键单击 Java Run Configurations,然后选择 New。
- 为新的配置命名。我称之为
MapFileExampleJava Run config。 - 在 Arguments 选项卡中,在 Program Arguments 字段中输入 SalesOrderDetails.csv 文件的路径、包含 Index 和 Data 文件的 MapFile 文件夹的路径以及输出文件夹的路径。在我的计算机上,如下所示:
/home/hduser/Desktop/sales_data/SalesOrderDetail.csv
/home/hduser/Desktop/sales_data/ProductMapFile
/home/hduser/Desktop/sales_data/mapfileOutput1

- 点击 Apply,然后点击 Run。
- 执行完成后,检查输出。
在集群上运行作业
首先,在 Hadoop 文件系统中为与此示例相关的项创建一个文件夹。我将文件夹命名为 mapfileexample。
hadoop fs -mkdir /hduser/mapfileexample/
接下来,使用 copyFromLocal 命令将 SalesOrderDetail.csv 复制到其中:
hadoop fs -copyFromLocal /home/hduser/Desktop/sales_data/SalesOrderDetail.csv
/hduser/mapfileexample/
接下来,复制 MapFile:
hadoop fs -mkdir /hduser/mapfileexample/ProductMapFile
hadoop fs -copyFromLocal /home/hduser/Desktop/sales_data/ProductMapFile/*
/hduser/mapfileexample/ProductMapFile/

然后,运行作业:
hadoop jar /home/hduser/Desktop/sales_data/MapFileExample-0.0.1-SNAPSHOT.jar Driver
/hduser/mapfileexample/SalesOrderDetail.csv /hduser/mapfileexample/ProductMapFile
/hduser/mapfileexample/output1
最后,将输出复制到本地文件系统,并检查输出。运行以下命令:
hadoop fs -copyToLocal /hduser/mapfileexample/output1/*
/home/hduser/Desktop/sales_data/output/fromCluster/
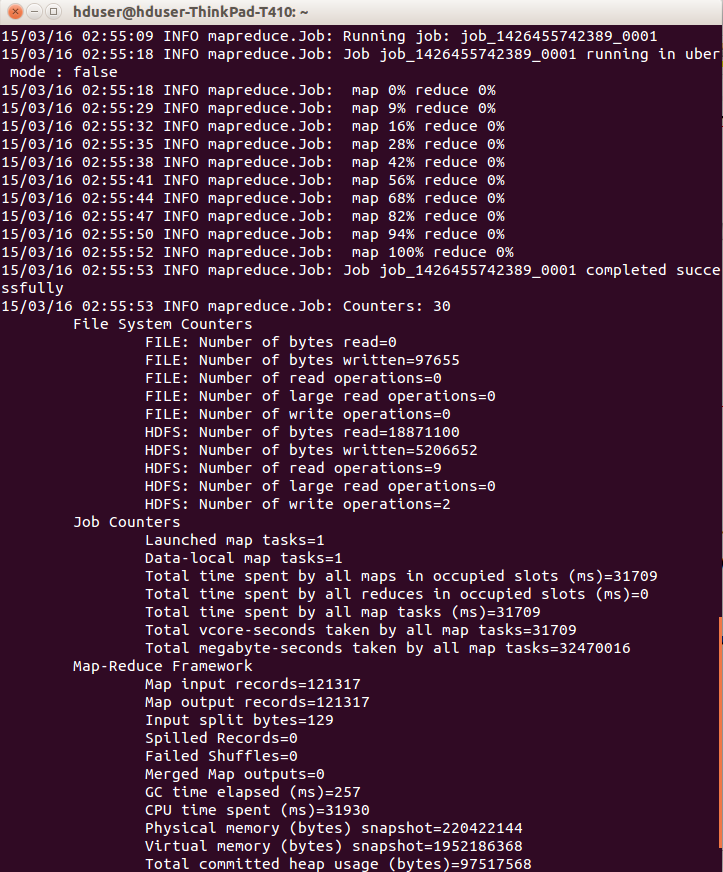
打开 part-m-00000 文件,可以看到每个 Product 的名称都出现在结果输出的每一行中。
最终代码
最终的 Driver.java 文件代码如下:
import java.io.BufferedReader;
import java.io.File;
import java.io.FileInputStream;
import java.io.IOException;
import java.io.InputStreamReader;
import java.net.URI;

import org.apache.hadoop.conf.Configuration;
import org.apache.hadoop.conf.Configured;
import org.apache.hadoop.fs.FileSystem;
import org.apache.hadoop.fs.Path;
import org.apache.hadoop.io.IntWritable;
import org.apache.hadoop.io.LongWritable;
import org.apache.hadoop.io.MapFile;
import org.apache.hadoop.io.NullWritable;
import org.apache.hadoop.io.SequenceFile;
import org.apache.hadoop.io.Text;
import org.apache.hadoop.io.MapFile.Writer.Option;
import org.apache.hadoop.mapreduce.Job;
import org.apache.hadoop.mapreduce.Mapper;
import org.apache.hadoop.mapreduce.lib.input.FileInputFormat;
import org.apache.hadoop.mapreduce.lib.input.TextInputFormat;
import org.apache.hadoop.mapreduce.lib.output.FileOutputFormat;
import org.apache.hadoop.mapreduce.lib.output.TextOutputFormat;
import org.apache.hadoop.util.GenericOptionsParser;
import org.apache.hadoop.util.Tool;
import org.apache.hadoop.util.ToolRunner;

public class Driver extends Configured implements Tool {

    public static class MapFileExampleMapper
           extends Mapper<LongWritable, Text, NullWritable, Text>
    {
        private MapFile.Reader reader = null;

        public void setup(Context context) throws IOException{
            Configuration conf = context.getConfiguration();
            FileSystem fs = FileSystem.get(conf);
            Path dir = new Path(context.getCacheFiles()[0]);
            this.reader = new MapFile.Reader(fs, dir.toString(), conf);
        }

        private Text findKey(IntWritable key) throws IOException{
            Text value = new Text();
            this.reader.get(key, value);
            return value;
        }

        public void map(LongWritable key, Text value, Context context)
                        throws IOException, InterruptedException{
            String[] values = value.toString().split("\\t");
            IntWritable productId = new IntWritable(Integer.parseInt(values[4]));
            Text productName = findKey(productId);

            context.write(NullWritable.get(), new Text(values[0] + "," +
            values[3] +  ", " + productName.toString() + " , " + values[8]));

        }

        public void cleanup(Context context) throws IOException{
            reader.close();
        }
    }

    public int run(String[] allArgs) throws Exception {
        Job job = Job.getInstance(getConf());
        job.setJarByClass(Driver.class);

        job.setMapperClass(MapFileExampleMapper.class);
        job.setMapOutputKeyClass(NullWritable.class);
        job.setMapOutputValueClass(Text.class);

        job.setInputFormatClass(TextInputFormat.class);
        job.setOutputFormatClass(TextOutputFormat.class);

        String[] args = new GenericOptionsParser(getConf(), allArgs).getRemainingArgs();
        FileInputFormat.setInputPaths(job, new Path(args[0]));
        FileOutputFormat.setOutputPath(job, new Path(args[2]));
        URI[] cacheFileURI = { new URI(args[1]) };
        job.setCacheFiles(cacheFileURI);

        job.setNumReduceTasks(0);

        boolean result = job.waitForCompletion(true);

        if (result)
        {
            return 1;
        }
        else
        {
            return 0;
        }
    }

    public static void main(String[] args) throws Exception
    {

        Configuration conf = new Configuration();
        int output = ToolRunner.run(new Driver(), args);

        /*CreateMapFile(conf, "/home/hduser/Desktop/sales_data/Product.csv",
                "/home/hduser/Desktop/sales_data/ProductMapFile/", 0, 1);*/
    }

    private static void CreateMapFile(Configuration conf,
                        String inputFilePath, String outputFilePath,
            int keyIndex, int valueIndex) throws IOException
    {
        Path outputLocation = new Path(outputFilePath);

        Option keyClass = (Option)MapFile.Writer.keyClass(IntWritable.class);
        SequenceFile.Writer.Option valueClass = MapFile.Writer.valueClass(Text.class);
        MapFile.Writer.setIndexInterval(conf, 1);
        MapFile.Writer writer =
                new MapFile.Writer(conf, outputLocation, keyClass, valueClass);

        File file = new File(inputFilePath);
        FileInputStream fis = new FileInputStream(file);
        BufferedReader br = new BufferedReader(new InputStreamReader(fis));
        String line;
        br.readLine();
        int i = 0;
        while ((line = br.readLine()) != null){
            String[] lineItems = line.split("\\t");
            IntWritable key = new IntWritable(Integer.parseInt(lineItems[keyIndex]));
            Text value = new Text(lineItems[valueIndex]);
            writer.append(key, value);
            i++;
        }
        br.close();
        writer.close();
    }
}
结论
本文解释了如何使用 MapFiles 执行 Map 阶段的 Join。在 Map 阶段而不是 Reduce 阶段执行 Join 通常很有用,可以提高作业速度。使用 MapFiles 进行 Join 的优势在于 MapFiles 是可分割的,它们可以被压缩,并且索引文件很小。所有这些因素都使 MapFiles 适合在 Map 阶段 Join 大量数据。
本文是我关于在 Hadoop Map-Reduce 作业中执行 Join 的前一篇关于该主题的文章的续篇,作为一项练习,此技术可以应用于上一篇文章中的示例。
欢迎提供反馈、建议和更正。
历史
- 2015年3月16日:初始版本