
Unity 图形模拟器,用于原生插件开发
本文介绍了 Unity 底层插件接口和 Unity 图形接口模拟器,以方便原生插件的开发。
引言
Unity 是一款非常流行的游戏引擎,拥有令人印象深刻的工具箱。然而,它很难提供客户可能需要的每一个功能,因此 Unity 支持以原生插件形式的扩展机制,这些插件由包含原生代码的动态库实现。这些插件可以包含通用功能,以及 DirectX11、DirectX12 或 OpenGL/GLES 等低级 API 中的图形命令。原生渲染插件通过 IUnityGraphics 接口与 Unity 通信。
由于多种原因,原生插件开发可能并非总是直截了当。首先,Unity 不支持热插件重载。动态库一旦加载,就永远不会卸载。也许可以为此问题创建一种解决方法(例如编写一个只加载真实动态库的代理插件),但这会增加额外的复杂性,并且可能无法在所有平台上运行。其次,当插件正在开发时,很容易导致 Unity 编辑器崩溃。重启编辑器并重新加载场景会增加迭代时间。最后,附加到正在运行的编辑器以调试插件当然是可能的,但可能并非总是最佳选择。
由于上述原因,拥有一个隔离的环境来模拟 Unity 接口以方便原生插件开发会更加方便。本文描述了这样一个环境。它模拟了 Unity 图形接口,目前支持 Windows 桌面平台上的 Direct3D11、Direct3D12 和 OpenGL,通用 Windows 平台上的 Direct3D11 和 Direct3D12,以及 Android 上的 OpenGLES。完整的源代码可免费使用并在 GitHub 上提供。
背景
对低级图形 API(例如 Direct3D11、Direct3D12 或 OpenGL/GLES)以及 Unity 原生插件接口有一些了解是可取的。
Unity 图形接口
本节介绍了 Unity 图形接口,这些接口允许原生插件访问低级图形 API 并发出绘制命令。详细信息可以在 Unity 帮助页面上找到。
要被识别为图形插件,库应导出以下两个函数
extern "C" void UNITY_INTERFACE_EXPORT UNITY_INTERFACE_API
    UnityPluginLoad(IUnityInterfaces* unityInterfaces);

extern "C" void UNITY_INTERFACE_EXPORT UNITY_INTERFACE_API
    UnityPluginUnload();
UnityPluginLoad() 在插件动态库加载时由 Unity 自动调用。UnityPluginUnload() 显然应该在插件卸载时调用,但在我的实验中,我从未见过该函数被调用(Unity 2017.1.1f1,Windows 64 位)。
UnityPluginLoad() 获取一个指向 IUnityInterfaces 的指针,这是插件与 Unity 交互的主要接口。此函数的典型实现存储该指针,请求一个指向 IUnityGraphics 接口的指针,注册 OnGraphicsDeviceEvent() 回调并手动调用它
static IUnityInterfaces* s_UnityInterfaces = nullptr;
static IUnityGraphics* s_Graphics = nullptr;

extern "C" void UNITY_INTERFACE_EXPORT UNITY_INTERFACE_API
    UnityPluginLoad(IUnityInterfaces* unityInterfaces)
{
    s_UnityInterfaces = unityInterfaces;
    s_Graphics = s_UnityInterfaces->Get<IUnityGraphics>();
    s_Graphics->RegisterDeviceEventCallback(OnGraphicsDeviceEvent);

    // Run OnGraphicsDeviceEvent(initialize) manually on plugin load
    OnGraphicsDeviceEvent(kUnityGfxDeviceEventInitialize);
}
IUnityGraphics 接口不提供对低级 API 的访问。它的首要目标是注册图形设备事件回调 OnGraphicsDeviceEvent()。当以下事件之一发生时,会调用此回调
- 图形设备初始化(
kUnityGfxDeviceEventInitialize) - 图形设备关闭(
kUnityGfxDeviceEventShutdown) - 图形设备即将重置(
kUnityGfxDeviceEventBeforeReset)。此事件仅在使用 Direct3D9 API 时发生,因此与我们无关。 - 图形设备刚刚重置(
kUnityGfxDeviceEventAfterReset)。类似地,此事件特定于 Direct3D9 并且不相关。
IUnityGraphics 接口的第二个目标是通过 GetRenderer() 函数报告 Unity 使用的低级 API。该函数可能会返回各种值,但我们只支持以下渲染器:kUnityGfxRendererD3D11、kUnityGfxRendererD3D12、kUnityGfxRendererOpenGLCore 和 kUnityGfxRendererOpenGLES30。
因此,OnGraphicsDeviceEvent() 需要处理 kUnityGfxDeviceEventInitialize 和 kUnityGfxDeviceEventShutdown 事件
static UnityGfxRenderer s_DeviceType = kUnityGfxRendererNull;
void UNITY_INTERFACE_API OnGraphicsDeviceEvent(UnityGfxDeviceEventType eventType)
{
    // Create graphics API implementation upon initialization
    if (eventType == kUnityGfxDeviceEventInitialize)
    {
        // Get render API
        s_DeviceType = s_Graphics->GetRenderer();
        CreateRenderAPI(s_DeviceType);
        if (s_CurrentAPI)
            s_CurrentAPI->ProcessDeviceEvent(eventType, s_UnityInterfaces);
    }
    else if (eventType == kUnityGfxDeviceEventShutdown)
    {
        // Cleanup graphics API implementation upon shutdown
        // We must destroy all resources before releasing the API
        g_SamplePlugin.reset();
        if (s_CurrentAPI)
        {
            s_CurrentAPI->ProcessDeviceEvent(eventType, s_UnityInterfaces);
            s_CurrentAPI.reset();
        }
        s_DeviceType = kUnityGfxRendererNull;
    }
    else if (s_CurrentAPI)
    {
        // Let the implementation process the device related events
        s_CurrentAPI->ProcessDeviceEvent(eventType, s_UnityInterfaces);
    }
}
CreateRenderAPI() 是初始化插件以使用特定低级 API 的函数。我们支持 Direct3D11、Direct3D12 和 OpenGL/GLES,因此该函数如下所示
static std::unique_ptr<RenderAPI> s_CurrentAPI;
void CreateRenderAPI(UnityGfxRenderer apiType)
{
#if SUPPORT_D3D11
    if (apiType == kUnityGfxRendererD3D11)
    {
        s_CurrentAPI.reset( CreateRenderAPI_D3D11() );
    }
#endif // if SUPPORT_D3D11

#if SUPPORT_D3D12
    if (apiType == kUnityGfxRendererD3D12)
    {
        s_CurrentAPI.reset( CreateRenderAPI_D3D12() );
    }
#endif // if SUPPORT_D3D9

#if SUPPORT_OPENGL_UNIFIED
    if (apiType == kUnityGfxRendererOpenGLCore || apiType == kUnityGfxRendererOpenGLES30)
    {
        s_CurrentAPI.reset( CreateRenderAPI_OpenGLCoreES(apiType) );
    }
#endif // if SUPPORT_OPENGL_UNIFIED
}
注意:在处理图形设备事件时,检查 s_CurrentAPI 是否为 null 非常重要,因为 Unity 可能会在第二次调用实际渲染器之前使用 kUnityGfxRendererNull(这将导致没有渲染 API 被初始化)调用 OnGraphicsDeviceEvent()。我们稍后将了解如何初始化特定 API,但现在让我们看看图形插件需要导出的另一个函数
extern "C" UnityRenderingEvent
        UNITY_INTERFACE_EXPORT UNITY_INTERFACE_API GetRenderEventFunc()
{
    return OnRenderEvent;
}
此函数由 Unity 调用,以查询此插件的渲染事件发生时调用的函数。该函数应声明如下
static void UNITY_INTERFACE_API OnRenderEvent(int eventID);
eventID 是传递给 Unity 端的 IssuePluginEvent() 的整数。这是一个调用原生渲染插件的极简 Unity 脚本的样子
public class UseRenderingPlugin : MonoBehaviour
{
    [DllImport("GhostCubePlugin")]
    private static extern IntPtr GetRenderEventFunc();

    void OnRenderObject()
    {
        // Issue a plugin event with arbitrary integer identifier.
        // The plugin can distinguish between different
        // things it needs to do based on this ID.
        // For our simple plugin, it does not matter which ID we pass here.
        GL.IssuePluginEvent(GetRenderEventFunc(), 1);
    }
}
渲染 API 初始化
现在让我们讨论插件为特定低级图形 API 进行初始化所需的步骤。CreateRenderAPI() 函数根据渲染类型创建 RenderAPI_D3D11、RenderAPI_D3D12 或 RenderAPI_OpenGLCoreES 类的实例。顾名思义,它们处理特定的低级 API。完整的源代码可以在 GitHub 上找到,所以这里不再赘述。
对于每个低级 API,Unity 都公开了特定的接口(IUnityGraphicsD3D11 和 IUnityGraphicsD3D12 对我们来说最重要),可以通过 IUnityInterfaces 查询,例如
IUnityGraphicsD3D11* d3d11 = interfaces->Get<IUnityGraphicsD3D11>();
让我们仔细看看特定于 API 的接口。
Direct3D11
对于 Direct3D11 渲染器,Unity 公开 IUnityGraphicsD3D11 接口,允许插件获取 D3D11 设备的指针。然后可以从设备请求即时上下文
IUnityGraphicsD3D11* d3d = interfaces->Get<IUnityGraphicsD3D11>();
m_d3d11Device = d3d->GetDevice();
CComPtr<ID3D11DeviceContext> d3d11ImmediateContext;
m_d3d11Device->GetImmediateContext(&d3d11ImmediateContext);
这就是应用程序发出 D3D11 渲染命令所需的一切。IUnityGraphicsD3D11 接口的其他方法允许应用程序访问 Unity 渲染缓冲区或原生纹理对象的内部 D3D11 对象。
OpenGL/GLES
并没有像人们可能期望的那样存在 IUnityGraphicsGL 接口。原因是,在 OpenGL/GLES 中,一切都是内部全局状态,因此接口确实无法返回任何东西。要在 GL 模式下初始化插件,Unity 只需从具有活动 GL 上下文的线程调用 OnGraphicsDeviceEvent()。插件可以调用它需要的任何 gl 函数来初始化自身。
注意:关于 OpenGL 模式最重要的一点是,Unity 使用由不同线程初始化的多个 GL 上下文。因此,OnRenderEvent() 可能不会从与 OnGraphicsDeviceEvent() 相同的线程调用,这意味着 GL 上下文特定的对象(如 VAO、FBO 和程序管线)无法在 OnGraphicsDeviceEvent() 中初始化。
Direct3D12
Direct3D12(不足为奇地)是最复杂的情况,Unity 2017.1.1f1 公开了五个不同的接口版本。模拟器目前支持版本 2
UNITY_DECLARE_INTERFACE(IUnityGraphicsD3D12v2)
{
    ID3D12Device* (UNITY_INTERFACE_API * GetDevice)();

    ID3D12Fence* (UNITY_INTERFACE_API * GetFrameFence)();
    // Returns the value set on the frame fence once the
    // current frame completes or the GPU is flushed
    UINT64(UNITY_INTERFACE_API * GetNextFrameFenceValue)();

    // Executes a given command list on a worker thread.
    // [Optional] Declares expected and post-execution resource states.
    // Returns the fence value.
    UINT64(UNITY_INTERFACE_API * ExecuteCommandList)
          (ID3D12GraphicsCommandList * commandList,
        int stateCount, UnityGraphicsD3D12ResourceState * states);
};
该接口公开了以下函数
GetDevice()- 返回 D3D12 设备的指针GetFrameFence()- 返回用于同步 GPU 执行的栅栏的指针GetNextFrameFenceValue()- 返回当前帧完成或 GPU 刷新后设置在帧栅栏上的值ExecuteCommandList()- 执行给定的命令列表
模拟器
概述
Unity 图形模拟器系统包含以下主要组件
- Unity 图形接口模拟器(
UnityGraphicsD3D11Emulator、UnityGraphicsD3D12Emulator和UnityGraphicsD3D11Emulator),它们负责模拟 Unity 图形接口(IUnityGraphicsD3D11和IUnityGraphicsD3D12)。 - 场景模拟器,负责模拟场景对象(如
RenderTexture)。插件使用 Diligent Engine 来促进与 API 无关的跨平台图形对象管理。引擎通过适配器(DiligentGraphicsAdapterD3D11、DiligentGraphicsAdapterD3D12和DiligentGraphicsAdapterGL)连接到 Unity 接口。场景模拟器还调用插件特定的函数,例如设置变换矩阵或时间。 - Unity 插件。插件通过 Unity 接口与模拟器(和 Unity)通信。插件通过
RenderAPI_D3D11、RenderAPI_D3D12和RenderAPI_OpenGLCoreES类连接到图形 API。它还与场景通信以获取其他信息,例如当前时间和变换矩阵。
系统图如下图所示

Unity 图形模拟器
Unity 图形模拟器派生自以下列表中所示的 UnityGraphicsEmulator 类,并且主要实现了不值得在此处发布的标准样板代码。
class UnityGraphicsEmulator
{
public:
    virtual void Release() = 0;
    virtual void Present() = 0;
    virtual void BeginFrame() = 0;
    virtual void EndFrame() = 0;
    virtual void ResizeSwapChain(unsigned int Width, unsigned int Height) = 0;
    virtual bool SwapChainInitialized() = 0;
    virtual bool UsesReverseZ()const;
    virtual IUnityInterface* GetUnityGraphicsAPIInterface() = 0;
    IUnityInterfaces &GeUnityInterfaces();

    static UnityGraphicsEmulator& GetInstance() { return *m_Instance; }
    void RegisterInterface(const UnityInterfaceGUID &guid, IUnityInterface* ptr);
    IUnityInterface* GetInterface(const UnityInterfaceGUID &guid);
    virtual UnityGfxRenderer GetUnityGfxRenderer() = 0;

    void RegisterDeviceEventCallback(IUnityGraphicsDeviceEventCallback callback);
    void UnregisterDeviceEventCallback(IUnityGraphicsDeviceEventCallback callback);
    void InvokeDeviceEventCallback(UnityGfxDeviceEventType eventType);

private:
    UnityGraphicsEmulator(const UnityGraphicsEmulator&) = delete;
    UnityGraphicsEmulator(UnityGraphicsEmulator&&) = delete;
    UnityGraphicsEmulator& operator = (const UnityGraphicsEmulator&) = delete;
    UnityGraphicsEmulator& operator = (UnityGraphicsEmulator&&) = delete;

    std::vector< std::pair<UnityInterfaceGUID, IUnityInterface*> > m_Interfaces;
    static UnityGraphicsEmulator *m_Instance;
    std::vector<IUnityGraphicsDeviceEventCallback> m_DeviceEventCallbacks;
};
每个模拟器都返回相应的 Unity 图形接口。在 D3D11 的情况下,代码如下所示
UnityGraphicsD3D11Impl* UnityGraphicsD3D11Emulator::GetGraphicsImpl()
{
    return m_GraphicsImpl.get();
}

static ID3D11Device* UNITY_INTERFACE_API UnityGraphicsD3D11_GetDevice()
{
    auto *GraphicsImpl = UnityGraphicsD3D11Emulator::GetGraphicsImpl();
    return GraphicsImpl != nullptr ? GraphicsImpl->GetD3D11Device() : nullptr;
}

IUnityInterface* UnityGraphicsD3D11Emulator::GetUnityGraphicsAPIInterface()
{
    static IUnityGraphicsD3D11 UnityGraphicsD3D11;
    UnityGraphicsD3D11.GetDevice = UnityGraphicsD3D11_GetDevice;
    return &UnityGraphicsD3D11;
}

UnityGfxRenderer UnityGraphicsD3D11Emulator::GetUnityGfxRenderer()
{
    return kUnityGfxRendererD3D11;
}
值得一提的两个方法是 BeginFrame() 和 EndFrame(),顾名思义,它们在每一帧的开始和结束时调用,并执行一些 API 特定的操作。BeginFrame() 设置默认的渲染目标和深度模板缓冲区,清除它们并设置视口。EndFrame() 对 D3D11 和 OpenGL/GLES 情况不做任何操作,而对于 D3D12,它将渲染目标转换为兼容呈现的状态并丢弃帧资源。
Unity 场景模拟器
Unity 场景包含许多不同的对象,在模拟器中复制所有这些对象既不实用也没有用。但是,一些对象确实需要在模拟环境中复制(例如我们示例项目中的镜像 RenderTexture)。由于模拟器支持多个低级 API,如果直接使用低级 API,则需要以多种方式实现场景对象。为了避免这个问题,场景模拟器使用 Diligent Engine,一个跨平台图形 API 抽象库。Diligent Engine 通过适配器(DiligentGraphicsAdapterD3D11、DiligentGraphicsAdapterD3D12 和 DiligentGraphicsAdapterGL)连接到 Unity 接口,这些适配器处理所有 API 特定功能。然后可以以与图形 API 无关的方式创建所需的场景对象(例如,请参阅 GhostCubeScene.cpp)。
源代码
模拟器的完整源代码可在 GitHub 上找到,并可免费使用。该仓库包含一个示例 Unity 项目,该项目使用原生插件在镜子中渲染一个幽灵立方体的反射

模拟器使用场景模拟器创建一个渲染纹理,并使用相同的原生插件渲染立方体
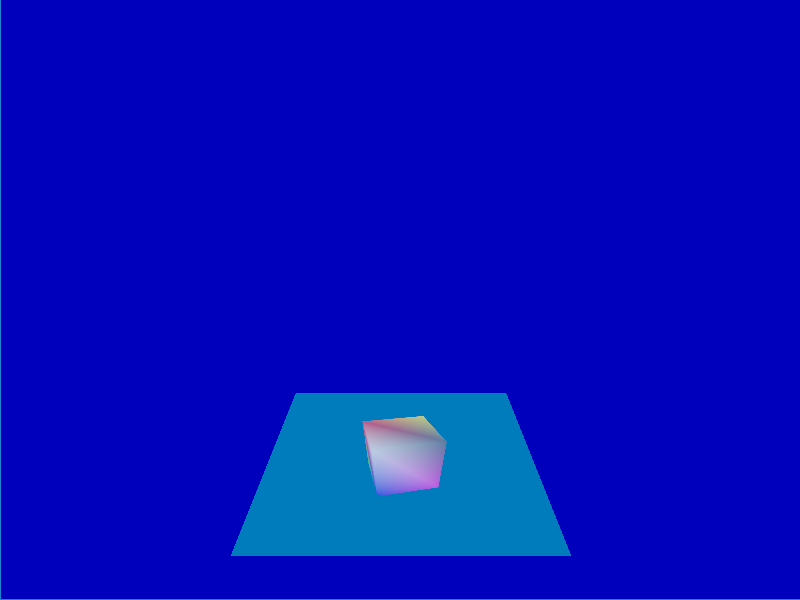
立方体只能在镜子中看到的主要原因显然是因为它是一个幽灵立方体。另一个原因是在 D3D12 模式下,我不知道有什么方法可以获取主后台缓冲区的渲染目标视图。在 D3D11 和 OpenGL/GLES 中可以做到这一点,但我希望插件在所有 API 上看起来都一样。同时,Unity 提供了对渲染纹理原生句柄的访问,这允许在 D3D12 插件中将其设置为渲染目标。
unityplugin 文件夹的组织方式如下
- UnityEmulator 文件夹包含主要模拟器组件的实现(Unity 图形模拟器、Diligent Engine 适配器、基本场景模拟器、平台特定功能)
- GhostCubeScene 文件夹包含场景特定对象的实现(
RenderTexture) - GhostCubePlugin/PluginSource 文件夹包含使用 Diligent Engine 渲染立方体的原生插件的实现
- GhostCubePlugin/UnityProject 文件夹包含 Unity 项目
- build 文件夹包含适用于 Windows 桌面和通用 Windows 平台的 Visual Studio 解决方案文件
构建和运行
Windows 桌面
要为 Windows 桌面平台构建项目,请在 unityplugin/build/Win32 文件夹中打开 UnityPlugin.sln 解决方案,选择所需的平台和配置,然后构建项目。选择 GhostCubeScene 作为启动项目并运行它。您可以使用 mode={GL|D3D11|D3D12} 命令行参数来选择图形 API。
通用 Windows 平台
要为 Windows 桌面平台构建项目,请在 unityplugin/build/Win32 文件夹中打开 UnityPlugin.sln 解决方案,选择所需的平台和配置,然后构建项目。
Android
要为 Android 构建,您需要首先设置您的机器以进行 Android 开发。
导航到 /unityplugin/GhostCubeScene/build/Win32/ 文件夹并运行 android_build.bat。