Apex 第 2 部分: 为 MVVM 应用程序添加命令
了解如何为您的 MVVM 应用程序添加命令,以添加功能而不破坏视图和 ViewModel 的分离。
系列文章
这是关于 Apex 和 MVVM 系列文章的一部分
引言
Apex 是一个用于快速构建 WPF、Silverlight 或 Windows Phone 7 MVVM 应用程序的框架。在本系列文章的第一部分中,我们介绍了如何创建您的第一个 MVVM 应用程序。在本文中,我们将以第一个基本应用程序为例,通过命令机制添加一些功能。
视频文章
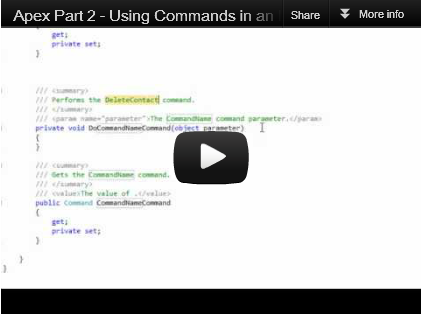
您可以通过观看下面的十分钟视频来详细了解本文 - 添加此功能到我们的示例应用程序只需十分钟,但在视频中,我还将介绍涉及的概念,并展示一些使用 Apex 的技巧。
直接链接: http://www.youtube.com/watch?v=wt7nncMNRG8
开始之前
本文实际上是在第一部分中编写的一个非常简单的应用程序的基础上进行的。如果您熟悉 MVVM 的基本知识,那么您可以跳过它。还有一个十分钟的视频,如果您只想快速了解。如果您还没有这样做,您需要下载 Apex SDK 才能将此类功能添加到您自己的应用程序中。
Apex SDK: http://apex.codeplex.com
Apex SDK 仅包含用于 WPF、Silverlight 和 Windows Phone 7 的 Apex 二进制文件,以及 Visual Studio 的扩展(例如用于 Views 和 ViewModels 的项模板)。
起点
在上一篇文章的结尾,我们创建了一个基本的 Contacts 应用程序,看起来大致如下:

我们有一个 Contact 的 ViewModel 和一个 Contact 的 View。我们还有一个主 View 和 ViewModel。然而,我们没有任何功能 - 我们所做的只是显示数据。我们将向我们的 view model 添加命令,以便开始实现业务逻辑。
命令 - 核心概念
命令是什么意思?可以这样理解:
在传统的 UI 开发中,如果我们想为(例如)按钮点击提供一些功能,我们会订阅按钮的 '
clicked' 事件(可能是 Windows Forms 中的事件,Win32 中的 Windows 消息,或类似的)。事件处理程序中的代码执行逻辑。但逻辑与 UI 紧密绑定。这意味着除非工具实际按下按钮,否则很难用自动化工具进行测试。在 MVVM 中,我们将命令绑定到按钮(或其他元素)。当按下按钮时,框架会尝试调用命令。这意味着通常,命令代码存储在
ViewModel中,并且与 UI 没有紧密绑定。因为命令只是一个普通的 C# 类中的代码,我们可以编写单元测试,并与其他视图重用它等等。这可能看起来是一个不必要的关注点分离,但随着我们深入这个系列,我们将做一些非常巧妙的事情,而没有这种分离会更加困难。
作为一点回顾(并与视频保持一致),我们将从向 Contact ViewModel 添加另一个通知属性开始 - 一个用于电子邮件地址。为什么?嗯,主要是为了巩固学习内容,并提醒您使用 apexnp!如果您有 SDK,请键入 apexnp 并按两次 Tab 键 - 它将为您生成通知属性!
在 ContactViewModel 中,键入 apexnp 并将属性命名为 'EmailAddress',并将类型设置为 'string'。您应该会得到如下内容:
        /// <summary>
        /// The NotifyingProperty for the EmailAddress property.
        /// </summary>
        private NotifyingProperty EmailAddressProperty =
          new NotifyingProperty("EmailAddress", typeof(string), default(string));

        /// <summary>
        /// Gets or sets EmailAddress.
        /// </summary>
        /// <value>The value of EmailAddress.</value>
        public string EmailAddress
        {
            get { return (string)GetValue(EmailAddressProperty); }
            set { SetValue(EmailAddressProperty, value); }
        }
这是 Apex 特有的 - NotifyingProperty 的设计非常类似于 DependencyProperty,并通过 INotifyPropertyChanged 自动处理 UI 更新。
现在我们可以打开 ContactView XAML,并将电子邮件地址添加到我们的控件网格中。更改的部分为粗体:
    <!-- The main grid of controls. -->
    <apexControls:PaddedGrid Rows="Auto,Auto,Auto" Columns="*,2*" Padding="4">

        <!-- The Name label and textbox. -->
        <Label Grid.Row="0" Grid.Column="0" Content="Name" />
        <TextBox x:Name="textBoxName" Grid.Row="0" Grid.Column="1" Text="{Binding Name}" />

        <!-- The Birthday label and textbox. -->
        <Label Grid.Row="1" Grid.Column="0" Content="Birthday" />
        <TextBox Grid.Row="1" Grid.Column="1" Text="{Binding Birthday}" />

        <!-- The Email Address label and textbox. -->
        <Label Grid.Row="2" Grid.Column="0" Content="Email Address" />
        <TextBox Grid.Row="2" Grid.Column="1" Text="{Binding EmailAddress}" />

    </apexControls:PaddedGrid>
这是一个关于通知属性如何工作的很好的回顾。它们由 ViewModel 拥有 - 而 View 只是绑定到它们。现在我们将继续讨论 Commands - 它们的操作方式类似,由 ViewModel 拥有和实现,而 View 只是绑定到它们。
更新 UI
首先,我们将更新 MainView.xaml,添加一个堆叠面板来容纳一些按钮以及一些按钮本身。新代码为粗体:
 <!-- The list of contacts. -->
<ListBox Grid.Column="0" ItemsSource="{Binding Contacts}" DisplayMemberPath="Name"
  SelectedItem="{Binding SelectedContact}" />

<!-- A contact view - bound to the selected contact. -->
<local:ContactView x:Name="contactView"
 Grid.Column="1" DataContext="{Binding SelectedContact}" />

<!-- A stack panel to hold buttons. -->
<StackPanel Grid.Row="1" Grid.ColumnSpan="2"
 Orientation="Horizontal" HorizontalAlignment="Right">

  <!-- A button to allow a new contact to be added. -->
  <Button Width="120" Margin="4" Content="Add New Contact"  />

  <!-- A button to allow a contact to be deleted. -->
  <Button Width="120" Margin="4" Content="Delete Contact" />
</StackPanel>
运行应用程序,我们已经有了按钮,但它们没有任何作用。首先,我们必须创建它们将绑定到的实际 Command。
创建添加联系人命令
导航到 MainViewModel,并在类底部键入 apexvmc,然后按两次 Tab 键。这是 Apex ViewModelCommand 的代码片段。您只需要为该片段提供名称,在本例中为 'AddContact'。键入名称并按 Enter 键将得到如下内容:
/// <summary>
/// Performs the AddContact command.
/// </summary>
/// <param name="parameter">The AddContact command parameter.</param>
private void DoAddContactCommand(object parameter)
{
}

/// <summary>
/// Gets the AddContact command.
/// </summary>
/// <value>The value of .</value>
public Command AddContactCommand
{
    get;
    private set;
}
现在我们有一个作为属性的 Command 对象,名为 AddContactCommand,还有一个函数。View 将绑定到该属性 - 但在我们实际创建对象实例之前,它将不会执行任何操作。因此,将这两个实体连接起来的关键步骤是向构造函数添加以下粗体行:
/// <summary>
/// Initializes a new instance of the <see cref="MainViewModel"/> class.
/// </summary>
public MainViewModel()
{
    AddContactCommand = new Command(DoAddContactCommand);
}
在本例中,我们创建了 Command 对象 - 并为其提供了命令调用时要执行的函数。此函数可以是 Action 或 Action<object>,如果您还想接受参数的话。现在我们有了一个 view model 的属性,我们可以更新 XAML 中按钮的定义来实际绑定到该命令 - 如下所示:
<!-- A button to allow a new contact to be added. -->
<Button Width="120" Margin="4" Content="Add New Contact"
 Command="{Binding AddContactCommand}" />
因此,我们将按钮的 'Command' 依赖属性绑定到我们 view model 的 'AddContactCommand' 对象。这意味着当按钮被按下时,DoAddContactCommand 函数将被调用。现在让我们添加功能 - 'AddContact' 命令应该执行以下操作:
/// <summary>
/// Performs the AddContact command.
/// </summary>
/// <param name="parameter">The AddContact command parameter.</param>
private void DoAddContactCommand(object parameter)
{
    //  Create the contact.
    ContactViewModel newContact = new ContactViewModel()
    {
        Name = "New Contact"
    };

    //  Add to the set of contacts.
    Contacts.Add(newContact);

    //  Select the new contact.
    SelectedContact = newContact;
}
运行应用程序,感受喜悦 - 一切正常!
关键是什么?业务逻辑完全与 UI 分离。在上面的代码中,我们没有在任何地方向 listbox 添加项,或在 listbox 中选择它,或更新 textbox 的文本值。我们操作 ViewModel 属性,而 View 决定如何呈现它们。我们的命令包含纯粹的业务逻辑 - 它可以被另一个视图在未来绑定 - 或者来自不同平台(例如 Silverlight)的视图。我们还可以单元测试此功能。通常,单元测试很容易为底层代码编写,但如果存在用户界面,自动化测试会非常困难 - 但我们可以直接测试 ViewModel 并验证它是否按预期工作。
创建删除联系人命令
现在您已经了解了命令机制的工作原理,添加删除联系人命令只需几秒钟。首先,我们使用 apexvmc 并添加名称 'DeleteContact',然后在构造函数中创建命令实例:
/// <summary>
/// Initializes a new instance of the <see cref="MainViewModel"/> class.
/// </summary>
public MainViewModel()
{
    AddContactCommand = new Command(DoAddContactCommand);
    DeleteContactCommand = new Command(DoDeleteContactCommand, false);
}

/// <summary>
/// Performs the DeleteContact command.
/// </summary>
/// <param name="parameter">The DeleteContact command parameter.</param>
private void DoDeleteContactCommand(object parameter)
{
    //  Remove the selected contact from the contacts list.
    Contacts.Remove(SelectedContact);

    //  Clear the selected contact.
    SelectedContact = null;
}

/// <summary>
/// Gets the DeleteContact command.
/// </summary>
public Command DeleteContactCommand
{
    get;
    private set;
}
'Delete' 甚至更简单!请注意一个区别 - 我们将值 'false' 作为第二个参数传递给了命令的构造函数。第二个参数是可选的,它决定了命令是否可以执行。默认值为 true。如果命令无法执行,用户界面将显示为灰色。
为什么禁用 delete 命令?嗯,只有当确实有一个选定的联系人时才有意义。所以我们可以做的是最初禁用它,然后使用下面的粗体代码更新 MainViewModel 中的 SelectedContact 属性:
/// <summary>
/// Gets or sets SelectedContact.
/// </summary>
/// <value>The value of SelectedContact.</value>
public ContactViewModel SelectedContact
{
    get { return (ContactViewModel)GetValue(SelectedContactProperty); }
    set
    {
        //  Set the value of the property.
        SetValue(SelectedContactProperty, value);

        //  If we have a contact selected, we can execute the delete contact command.
        DeleteContactCommand.CanExecute = value != null;
    }
}
'CanExecute' 是 Command 的一个属性。一旦我们更改它,用户界面就会立即更新,以启用或禁用 UI 元素。所以我们又一次看到了业务逻辑与 UI 完全分离。我们为命令编写了非常基础的代码,仅此而已 - 我们将如何呈现它留给 View 来决定。
从命令操作 UI
假设我们想从 Command 操作 View - 例如,当调用 Add New Contact Command 时,我们想将焦点设置在 Contact Name 文本框上。我们该怎么做?
我们不这样做!ViewModel 永远不应该知道 View - 因为 View 可以是任何东西(甚至在单元测试的情况下,什么也不是)。但实际上,当然,我们必须处理这样的情况。幸运的是,有一种稳健且合理的方法可以做到这一点。在主视图的构造函数中,我们为命令的 Executed 事件添加一个处理程序:
public MainView()
{
    InitializeComponent();

    //  Add a hander for the executed event of the add contact command.
    viewModel.AddContactCommand.Executed += new CommandEventHandler(AddContactCommand_Executed);
}

void AddContactCommand_Executed(object sender, CommandEventArgs args)
{
    //  Focus the contact name.
    contactView.FocusContactName();
}
'FocusContactName' 只是 ContactView 中一个单行的函数,它将焦点设置在相应的文本框上。所以我们看到了 - View 可以响应命令的执行。我们甚至可以在命令执行之前让 View 参与进来 - 请看下面的代码:
public MainView()
{
    InitializeComponent();

    //  Add a hander for the executed event of the add contact command.
    viewModel.AddContactCommand.Executed +=
                      new CommandEventHandler(AddContactCommand_Executed);

    //  Add a handler for the executing event of the delete contact command.
    viewModel.DeleteContactCommand.Executing +=
                      new CancelCommandEventHandler(DeleteContactCommand_Executing);
}

void DeleteContactCommand_Executing(object sender, CancelCommandEventArgs args)
{
    //  Cancel the command if the user says they're NOT sure.
    args.Cancel = MessageBox.Show
         ("Are you sure?", "Sure?", MessageBoxButton.YesNoCancel) != MessageBoxResult.Yes;
}
Executing 事件实际上提供了一个 CancelCommandEventArgs,允许取消命令。在这种情况下,我们会显示一个消息框询问用户是否确定要继续。
结论
现在我们已经掌握了 View、ViewModel、NotifyingProperty 和 Command 的概念,并朝着成为 MVVM 大师的目标迈进!请在下方添加任何评论或问题 - 以及对文章下一部分(到目前为止,我认为将是添加 Model)的建议。

