
ImageGrassy:一个图像处理和实用工具
4.90/5 (21投票s)
该应用程序提供简便的图像分析、处理、模式识别和算法开发。

下载
您可以从Intel AppUp商店此处下载适用于Ultrabook(TM)的应用程序。
介绍
当我开始思考Ultrabook时,我发现这个设备和概念相当棘手。它是平板电脑和笔记本电脑的混合体,预装了大量的传感器。当我环顾人们正在构建的应用程序时,我意识到这些应用程序主要是以娱乐为中心,或者是通过纯桌面或平板电脑可以解决的问题。使用平板电脑和笔记本电脑很长时间后,我发现平板电脑的主要缺陷是它们缺乏生产力。大多数人使用它们来上网、看视频和阅读电子书。我希望开发一个混合应用程序,既能为Ultrabook增加生产力价值,又能带来娱乐价值。因此,该应用程序需要探索强大的编程和处理能力,同时结合触摸和轻触操作。所以我将介绍一个强大的图像实用程序应用程序,我将其命名为ImageGrassy。那么这个应用程序能做什么呢?它为你提供了一些很酷的工具,让你的图片充满乐趣。它为你提供了分析图片的工具,并赋予你创建自定义XML例程来构建图像处理批处理应用程序的能力。
那么,既然已经有Photoshop、OpenCV等大量优秀的工具可用,为什么我们还需要另一个图像处理工具呢?
像Photoshop这样的图像编辑工具很难用于图像分析目的,而像Matlab这样的工具则难以作为娱乐站和图像编辑进行修改。OpenCV需要编码。
因此,这是一个混合工具,它能完成所有这些任务(在一定程度上),同时利用各种传感器的力量。
背景

所以你对系统应该如何运作有了基本的了解。系统的核心是一个图库,它是用户照片库,带有存储图像标签和其他信息的图库配置。你可以手动从图库中添加和删除文件。
一旦你启动应用程序,图库就会加载;如果你没有图库,它会提示你创建一个。图库中的图像会以缩略图的形式加载。你可以从图库中选择任何图像,并将其导入主查看器。它会渲染图像。
用户可以利用随此应用程序移植的许多实用程序和娱乐应用程序,随时玩转他们的图像。他们还可以使用标签系统,将从图像中提取的特征关联起来,以记住一种图像类型。用户可以输入一张图像进行搜索,系统会通过特征匹配过程从图库中找出所有相关的图像。
该系统还将支持模板匹配。您创建脸部或其他对象的小缩略图模板,系统应该能够定位图像中与模板匹配的部分。
以上都是从用户角度来看。此应用程序将附带一个开发者界面。在这里,您可以基本上按顺序指定操作,系统将以批处理方式处理您的算法,并为您生成所需的结果。
以下是App中引入的新算法级别程序的示例“代码片段”。
start;
I=input of type jpg;
Ig=convert I to GRAY;
Ige=equilize Ig through Histogram;
Ib= convert Ige to BINARY;
Ibr=resize Ib to 128,128;
Ibr=process Ibr with DILATION with 3,3;
M=process Ibr with BLOB_DETECTION;
M=combine M with I;
save M as "rslt.jpg";
end
其基本原理是,它将隐藏任何循环或强大的编程基础,程序员可以通过组合和合并来简单地使用算法。我们尚未测试控制语句。
传感器
计划中的一个功能是根据传感器感测到的光强度调整查看器的亮度。查看窗格的大小和方向可以通过触摸传感器改变。还将提供上下文菜单驱动的操作渲染。窗格可以使用屏幕触摸输入进行大小调整、旋转、移动到屏幕的不同部分。
将通过手写笔支持图像裁剪。
A. 环境光传感器
int changed=0;
var brightnessSensor = Windows.Devices.Sensors.LightSensor.GetDefault();
if(brightnessSensor != null)
{
  brightnessSensor.ReadingChanged += (sender, eventArgs) =>
  {
    double mc=WpfImageProcessing.GetMeanContrast(iSrc);
    var isLow  = eventArgs.Reading.IlluminanceInLux != mc;

    if(changed/100>0)
    {
        Image1.Source=WpfImageProcessing.ContrastStretch(iSrc,.5-(mc-eventArgs.Reading.IlluminanceInLux)/MaxLux;
        iSrc=Bitmap.BitmapImageFromBitmapSource(Image1.Source as BitmapSource);
        changed=0;
    }
    else
        changed++;
    };
}
逻辑是:捕获光线变化事件。根据我长期使用Arduino、16F84以及各种传感器的经验,这种事件在户外(例如火车站)可能会频繁发生。因此,用这个事件处理程序调整主图像亮度可能会导致闪烁。所以我添加了一个变量来限制刷新次数。
对比度拉伸逻辑如下
public static BitmapSource ContrastStretch(BitmapImage srcBmp, double pc )
{
    if (pc == .5)
    {
        return srcBmp;
    }
    bool bright = true;
    pc = .5 - pc;
    if (pc < 0)
    {
        bright = false;
    }
    pc = Math.Abs(pc);
    Bitmap bmp = new Bitmap(srcBmp);

    Bitmap contrast = new Bitmap(srcBmp);// GRAY is the resultant matrix
    PixelColor c ;
    for (int i = 0; i < bmp.NumRow; i++)
    {
        for (int j = 0; j < bmp.NumCol; j++)
        {
            c = bmp.GetPixel(j, i);// Extract the color of a pixel
            int rd = c.Red; int gr = c.Green; int bl = c.Blue;
            // extract the red,green, blue components from the color.

            if (bright)
            {
                rd = rd + (int)((double)rd * pc);
                gr = gr + (int)((double)gr * pc);
                bl = bl + (int)((double)bl * pc);
                if (rd > 255)
                    rd = 255;
                if (gr > 255)
                    gr = 255;
                if (bl > 255)
                    bl = 255;
            }
            else
            {
                if (bright)
                {
                    rd = rd - (int)((double)rd * pc);
                    gr = gr - (int)((double)gr * pc);
                    bl = bl - (int)((double)bl * pc);
                    if (rd < 0)
                        rd = 0;
                    if (gr < 0)
                        gr = 0;
                    if (bl < 0)
                        bl = 0;
                }
            }

            PixelColor c2 =new PixelColor(rd, gr, bl,c.Alpha);
            contrast.SetPixel(j, i, c2);
        }
    }
    contrast.Finalize();
    return contrast.Image;
}
如您所见,该方法将当前对比度值视为50%,然后在线性刻度上将其调整至100%或10%。
B. GPS传感器和指南针
这很有趣。克里斯在我的帖子里指出“GPS是图像处理的好工具”。我必须承认,我当时确实没有理解他的意思。但后来我回到绘图板,才意识到哇!GPS!所以你到一个地方,拍照,创建一个图库。你添加一个GPS位置的标签。当你四处走动时,图库会更新并显示与该位置对应的图像。但这有什么用呢?你有没有在马来西亚,或印度德里/孟买/加尔各答等任何亚洲国家的繁忙街道上穿行过?街道看起来都一样,拥挤,让你很难找到你的酒店或其他地标。所以用你的Ultrabook来追踪它们。
如您所知,该应用程序使用XML图库数据,其中包含标签、路径、IsFacePresent、FaceLocation、Features等多个元素。我们添加了一个名为GPS的新元素,并根据此元素填充图库。
更重要的是,我们有指南针,可以让我们及时了解运动方向。因此,根据当前位置和方向,我们计算出图库中途经的带有图像的其他GPS点,并显示叠加层。
通过与Bing Map集成,该工具可以变得更好。然而,目前,我还没有测试这种集成。
C. 网络摄像头
我知道,你会争辩说它不是真正的传感器!但等等,我们的应用程序是一个图像处理应用程序,允许我们进行图像处理、搜索、调整、共享等等。那么,还有什么比从你的Ultrabook捕获更好的传感器呢?克里斯指出,Ultrabook足够薄,他可以轻松地扭转和旋转它。所以我会假设它也可以在户外和活动中使用。你可能真的希望图像处理框架对从网络摄像头捕获的图像进行处理。
实际上,我们确实集成了这一部分。现在请注意,WPF不支持网络摄像头访问,你需要使用Microsoft Expression Encoder框架等框架来实现。我测试后没有发现任何明显的优势。所以我使用DirectX和System.Drawing来捕获一个System.Drawing.Bitmap(是的,我知道这是脏代码,但它有效!),然后将其转换为WPF类型的BitmapImage。其余的处理则借助我们的WpfImageProcessing库完成,然后通过ImageBrush叠加在捕获的图像上。
使用代码
此查看器基本上是WPF图像类型。因此,源必须是BitmapImage类型。我们将实际图像保存在BitmapImage类型中,并将其分配为此图像的图像源。
现在谈到处理部分。WPF不支持像GDI或使用System.Drawing.Imaging那样访问图像。它提供了一些类,如WritableBitmap、BitmapFrame、BitmapImage,它们需要与流一起用于图像处理。流或数组是线性内存,但图像处理的许多任务需要矩阵操作。因此,我们首先创建一个Bitmap类,它提供对整个图像操作的抽象,我们可以像使用System.Drawing.Bitmap类对象一样处理图像。
这是Bitmap类。
using System;
using System.Collections.Generic;
using System.Linq;
using System.Text;
using System.Threading.Tasks;
using System.Windows;
using System.Windows.Controls;
using System.Windows.Data;
using System.Windows.Documents;
using System.Windows.Input;
using System.Windows.Media;
using System.Windows.Media.Imaging;
using System.Windows.Navigation;
using System.Windows.Shapes;
using Microsoft.Win32;
using System.Windows.Media.Imaging;
using System.IO;
namespace ImageApplications
{
    public struct PixelColor
    {
        public byte Blue;
        public byte Green;
        public byte Red;
        public byte Alpha;
        public PixelColor(int r, int g, int b, int a)
        {
            this.Red = (byte)r;
            this.Green = (byte)g;
            this.Blue = (byte)b;
            this.Alpha = (byte)a;
        }
    }

    public class Bitmap
    {
        public BitmapSource Image;
        private BitmapImage iSrc;
        private byte []array;
        private Int32Rect rect;
        public int Height, Width;
       public int NumCol, NumRow;

        public Bitmap(string fileName)
        {
            iSrc = new BitmapImage(new Uri(fileName));
            Image = iSrc;
            array = new byte[iSrc.PixelWidth * iSrc.PixelHeight * 4];
            rect = new Int32Rect(0, 0, iSrc.PixelWidth, iSrc.PixelHeight);
            iSrc.CopyPixels(rect, array, iSrc.PixelWidth * 4, 0);
            NumRow = iSrc.PixelHeight;
            NumCol = iSrc.PixelWidth;
            Height = NumRow;
            Width = NumCol;


        }
        public Bitmap(BitmapImage bmpSrc)
        {
            iSrc = bmpSrc;
            Image = iSrc;
            array = new byte[iSrc.PixelWidth * iSrc.PixelHeight * 4];
            rect = new Int32Rect(0, 0, iSrc.PixelWidth, iSrc.PixelHeight);
            iSrc.CopyPixels(rect, array, iSrc.PixelWidth * 4, 0);
            NumRow = iSrc.PixelHeight;
            NumCol = iSrc.PixelWidth;
            Height = NumRow;
            Width = NumCol;


        }
        private  BitmapImage CropImage(ImageSource source, int width, int height, int startx,int starty)
        {
            var rect = new Rect(startx, starty, startx+width , height +startx);
            var group = new DrawingGroup();
            RenderOptions.SetBitmapScalingMode(group, BitmapScalingMode.HighQuality);
            group.Children.Add(new ImageDrawing(source, rect));
            var drawingVisual = new DrawingVisual();
            using (var drawingContext = drawingVisual.RenderOpen())
                drawingContext.DrawDrawing(group);
            var resizedImage = new RenderTargetBitmap(
                width, height,         // Resized dimensions
                96, 96,                // Default DPI values
                PixelFormats.Default); // Default pixel format
            resizedImage.Render(drawingVisual);
            BitmapSource bf= BitmapFrame.Create(resizedImage);
            BitmapImage bi = BitmapImageFromBitmapSource(bf);
            return bi;
        }
        public void CropTheImage(int startx, int starty, int width, int height)
        {
            Image = CropImage(Image, width, height, startx, starty);
        }
        public  void Resize(int rRows,int rCols)
        {

            TransformedBitmap tb = new System.Windows.Media.Imaging.TransformedBitmap(
                  Image, new ScaleTransform((double)rRows/iSrc.Height, (double)rCols/iSrc.Width));
            Image = tb;
            iSrc = BitmapImageFromBitmapSource(Image);
            array = new byte[iSrc.PixelWidth * iSrc.PixelHeight * 4];
            rect = new Int32Rect(0, 0, iSrc.PixelWidth, iSrc.PixelHeight);
            iSrc.CopyPixels(rect, array, iSrc.PixelWidth * 4, 0);
            NumRow = iSrc.PixelHeight;
            NumCol = iSrc.PixelWidth;
            Height = NumRow;
            Width = NumCol;
        }
        public Bitmap(int Height,int Width)
        {
            WriteableBitmap wb = new System.Windows.Media.Imaging.WriteableBitmap(
                   Width, Height, 96, 96, PixelFormats.Bgra32, null);
            Image = wb;

            iSrc = BitmapImageFromBitmapSource(Image);
            //BitmapImage bmp=new System.Windows.Media.Imaging.BitmapImage(
            //iSrc = bmpSrc;
            //iSrc.H

            array = new byte[iSrc.PixelWidth * iSrc.PixelHeight * 4];
            rect = new Int32Rect(0, 0, iSrc.PixelWidth, iSrc.PixelHeight);
            iSrc.CopyPixels(rect, array, iSrc.PixelWidth * 4, 0);
            NumRow = iSrc.PixelHeight;
            NumCol = iSrc.PixelWidth;
            Height = NumRow;
            Width = NumCol;


        }
        #region Image Processing Stuff
        public void Finalize()
        {

            Image=WriteableBitmap.Create(iSrc.PixelWidth, iSrc.PixelHeight,
                       96, 96, PixelFormats.Bgra32, null, array, iSrc.PixelWidth * 4);
        }
        private PixelColor GetPixelValue(int x, int y, byte[] rawpixel, int width, int hight)
        {
            PixelColor pointpixel;
            int offset = y * width * 4 + x * 4;
            pointpixel.Blue = rawpixel[offset + 0];
            pointpixel.Green = rawpixel[offset + 1];
            pointpixel.Red = rawpixel[offset + 2];
            pointpixel.Alpha = rawpixel[offset + 3];
            return pointpixel;
        }
        public PixelColor GetPixel(int x,int y)
        {
            return(GetPixelValue( x,  y, array, Width, Height));
        }
        public void SetPixel(int x,int y, PixelColor color)
        {
            array=PutPixel(array, Width, Height, color,  x,  y);
        }
       private byte[] PutPixel(byte[] rawimagepixel, int width, int hight, PixelColor pixels, int x, int y)
        {
            int offset = y * width * 4 + x * 4;
            rawimagepixel[offset + 0] = pixels.Blue;
            rawimagepixel[offset + 1] = pixels.Green;
            rawimagepixel[offset + 2] = pixels.Red;
            rawimagepixel[offset + 3] = pixels.Alpha;
            return rawimagepixel;
        }
       public static BitmapImage BitmapImageFromBitmapSource(BitmapSource src)
       {
           BitmapSource bitmapSource = src;
           JpegBitmapEncoder encoder = new JpegBitmapEncoder();
           MemoryStream memoryStream = new MemoryStream();
           BitmapImage bImg = new BitmapImage();
           encoder.Frames.Add(BitmapFrame.Create(bitmapSource));
           encoder.Save(memoryStream);
           bImg.BeginInit();
           bImg.StreamSource = new MemoryStream(memoryStream.ToArray());
           bImg.EndInit();
           memoryStream.Close();
           return bImg;
       }
       public  void Save(string filePath)
       {
           var image = Image;
           using (var fileStream = new FileStream(filePath, FileMode.Create, FileAccess.Write))
           {
               BitmapEncoder encoder = new JpegBitmapEncoder();
               encoder.Frames.Add(BitmapFrame.Create(image));
               encoder.Save(fileStream);
           }
       }
        #endregion
    }
}
我们使用四个颜色通道:R、G、B、A。因此,我们首先声明一个名为`PixelColor`的结构来表示每个像素的颜色模式。
Bitmap 类提供了三个构造函数。一个用于读取文件名并初始化一个位图对象,一个用于创建仅包含宽度和高度参数的空对象,还有一个用于使用 `BitmapImage` 初始化一个位图对象。我们引入了 `GetPixel` 和 `SetPixel` 两个函数,以便我们可以像 `System.Drawing.Bitmap` 对象那样访问像素。然而,这些函数调用 `GetPixelColor` 和 `SetPixelColor` 方法,这些方法直接从通过 Bitmap 类的构造函数使用 `CopyPixel` 方法以 `BitmapImage` 的像素初始化的“数组”变量访问像素。此外,还添加了一个从 `BitmapSource` 转换为 `BitmapImage` 的转换工具,以便根据需要以 `BitmapImage` 或 `BitmapSource` 的形式返回操作结果。
类支持:
目前,该类和所有其他函数均已针对 Jpeg 图像类型进行优化。
大小:算法已使用 6Mb 4000x4000 像素图像进行测试。
我们还提供了保存选项,用于将Bitmap类对象作为图像保存到您的文件系统中。
所以现在我们有了名为`Bitmap`的基本图像类和`PixelColor`类。让我们从图像处理开始。
预处理。
它本质上是在主要图像处理之前执行的操作。
1. 调整大小
WPF 不提供任何图像大小调整的本机支持。因此,我们利用了缩放变换来调整图像大小,而且不影响纵横比。
该支持通过Bitmap类中的resize方法提供。
TransformedBitmap tb = new System.Windows.Media.Imaging.TransformedBitmap(
   Image, new ScaleTransform((double)rRows/iSrc.Height, (double)rCols/iSrc.Width));
从使用Resize操作的方法中,我们将指定确切的大小,该大小将被转换为相对百分比,然后图像将通过`ScaleTransform`进行大小调整。

查看图像调整为 64x32 大小
2. 灰度转换
这与朴素的位图支持无关。这是核心的图像处理内容。所以我们将方法放在`WpfImageProcessing`类中。
public static BitmapSource GrayConversion(BitmapImage srcImage)
{

    Bitmap bmp = new Bitmap(srcImage);
    for (int i = 0; i < bmp.NumRow; i++)
    {
        for (int j = 0; j < bmp.NumCol; j++)
        {
            PixelColor c = bmp.GetPixel(j, i);
            //Color c = bmp.GetPixel(j, i);// Extract the color of a pixel
            // extract the red,green, blue components from the color.
            int rd = c.Red; int gr = c.Green; int bl = c.Blue;
            double d1 = 0.2989 * (double)rd + 0.5870 * (double)gr + 0.1140 * (double)bl;
            int c1 = (int)Math.Round(d1);
            PixelColor c2 = new PixelColor(c1, c1, c1, c.Alpha);
            bmp.SetPixel(j, i, c2);

        }
    }
    bmp.Finalize();
    return bmp.Image;
}
你可以看到,我们使用了著名的公式来读取RGB值并将其转换为灰色。
double d1 = 0.2989 * (double)rd + 0.5870 * (double)gr + 0.1140 * (double)bl;
请注意方法末尾的`finalize`方法。它就像Lock和Unlock函数。我们不是操纵`Bitmap`类的原始位图`BitmapImage` iSrc,而是在操作完成后只执行一次。这会加快操作速度。由于WPF不支持操纵`BitmapImage`,因此我们借助`WritableBitmap`从通过图像操作操纵的数组创建`BitmapImage`,最后将其分配给`Bitmap`类的`Image`变量。
Image=WriteableBitmap.Create(iSrc.PixelWidth, iSrc.PixelHeight,
        96, 96, PixelFormats.Bgra32, null, array, iSrc.PixelWidth * 4);.
这是灰度转换的结果
3. 二进制转换
二值图像本质上是像素值为“0”或“1”的图像。但我们希望在处理和查看图像的方式上保持一致性。因此,我们将用255表示1。所以我们的二值图像也是一个3通道图像,值为255和0。任何灰度值>阈值应为255,否则为0。
public static BitmapSource Gray2Binary(BitmapImage grayImage,double threshold)
{
    if (threshold > 1)
    {
        throw new ApplicationException("Threshold must be between 0 and 1");
    }
    if (threshold < 0)
    {
        threshold = System.Math.Abs(threshold);
    }
    threshold = 255 * threshold;
    Bitmap bmp = new Bitmap(grayImage);
    for (int i = 0; i < bmp.NumRow; i++)
    {
        for (int j = 0; j < bmp.NumCol; j++)
        {
            PixelColor c = bmp.GetPixel(j, i);
            //Color c = bmp.GetPixel(j, i);// Extract the color of a pixel
            int rd = c.Red;
            double d1 = 0;
            if (rd > threshold)
            {
                d1 = 255;
            }
            int c1 = (int)Math.Round(d1);
            PixelColor c2 = new PixelColor(c1, c1, c1, c.Alpha);
            bmp.SetPixel(j, i, c2);
        }
    }
    bmp.Finalize();
    return bmp.Image;

}
这是操作的样本输出

这里重要的 是例程期望其输入为灰色类型。一旦您在Image1或主图像渲染器中获得了灰度转换的结果,您还必须更新源`BitMapImage`或iSrc,如下所示:
iSrc = Bitmap.BitmapImageFromBitmapSource(Image1.Source as BitmapSource);
膨胀和腐蚀是二值图像上所需的两个主要操作。膨胀是将像素附近的像素填充为白色,而腐蚀则是相反的过程。为了保持文章简短,我将省略这些简单方法的描述。
图像操作中常用的另一种颜色操纵是颜色反转。逻辑非常简单,任何像素颜色都应根据(最大值-值)理论进行反转。因此,如果像素的红色分量为10,则反转的颜色值为255。
这是一个示例输出。

变换
变换是数据从一个域到另一个域的数学建模或更精确的映射,以探索数据的隐藏行为。我们在图像处理中使用不同类型的变换,如小波变换、DCT等。
我们已经在这个工作室中实现了最常见的变换。为了讨论的连续性,我将展示我们如何使用小波变换。
小波变换
小波基本上能给出多分辨率图像。当你对任何图像进行小波变换时,你会得到四个子图像:HH、HL、LH、LL。HH是保留实际图像差异和映射的组件。HL、LH、LL是其他三个经过重新缩放、滤波的图像。小波变换提供了一种提取边缘和其他特征的绝佳方法,这些特征对于模式识别至关重要。
因此,我们的小波变换接受两个输入:图像和一个函数值,函数值可以是1或0。0将从小波变换图像返回边缘,1将所有缩放图像作为单个图像返回。
public static BitmapSource WaveletTransform(BitmapImage bmpSource, int function,int m_threshold)
{
    int[,] orgred;
    int[,] orgblue;
    int[,] orggreen;
    int[,] rowred;
    int[,] rowblue;
    int[,] rowgreen;
    int[,] colred;
    int[,] colblue;
    int[,] colgreen;
    int[,] scalered;
    int[,] scaleblue;
    int[,] scalegreen;
    int[,] recrowred;
    int[,] recrowblue;
    int[,] recrowgreen;
    int[,] recorgred;
    int[,] recorgblue;
    int[,] recorggreen;
    Bitmap bitmap = new Bitmap(bmpSource);
    // BitmapData bitmapdata = bitmap.LockBits(new Rectangle(0, 0, bitmap.Width,
    //     bitmap.Height), ImageLockMode.ReadWrite, img.PixelFormat);
    orgred = new int[bitmap.Height + 1, bitmap.Width + 1];
    orgblue = new int[bitmap.Height + 1, bitmap.Width + 1];
    orggreen = new int[bitmap.Height + 1, bitmap.Width + 1];
    rowred = new int[bitmap.Height + 1, bitmap.Width + 1];
    rowblue = new int[bitmap.Height + 1, bitmap.Width + 1];
    rowgreen = new int[bitmap.Height + 1, bitmap.Width + 1];
    colred = new int[bitmap.Height + 1, bitmap.Width + 1];
    colblue = new int[bitmap.Height + 1, bitmap.Width + 1];
    colgreen = new int[bitmap.Height + 1, bitmap.Width + 1];
    scalered = new int[bitmap.Height + 1, bitmap.Width + 1];
    scaleblue = new int[bitmap.Height + 1, bitmap.Width + 1];
    scalegreen = new int[bitmap.Height + 1, bitmap.Width + 1];
    recrowred = new int[bitmap.Height + 1, bitmap.Width + 1];
    recrowblue = new int[bitmap.Height + 1, bitmap.Width + 1];
    recrowgreen = new int[bitmap.Height + 1, bitmap.Width + 1];
    recorgred = new int[bitmap.Height + 1, bitmap.Width + 1];
    recorgblue = new int[bitmap.Height + 1, bitmap.Width + 1];
    recorggreen = new int[bitmap.Height + 1, bitmap.Width + 1];
    //unsafe
    {

        for (int i = 0; i < bitmap.Height; i++)
        {
            for (int j = 0; j < bitmap.Width; j++)
            {
                orgred[i, j] = bitmap.GetPixel(j,i).Red;
                orggreen[i, j] = bitmap.GetPixel(j, i).Green;
                orgblue[i, j] = bitmap.GetPixel(j, i).Blue;

            }

        }
    }
    //Transform rows
    for (int r = 0; r < bitmap.Height; r++)
    {
        int k = 0;
        for (int p = 0; p < bitmap.Width; p = p + 2)
        {
            rowred[r, k] = (int)((double)(orgred[r, p] + orgred[r, p + 1]) / 2);
            rowred[r, k + (bitmap.Width / 2)] = (int)((double)(orgred[r, p] - orgred[r, p + 1]) / 2);
            rowgreen[r, k] = (int)((double)(orggreen[r, p] + orggreen[r, p + 1]) / 2);
            rowgreen[r, k + (bitmap.Width / 2)] = (int)((double)(orggreen[r, p] - orggreen[r, p + 1]) / 2);
            rowblue[r, k] = (int)((double)(orgblue[r, p] + orgblue[r, p + 1]) / 2);
            rowblue[r, k + (bitmap.Width / 2)] = (int)((double)(orgblue[r, p] - orgblue[r, p + 1]) / 2);
            k++;
        }
    }
    //Transform columns
    for (int c = 0; c < bitmap.Width; c++)
    {
        int k = 0;
        for (int p = 0; p < bitmap.Height; p = p + 2)
        {
            colred[k, c] = (int)((double)(rowred[p, c] + rowred[p + 1, c]) / 2);
            colred[k + bitmap.Height / 2, c] = (int)((double)(rowred[p, c] - rowred[p + 1, c]) / 2);
            colgreen[k, c] = (int)((double)(rowgreen[p, c] + rowgreen[p + 1, c]) / 2);
            colgreen[k + bitmap.Height / 2, c] = (int)((double)(rowgreen[p, c] - rowgreen[p + 1, c]) / 2);
            colblue[k, c] = (int)((double)(rowblue[p, c] + rowblue[p + 1, c]) / 2);
            colblue[k + bitmap.Height / 2, c] = (int)((double)(rowblue[p, c] - rowblue[p + 1, c]) / 2);
            k++;
        }
    }
    //Scale col
    for (int r = 0; r < bitmap.Height; r++)
    {
        for (int c = 0; c < bitmap.Width; c++)
        {
            if (r >= 0 && r < bitmap.Height / 2 && c >= 0 && c < bitmap.Width / 2)
            {
                scalered[r, c] = colred[r, c];
                scalegreen[r, c] = colgreen[r, c];
                scaleblue[r, c] = colblue[r, c];
            }
            else
            {
                scalered[r, c] = Math.Abs((colred[r, c] - 127));
                scalegreen[r, c] = Math.Abs((colgreen[r, c] - 127));
                scaleblue[r, c] = Math.Abs((colblue[r, c] - 127));
            }
        }
    }
    //Set LL = 0
    for (int r = 0; r < bitmap.Width / 2; r++)
    {
        for (int c = 0; c < bitmap.Height / 2; c++)
        {
            colred[r, c] = 0;
            colgreen[r, c] = 0;
            colblue[r, c] = 0;
        }
    }
    //Set LL = 0
    for (int r = 0; r < bitmap.Height; r++)
    {
        for (int c = 0; c < bitmap.Width; c++)
        {
            if (!(r >= 0 && r < bitmap.Height / 2 && c >= 0 && c < bitmap.Width / 2))
            {
                if (Math.Abs(colred[r, c]) <= m_threshold)
                {
                    colred[r, c] = 0;
                }
                else
                {
                    //colred[r, c] = 255;
                }
                if (Math.Abs(colgreen[r, c]) <= m_threshold)
                {
                    colgreen[r, c] = 0;
                }
                else
                {
                    //colgreen[r, c] = 255;
                }
                if (Math.Abs(colblue[r, c]) <= m_threshold)
                {
                    colblue[r, c] = 0;
                }
                else
                {
                    //colblue[r, c] = 255;
                }
            }
        }
    }
    //Inverse Transform columns
    for (int c = 0; c < bitmap.Width; c++)
    {
        int k = 0;
        for (int p = 0; p < bitmap.Height; p = p + 2)
        {
            recrowred[p, c] = (int)((colred[k, c] + colred[k + bitmap.Height / 2, c]));
            recrowred[p + 1, c] = (int)((colred[k, c] - colred[k + bitmap.Height / 2, c]));
            recrowgreen[p, c] = (int)((colgreen[k, c] + colgreen[k + bitmap.Height / 2, c]));
            recrowgreen[p + 1, c] = (int)((colgreen[k, c] - colgreen[k + bitmap.Height / 2, c]));
            recrowblue[p, c] = (int)((colblue[k, c] + colblue[k + bitmap.Height / 2, c]));
            recrowblue[p + 1, c] = (int)((colblue[k, c] - colblue[k + bitmap.Height / 2, c]));
            k++;
        }
    }

    //Invers Transform rows
    for (int r = 0; r < bitmap.Height; r++)
    {
        int k = 0;
        for (int p = 0; p < bitmap.Width; p = p + 2)
        {
            recorgred[r, p] = (int)((recrowred[r, k] + recrowred[r, k + (bitmap.Width / 2)]));
            recorgred[r, p + 1] = (int)((recrowred[r, k] - recrowred[r, k + (bitmap.Width / 2)]));
            recorggreen[r, p] = (int)((recrowgreen[r, k] + recrowgreen[r, k + (bitmap.Width / 2)]));
            recorggreen[r, p + 1] = (int)((recrowgreen[r, k] - recrowgreen[r, k + (bitmap.Width / 2)]));
            recorgblue[r, p] = (int)((recrowblue[r, k] + recrowblue[r, k + (bitmap.Width / 2)]));
            recorgblue[r, p + 1] = (int)((recrowblue[r, k] - recrowblue[r, k + (bitmap.Width / 2)]));
            k++;
        }
    }
    Bitmap imgPtr = new Bitmap(bmpSource);

  //  unsafe
    {

      //  byte[] imgPtr = new byte[bitmap.Height*bitmap.Width*4];
        int k = 0;
        for (int i = 0; i < bitmap.Height; i++)
        {
            for (int j = 0; j < bitmap.Width; j++)
            {
                if (function == 0)
                {
                    PixelColor pc=new PixelColor();
                    pc.Red =(byte) Math.Abs(recorgred[i, j] - 0);
                    pc.Green = (byte)Math.Abs(recorggreen[i, j] - 0);
                    pc.Blue = (byte)Math.Abs(recorgblue[i, j] - 0);
                    imgPtr.SetPixel(j, i, pc);
                }
                else
                {
                    PixelColor pc = new PixelColor();
                    pc.Red = (byte)scalered[i, j];
                    pc.Green = (byte)scalegreen[i, j];
                    pc.Blue= (byte)scaleblue[i, j];
                    imgPtr.SetPixel(j, i, pc);
                }

            }

        }
    }
    imgPtr.Finalize();
    return imgPtr.Image;
    //bitmap.UnlockBits(bitmapdata);
}
这是多分辨率图像的结果。

以上是小波边缘检测的结果。
过滤
滤波是图像最重要的方面之一。它用于去除图像中的噪声或提高可见度或锐度。滤波过程被定义为核与图像块卷积的函数。因此,您基本上将核或滤波器核心定义为mxn矩阵。
示例

滤波应将核值与关联像素相乘,然后求和并替换中心像素。其中一个突出的滤波器是中值滤波器。让我们看看中值滤波器如何与我们的应用程序配合使用。
public static BitmapSource MedianFilter(BitmapImage srcBmp, int []Kernel)
{

    List<int> rd = new List<int>();
    List<int> gr = new List<int>();
    List<int> bl = new List<int>();
    List<int> alp = new List<int>();

    int xdir = Kernel[0];
    int ydir = Kernel[1];
    Bitmap bmp = new Bitmap(srcBmp);
    Bitmap median = new Bitmap(srcBmp);
    PixelColor c;

    for (int i = 0; i < bmp.NumRow; i++)
    {
        for (int j = 0; j < bmp.NumCol; j++)
        {
            rd = new List<int>();
             gr = new List<int>();
            bl = new List<int>();
            alp = new List<int>();
            int ind = 0;
            PixelColor pc=new PixelColor();
            for (int i1 = i-ydir; i1 <= i+ydir; i1++)
            {
                for (int j1 = j-xdir; j1 <= j+xdir; j1++)
                {
           //
                    if((j1<bmp.NumCol) && (i1<bmp.NumRow) &&
                          (j1>=0)&&(i1>=0)&&(i1!=i)&&(j1!=j))
                    {
                            pc = median.GetPixel(j1, i1);
                            rd.Add(pc.Red);
                            gr.Add(pc.Green);
                            bl.Add(pc.Blue);
                            alp.Add(pc.Alpha);
                            ind++;

                    }
             //       catch (Exception ex)
                    {
                    }
                }
            }
            if (rd.Count > 0)
            {
                int red = (int)GetMedian(rd.ToArray());
                int green = (int)GetMedian(gr.ToArray());
                int blue = (int)GetMedian(bl.ToArray());
                int alpha = (int)GetMedian(alp.ToArray());
                PixelColor pc2 = new PixelColor(red, green, blue, alpha);
                median.SetPixel(j, i, pc2);

            }


        }
    }
    median.Finalize();
    return median.Image;
}
它基本上会遍历图像,取一个像素,提取周围的所有像素并找到中位数。然后用邻居的中位数替换中心像素。
从根本上说,尽管大小是预定义的,但在边缘处,像素将不会有足够多的邻居。因此,我们使用列表而不是固定数组来提取邻居。GetMedian方法返回列表的中位数。
中位数由排序数组的中心给出。如果数组长度为奇数,则计算为两个中心值的平均值。
这是中值滤波的结果

说到滤波,如果没有一个允许用户执行基于核处理的适当卷积滤波器,我们该怎么办?最简单的滤波器形式之一是上面描绘的3x3滤波器。让我们探索用于边缘检测的3x3滤波器。我们使用{-5 0 0,0 0 0,0 0 5}滤波器进行卷积以检测边缘(对角线边缘检测)。
以下是卷积的代码:
public static BitmapSource ConvFilter(BitmapImage b, int [,]Kernel)
{
    Bitmap bmp = new Bitmap(b);
    Bitmap rslt = new Bitmap(b);
    int nRows = Kernel.GetUpperBound(0);
    int nCols = Kernel.GetUpperBound(1);

    double sumR = 0, sumG = 0, sumB = 0,sumAlpha=0;
    int weight = 0;
    int r = 0, c = 0;
    int tot = 0;
    string s = "";
    for (int i = nRows/2; i < bmp.NumRow-nRows/2; i++)
    {
        for (int j = nCols/2; j < bmp.NumCol-nCols/2; j++)
        {
            sumR = sumG = sumB = sumAlpha=0;
            r = 0;
            c = 0;
            PixelColor pc = bmp.GetPixel(j, i);
            for (int i1 = -nRows/2; i1 <=nRows/2 ; i1++)
            {
                for (int j1 = -nCols/2; j1 <=nCols/2; j1++)
                {
                    pc = bmp.GetPixel(j1+j, i1+i);
                    double red = (double)pc.Red;
                    sumR = sumR+red * (double)Kernel[r, c];
                    double green = (double)pc.Green;
                    double blue = pc.Blue;
                    sumG = sumG + green * (double)Kernel[r, c];
                    sumB = sumB + blue* (double)Kernel[r, c];
                    tot++;
                    c++;
                }
                r++;
                c = 0;
            }
            if (weight == 0)
            {
                weight = 1;
            }
            sumG = 0;
            sumB = 0;
            //sumR = sumR / (double)tot;
            if (sumR > 255)
            {
                sumR = 255;
            }
            if (sumR < 0)
            {
                sumR = 0;
            }
            if (sumG > 255)
            {
                sumG = 255;
            }
            if (sumG < 0)
            {
                sumG = 0;
            }
            if (sumB < 0)
            {
                sumB = 0;
            }
            if (sumB > 255)
            {
                sumB = 255;
            }

            pc.Red = (byte)(int)sumR;
            pc.Green = (byte)sumG;
            pc.Blue = (byte)sumB;
            rslt.SetPixel(j, i, pc);
        }
    }

    rslt.Finalize();
    return rslt.Image;
}
卷积滤波器的一个问题是它需要在浮点或更好的双精度域上进行乘法运算。而像素值是字节。因此系统需要多次类型转换。我们正在寻找解决此问题的可能方法。
这是使用上述3x3对角线掩码进行边缘检测的结果。

分段
分割是将颜色归类并将其标准化到最接近的颜色值,从而减少图像中的颜色总数的过程。这有助于图像中的对象检测。有几种颜色分割方法,但此应用程序将开箱即用地支持均值漂移分割和人脸分割。
均值漂移分割
这种技术的基本原理非常简单。首先,收集像素 (x,y) 的 NxN 个相邻像素。计算均值,然后检查中心是否足够接近均值。如果是,则用均值替换中心像素。但这种方法有一定的局限性。随着新的高清摄像头,颜色深度巨大。因此,一种颜色到另一种颜色的变化巨大。因此,我以以下方式修改了算法:
1) 从RGB分量计算HSV分量
2) 在HSV分量上运行均值漂移算法
3) 如果中心像素替换为正,则替换RGB图像中的RGB均值和HSV图像中的HSV均值。因此,HSV图像与RGB图像一起自动聚类。一旦处理完成,返回RGB图像。
以下是均值漂移算法的代码
public static BitmapSource MeanShiftSegmentation(BitmapImage src, double ThresholdDistance,int radious)
{
    Bitmap rgb = new Bitmap(src);
    Bitmap hsv = new Bitmap(Bitmap.BitmapImageFromBitmapSource(ConvertImageFromRGB2HSV(src)));

    for (int i = 0; i < rgb.NumRow; i++)
    {
        for (int j = 0; j < rgb.NumCol; j++)
        {
            double tot=0;
            double valsH = 0;
            double valsS = 0;
            double valsB = 0;
            double valsR = 0;
            double valsG = 0;
            double valsBl = 0;

            for (int i1 = -radious; i1 < radious; i1++)
            {
                for (int j1 = -radious; j1 < radious; j1++)
                {
                    if (((i1 + i) >= 0) && ((i1 + i) < rgb.NumRow) &&
                             ((j1 + j) >= 0) && ((j1 + j) < rgb.NumCol))
                    {
                        PixelColor pcHSV = hsv.GetPixel(j1 + j, i1 + i);
                        valsH+=(double)(pcHSV.Red);
                        valsS += (double)(pcHSV.Green);
                        valsB+=(double)(pcHSV.Blue);
                        PixelColor pcRGB = rgb.GetPixel(j1 + j, i1 + i);
                        valsR += (double)(pcRGB.Red);
                        valsG += (double)(pcRGB.Green);
                        valsBl += (double)(pcRGB.Blue);
                        tot++;
                    }

                }
            }
            double mH = valsH/tot;
            double mS =valsS/tot;
            double mV = valsB/tot;
            byte mR =(byte) (valsR/tot);
            byte mG = (byte)(valsG/tot);
            byte mB = (byte)(valsBl/tot);

            PixelColor pcv = hsv.GetPixel( j, i);
            PixelColor pcR = new PixelColor();
            double avgColor = (Math.Abs(pcv.Red - mH) +
              Math.Abs(pcv.Green - mS) + Math.Abs(pcv.Blue - mV)) / 3;
            if (avgColor < ThresholdDistance)
            {
                pcR = new PixelColor(mR, mG, mB, 255);
                rgb.SetPixel(j,  i, pcR);
            }
        }
    }
    rgb.Finalize();
    return rgb.Image;
}
这是分割结果。您可以看到,突出部分标有最接近的颜色,变化最小。边缘得以保留。通过适当地更改距离和半径参数,您可以改变分割过程的行为。

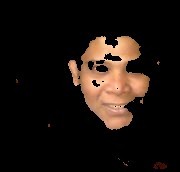
这是基于Ycbr颜色尺度中的颜色阈值化,然后进行形态学处理的人脸检测结果。
乐趣
没有乐趣元素的Ultrabook应用算什么?人们使用应用程序来增加娱乐因素,图像有很多有趣的事情可以做。
我们已经集成了三个开箱即用的应用程序。
- 图像修复
- 人脸拼贴
- 立体图
图像修复是一种通过替换图像中不需要的物体的方法。假设你有一张和前女友的美丽照片,你看上去非常帅气。但不幸的是,你要和别人结婚了,你不想删除这张照片。那怎么办?使用图像修复,从图像中移除你的前女友。或者你有一张美丽的快照,你发现一些烦人的电线垂着,使用图像修复来移除这些东西。
阅读我关于图像修复的文章以了解更多细节:<<此处>>
人脸拼贴
好吧,你有很多朋友的相册,你想通过将所有照片级联起来创建一张照片,使得级联的照片也能解读出一幅画。
这是我18个月大的儿子的拼贴画。

代码如下
public static BitmapSource MakeCollage(BitmapImage srcBmp,Bitmap[]allBmp,int BlockSizeRow,int BlockSizeCol)
{
    Bitmap Rslt = new Bitmap(srcBmp);// GRAY is the resultant matrix
    Bitmap src = new Bitmap(srcBmp);
    int NumRow = src.Height;
    int numCol = src.Width;


    Bitmap srcBlock = new Bitmap(BlockSizeRow, BlockSizeCol);
    for (int i = 0; i < NumRow - BlockSizeRow; i += BlockSizeRow)
    {
        for (int j = 0; j < numCol - BlockSizeCol; j += BlockSizeCol)
        {
            srcBlock = new Bitmap(BlockSizeRow, BlockSizeCol);
            ////1. Extract all the pixels in main image block
            for (int i1 = 0; i1 < (BlockSizeRow); i1++)
            {
                for (int j1 = 0; j1 < (BlockSizeCol); j1++)
                {
                    srcBlock.SetPixel(j1, i1, Rslt.GetPixel(j + j1, i + i1));
                    //      System.Threading.Thread.Sleep(15);
                }
            }
            srcBlock.Finalize();
            ////////// 2. Let us now compare this block with every image in database
            double dst = 999999999999999.0;
            int small = -1;
            for (int k = 0; k < allBmp.Length; k++)
            {
                double d = 0;
                for (int i1 = 0; i1 < BlockSizeRow; i1++)
                {
                    for (int j1 = 0; j1 < BlockSizeCol; j1++)
                    {
                        PixelColor c1 = srcBlock.GetPixel(j1, i1);
                        int rd1 = c1.Red;
                        int gr1 = c1.Green;
                        int bl = c1.Blue;

                        PixelColor c2 = allBmp[k].GetPixel(j1, i1);
                        int rd2 = c2.Red;
                        int gr2 = c2.Green;
                        int bl2 = c2.Blue;
                        d = d + Math.Abs(rd1 - rd2) + Math.Abs(gr1 - gr2) + Math.Abs(bl - bl2);
                    }
                }
                d = d / (double)(BlockSizeRow * BlockSizeCol);
                if (d < dst)
                {
                    dst = d;
                    small = k;
                }
            }
            for (int i1 = 0; i1 < BlockSizeRow; i1++)
            {
                for (int j1 = 0; j1 < BlockSizeCol; j1++)
                {
                    PixelColor c1 = allBmp[small].GetPixel(j1, i1);
                    try
                    {
                        Rslt.SetPixel(j1 + j, i1 + i, c1);
                    }
                    catch (Exception ex)
                    {
                    }

                }
            }
        }
        //timer1.Enabled = true;
    }
    Rslt.Finalize();
    return Rslt.Image;
}
此处提供有关拼贴技术的更多说明:<此处>
立体图
Anaglyphs 基本上是红蓝通道图像,当用3D眼镜或具有红蓝视觉的眼镜观看时,会产生3D视觉效果。这是为3D视觉提供的主要界面,并计划作为该应用程序的未来版本。
这是一个从一对立体图像生成的立体图像。

以下是源立体图像

这是我们将看到的3D视图

此图像将通过将立体图像的深度图与左视图图像进行映射来生成。深度图是与立体视图相关的视觉差异。
隐写术
为了增加乐趣,我们还准备了一种独特的图像隐写术过程,它允许您将一个图像隐藏在另一个相同比例的图像后面。是的,您没听错。源图像和有效载荷图像将具有相同的大小,以消除隐写术典型的额外像素的需求。
这是算法
编码过程
- 输入要隐藏的图像 (img_hide)
- 对 img_hide 进行 HAAR 小波变换,并分别称其分量为:cA、cH、cV、cD。
- 将 img_hide 中冗余的值设为 0。
- 找出所有分量的最大值,并通过除以最大值来标准化每个子图像。
- DEC 是包含 img_hide 归一化小波分解值的数据。
- 使用 HAAR 小波将覆盖图像 im 分解为 cA1、cV1、cH1、cD1 分量
- 存储 cA 大小、M1、M2、M3、M4,我将前四个值存储在 cH1 中。
- 将标准化后的 img_hide 数据 dec 存储在 cV1 和 cD1 中。
- 对 DEC1 进行 IDWT,即 idwt(cA1,cH1,cV1,cD1),并将其命名为 S。
- 直接保存图像S时,转换过程中可能会有损失,因此我们对S进行归一化。
- 将 S 转换为 16 位格式,并将值 M 存储为第一个像素值。其中 M = 最大值 (绝对值(S))。
解码过程
- 将隐写图像读取到 S1。
- 从第一个像素中提取归一化大小 m。
- 将第一个像素值设置为第二个像素,以补偿否则会发生的损失。
- 将 S1 从 unit16 尺度转换为原始尺度。
- 对变量 S1 应用小波变换,并将子图像或分量分别称为 cA1、cV1、cH1、cD1。
- 从 cH1 中提取数据。
- 对值进行反归一化。
- 从cD1和cH1的组合数据中提取dec。
- 对 dec 进行反归一化。
- 对集合 {cA,cD,cV,cH} 进行 IDWT,并将其命名为 rec。
- 这是恢复的图像
实用程序
这些是与主应用程序一起移植的小型应用程序,通常用于商业和其他教育目的。
目前已几乎准备好随应用程序一起发布的功能包括:
- Gif 电影制作器
- 可见和不可见水印
- Dicom查看器和Jpeg导出器
基于内容的图像搜索与检索
通过模板进行内容搜索的第一部分已经准备就绪,解释如下。然而,对于机器学习和基于内容的图像搜索,您需要再次回来。
在图像中搜索模板
模板匹配是一种技术,您选择一个(或多个)称为模板的小图像,并在一个称为f的大图像上搜索它。模板匹配基于互相关原理,这意味着由模板t的大小定义的块内的值与f的接近程度。
用最简单的术语来说,这个过程可以用下面的公式来解释:

像OpenCV这样的软件提供了很好的模板匹配技术。然而,在当前的框架下,我的主要目标是消除任何第三方、GDI支持甚至指针,以便该库可以轻松地用Java重写。所以,这是我使用的相关性代码。
public static Int32Rect TemplateMatch(BitmapImage mainImage, BitmapImage templateImage)
{
    Bitmap f=new Bitmap(mainImage);
    Bitmap t=new Bitmap(templateImage);
    int BlockSizeRow = t.NumRow;
    int BlockSizeCol = t.NumCol;
    int NumRow = f.NumRow;
    int numCol = f.NumCol;

    double dst = 0;
    int smallX = 0,smallY=0;
    double miuF = CalculateMean(f.GetImageAsList());
    double stdF = CalculateStdDev(f.GetImageAsList());
    double miuT = CalculateStdDev(t.GetImageAsList());
    double stdT = CalculateStdDev(t.GetImageAsList());

    for (int i = 0; i < NumRow - BlockSizeRow; i ++)
    {
        for (int j = 0; j < numCol - BlockSizeCol; j ++)
        {
            double sm = 0;
            for (int i1 = 0; i1 < (BlockSizeRow); i1++)
            {
                for (int j1 = 0; j1 < (BlockSizeCol); j1++)
                {
                    PixelColor fpc = f.GetPixel(j1 + j, i1 + i);
                    PixelColor tpc = t.GetPixel(j1, i1);
                    sm =sm+ ((double)fpc.Red - miuF) * ((double)tpc.Red - miuT) / (stdF * stdT);
                }
            }
            sm=sm/(double)(BlockSizeCol*BlockSizeRow);
            sm = Math.Abs(sm);
            if (sm > dst)
            {
                dst = sm;

                smallX = i;
                smallY = j;
            }
        }
    }

    return new Int32Rect(smallX, smallY, (int)templateImage.Width, (int)templateImage.Height);
}
简单来说,上述方法实现了我提到的公式。它在f上找到与模板最匹配的块,并返回一个从最佳匹配出现坐标开始的、模板大小的矩形。
但是等等,在您认为这很容易之前,我想强调一些事实。如您所见,模板匹配是在灰度图像中执行的,并且该方法是空间性的,因此不匹配的可能性很高。所以您所要做的就是,通过对模板和f进行DCT/小波变换,然后对它们进行模板匹配技术,将空间模板匹配转换为谱模板匹配方法。我已将小波技术纳入其中。DCT将在下次更新中很快介绍。
这是模板匹配过程的结果,附带了我用于测试算法的最简单界面的屏幕截图。

我正在使用左下角的一个小模板,在我的图库中的一张图片中进行匹配。为了将矩形叠加在图像上,我正在使用画布。MainImage源被分配为ImageBrush的源。一个矩形首先用源图像填充,并作为子元素添加到画布中。另一个矩形用于绘制TemplateMatch方法产生的矩形,并作为另一个子元素添加到画布中。
这是叠加代码。
Rectangle exampleRectangle1 = new Rectangle();

exampleRectangle1.TranslatePoint(new Point(r.X+30, r.Y+30), Image1);
exampleRectangle1.Width = r.Width;
exampleRectangle1.Height = r.Height;
exampleRectangle1.Stroke = Brushes.Red;
exampleRectangle1.StrokeThickness = 4;
canvas.Children.Insert(1, exampleRectangle1);

Rectangle exampleRectangle = new Rectangle();
exampleRectangle.TranslatePoint(new Point(r.X, r.Y), Image1);
exampleRectangle.Width = 128;
exampleRectangle.Height = 128;
// Create a SolidColorBrush and use it to
// paint the rectangle.
ImageBrush myBrush = new ImageBrush();
myBrush.ImageSource = Image1.Source;
exampleRectangle.Fill = myBrush;
canvas.Children.Insert(0, exampleRectangle);
Rectangle exampleRectangle1 = new Rectangle();

exampleRectangle1.TranslatePoint(new Point(r.X+30, r.Y+30), Image1);
exampleRectangle1.Width = r.Width;
exampleRectangle1.Height = r.Height;
exampleRectangle1.Stroke = Brushes.Red;
exampleRectangle1.StrokeThickness = 4;
canvas.Children.Insert(1, exampleRectangle1);
沟通
当我向妻子展示这些应用并让她评价时,她直言不讳地说:“如果是我选择你的应用,我不会。是的,它提供了很多处理、图像搜索和修改功能,但我什么都分享不了!这太糟糕了!”
我惊呆了,心想,对啊,我们做的任何酷炫的事情,都想展示,想分享,而且想通过应用程序来完成。所以我决定在图像处理框架旁边添加一个通信框架,以便轻松分享照片。
该框架开箱即用地提供了获取和共享选项:Facebook和蓝牙。
首先,我们可以直接从我们和朋友的Facebook相册下载图片。然后我们可以将照片直接发布到我们的Image1主图像面板到Facebook。
A. Facebook 集成
1. 获取 API 密钥
对于任何 Facebook 应用程序,您首先需要一个经过 Facebook 批准的应用程序(应用程序名称中不能包含“Face”字样)。
因此,打开https://developers.facebook.com
点击“应用程序”,然后点击“创建应用程序”。输入名称并获取API密钥。请查看以下屏幕截图。绿色标记的字段很重要。
2. 使用 API 详细信息配置您的应用程序
在 Visual Studio.Net 2010 中打开 FacebookingTest Solution。在应用程序层面,您首先需要的是应用程序获得 Facebook 的身份验证。
假设您正在分发该应用程序,那么任何使用它的人都需要接受其Facebook数据(称为Graph)必须允许应用程序获取或访问。
因此,连接到 Facebook 时,应用程序必须告知 Apps 是有效的。
打开项目后,您可能会在解决方案资源管理器中看到App.config。打开文件。
保存代码。现在,应用程序必须做的第一步是调用 Facebook 授权服务。
将您的应用程序ID作为client_id传递,该ID请求Facebook对应用程序进行身份验证。如果身份验证成功,您将被重定向到
https://#/connect/login_success.html,并带有一个确认登录成功的会话令牌。
然后您需要创建一个图片获取方法。
请注意,当您尝试获取朋友列表或朋友的状态更新等任何详细信息时,您使用“Get”类型的API;当您想发布内容时,您使用“Post”API。
此页面提供了所有API的详细信息
https://developers.facebook.com/docs/reference/api/
https://developers.facebook.com/docs/ref.../api/post/ 提供了 Post API 中参数的详细信息。
me/feed 显示您自己的动态。您需要查看 Post API 字段以了解可以传递的所有内容。
请注意,结果存储在动态数据对象中。因此,它能够消费不同格式的数据。任何Facebook API访问方法的结果都将是XML流。动态数据类型可以轻松解析流并枚举数据对象。
将把您和您朋友列表中的所有照片都发送给您。
B. 蓝牙集成
我们使用 32Feet 蓝牙库的 InTheHand 命名空间来开发搜索和发送图像的机制。BluetoothDeviceSelectionDialog 将首先使用户能够获取附近的蓝牙设备,然后选择一个设备来传输 Image1 中的图像。
我们将首先使用我们的Bitmap类的Save实用程序保存Image1的图像,然后使用包含文件名和所选设备地址的Uri创建ObexWebRequest。我们请求使用post方法进行读取,该方法将图像写入所选的蓝牙设备。成功后,我们删除本地图像。
这是示例代码:
private void sendfile()
{
    SelectBluetoothDeviceDialog dialog = new SelectBluetoothDeviceDialog();
    dialog.ShowAuthenticated = true;
    dialog.ShowRemembered = true;
    dialog.ShowUnknown = true;
    dialog.ShowDialog();
    BitmapImage iSrc = Bitmap.BitmapImageFromBitmapSource(Image1.Source as BitmapSource);
    Bitmap bmp = new Bitmap(iSrc);
    bmp.Save("my.jpg");

    System.Uri uri = new Uri("obex://" +
      dialog.SelectedDevice.DeviceAddress.ToString() + "/" + "my.jpg");
    ObexWebRequest request = new ObexWebRequest(uri);
    request.ReadFile("my.jpg");
    ObexWebResponse response = (ObexWebResponse)request.GetResponse();
    MessageBox.Show(response.StatusCode.ToString());
    response.Close();
}
图库管理和基于内容的图像搜索
图库管理的基本原理非常简单。用户可以拥有多个图库(类似于Facebook中的相册)。主配置文件存储图库的详细信息。
<Gallery>
<Name> My Wedding</Name>
<ConfigLocation>MyWedding.xml</ConfigLocation>
<Message> Photos of My Wedding</Message>
<Date>dd.mm.yyyy</Date>
<GeoLocation>
<Latitude>LT</Latitude>
<Longitude>LN</Longitude>
</GeoLocation>
</Gallery>
每个图库都以相同的结构作为节点存储在此配置文件中。用户可以选择使用这些属性,也可以将其留空。从配置文件中可以看出,它存储了独立图库的位置。独立图库的结构如下:
<Picture>
<location>c:\Photos\wed1.jpg</location>
<NumFaces>1</NumFaces>
<Face>
<Name>Rupam</Name>
<Rectangle> 20 30 80 110</Rectangle>
<FacePca>1.7 3.49 6.66 2.23 8.41 9.92 9.99 17.6</FacePca>
</Face>
 <StandardFeatures>
<ColorFeatures>MR MG MB SR SG SB</ColorFeatures>
<TextureFeatures>MH MS MV SH SS SV<TextureFeatures>
<ShapeFeatures>
 <Zernike>
ZM1_M ZM2_M ZM3_M ZM4_M
</Zernike>
<ShapeFeatures>
</StandardFeatures>
</Picture>
可以看出,每张图片都被视为图库中的一个元素。每张图片都可以通过皮肤分割和上述连接组件检测到多张人脸。我们从特征人脸中提取8个主导PCA分量。当您浏览图像时,应用程序会尝试自动定位人脸并进行标记。提取矩形的PCA并进行归一化。用户还可以使用鼠标或手写笔设备选择人脸。随着数据库的增长,有关人脸的重要信息将可用。当加载新照片时,采用基于PCA的模板匹配来搜索人脸,系统在定位人脸方面变得非常准确。
使用 Facebook 图像系统,您需要手动标记人脸。但使用此 APP,它是自动完成的。人脸在检测后使用基于 PCA 的人脸匹配自动标记。但正如您所期望的,由于训练人脸数量少,系统在开始时的误检率非常高。因此,我们为用户提供了一个重新标记人脸并提供正确名称的选项。但随着您的图库扩大,识别准确性也会提高。
现在,一旦提取出人脸,图像的其余部分就被视为背景。我们从图像中提取全局特征,包括红色、绿色、蓝色颜色分量的平均值(MR、MG、MB),HSV纹理分量的平均值(MH、MS、MV),颜色分量的标准差(SR、SG、SB),纹理分量的标准差(SH、SS、SV)。我们还结合了全局形状信息,以实现花卉、动物、食物等的正确匹配。
形状特征是从 Zernike 矩中提取的。Zernike 矩是从图像的极谐波中提取的矩。最初,我们仅限于 4 阶 Zernike 矩。我正在尝试整合的其他形状特征包括:极坐标直方图和形状上下文。
一旦您加载图像并进行搜索,搜索将在您的所有图库中执行,并将创建一个包含匹配搜索的新文件的临时xml。用户可以将搜索结果保存为另一个图库。
这是测试算法的示例屏幕截图。

左侧是查询图像,右侧是匹配图像。下方的列表框按接近度顺序列出所有匹配项。
功能和用法摘要
用户模式
1) 用户可以管理多个图库
2) 人脸自动提取和标记
3) 图片可通过蓝牙和Facebook导入
4) 图片可以发布到Facebook或通过蓝牙分享
5) 图片可根据地理位置、特征、人脸进行搜索。搜索输入可以是简单的标签,也可以是图片本身。搜索结果也可保存为图库。
6) 用户可以从图库中的所有图片中创建一个面部拼贴画
7) 用户可以使用图像修复技术从图像中移除不需要的对象
8) 用户可以将一个图像隐藏在另一个图像后面
9) 用户可以在图像后面隐藏文本
10) 用户可以从立体图像对创建立体图像
11) 深度图提取和图像三维渲染
12) 基于 GPS 的图库间图片自动渲染
13) 从网络摄像头提取静止图像并加载到图库
14) 基于环境光的亮度调节
15) 基于手写笔和触摸的轮廓选择
16) 带有幻灯片和幻灯片效果的酷炫演示模式。
开发者模式
1) 使用框架和简单算法语言开发自己的图像处理例程
3) 过滤器易于设计
4) 导入技术并应用于视频
5) 开发人脸生物识别解决方案
6) 为任何内容创建自定义 CBIR 系统
简而言之,您可以将图像作为内容进行管理,并探索图像处理的强大功能。
它与OpenCV或Matlab有何不同?
Matlab 和 OpenCV 需要编码来实现技术,主要用于开发算法。没有其他软件(至少在我所知范围内)提供在图像中获得乐趣的同时构建自己技术的选项。所以如果你没有 ImageGrassy,你可能永远不知道图像处理能有多强大!
兴趣点
最终集成测试正在进行中,以获得AppStore的批准。在通过第一轮后,下一个目标是为用户提供独特的体验和图像乐趣。因此,我将引入另一个部分,“产品导览”,您将在其中看到整个系统的初始屏幕和功能。您的建议非常宝贵。别忘了留下您的评论!
免责声明:所有界面和设计尚未最终确定。我将保持“产品导览”部分更新,让您了解当前开发情况,并获取您的宝贵建议!
为什么选择Ultrabook?
你懂的!当人们访问Ultrabook应用商店时,他们会发现这里的应用程序是像其他微软产品一样的生产力工具,而不仅仅是成千上万个Apple应用程序的精简和变形版本。其次,设计、混合编程模型和酷炫的应用程序需要一个酷炫的平台,而在Windows 7中,它看起来有点像一个笨拙的编辑器,有人把成千上万个例程组合在一起。
代码在哪里?
我没有计划把它做成我制作和分发的另一个免费软件。它是一种纯粹的WPF模型,抽象了WPF的强大功能,并为您的传统编程技能插上了翅膀。由于这些东西是为商业应用程序计划和编写的,因此很难发布代码。但是等等,所有的代码片段都是功能性的,您可以构建自己的应用程序或在您的项目中使用它们。它们都有效!
为什么不用其他传感器?
厨子多了坏事。所以我将应用传感器的使用限制在触摸、手写笔和光感应上。看在上帝的份上,它更像一台笔记本电脑,你不会把它扭在手里(我收回我的话  " /> )。
欢迎提出您认为该框架可能实现的任何其他酷炫应用程序。别忘了留下关于您认为应用程序绝对必要的功能的评论。
哪个类别?
起初我想到Metro,但当我在单调的Metro界面上测试它时,它看起来很傻。因为这个应用程序提供了许多图像操作和处理,有很多颜色和变化,最终失去了Metro的外观和感觉。所以我宁愿选择教育/娱乐类别的桌面应用程序。
参考
以下链接、概念和代码片段非常有帮助,我感谢所有以下文章/片段的作者
[1] https://codeproject.org.cn/Articles/340859/Metro-Style-Lightweight-Image-Processing
[2] https://codeproject.org.cn/Articles/354702/WPF-Slideshow
[3] http://social.msdn.microsoft.com/forums/en-US/wpf/thread/580fca03-d15b-48b2-9fb3-2e6fec8a2c68/
[4] http://langexplr.blogspot.in/2007/06/creating-fractal-images-using-c-30.html
[5] http://stackoverflow.com/questions/5275115/add-a-median-method-to-a-list
[6] http://stackoverflow.com/questions/3141692/c-sharp-standard-deviation-of-generic-list
[7] http://www.8bitavenue.com/2012/04/wavelet-edge-detector-in-c/
[8] https://codeproject.org.cn/Articles/93642/Canny-Edge-Detection-in-C
[9] https://codeproject.org.cn/Articles/99457/Edge-Based-Template-Matching
[10] http://www.c-sharpcorner.com/uploadfile/raj1979/dynamic-and-static-rectangle-in-wpf/历史
1. 无 CBIS 和模板匹配的文章于 2012 年 10 月 10 日发布
2. 卷积和对角线滤波器边缘检测解释于 2012 年 10 月 11 日
3. 归一化互相关模板匹配解释于 2012 年 10 月 11 日
4. 传感器、网络摄像头、通信框架集成和阐述于 2012 年 10 月 13 日