
MonoAndroid:在移动应用中使用 Fragments
在移动应用中使用 Fragment。
引言
这是 MonoAndroid 系列文章的第四篇,之前的文章有 通用 BaseAdapter、Android Grid View 和 Android TabHost 容器。
本文将演示 Fragment(字典含义为“一小部分被打破或分离”)。如果你理解/记得桌面编程中的用户控件,它与此类似。如果你不理解,可以将 Fragment 视为可以独立插入和运行的独立代码/UI 组件。
Fragment 需要一个容器才能运行。现在你可以使用 FrameLayout 并为其提供 Fragment 对象,或者在设计时使用 Fragment 标签,通过提供 class 属性和 Fragment 类名。我将进一步解释。
Fragment 可以通过以下图表进一步解释。在第一个布局中,我们在一个屏幕中使用了三个 Fragment,类似地根据 Fragment 显示不同的布局。

在本文中,我们将创建一个 软件开发人员信息 应用程序。Fragment 最早是在 Android 的 Honeycomb 版本中引入的。
我们将一步一步进行。
`- 通过选择 New ->Solutions 并将其命名为 “
MonoFragmentDemo” 来创建 Android 应用程序。

图 1:创建Android项目! - 项目创建后,打开 Resource Folder->Layout 并添加两个类型为 FragmentLeft.axml 和 FragmentRight.axml 的新文件,这将作为不同的 fragment,我们将在单个 activity 中进一步组合它们。
- 在 FragmentLeft 布局文件中添加以下代码:
<?xml version="1.0" encoding="utf-8"?>
<LinearLayout xmlns:android="http://schemas.android.com/apk/res/android"
    android:orientation="vertical"
    android:layout_width="fill_parent"
    android:layout_height="fill_parent">
    <TextView
        android:text="Medium Text"
        android:textAppearance="?android:attr/textAppearanceMedium"
        android:layout_width="fill_parent"
        android:layout_height="wrap_content"
        android:id="@+id/fl_textVDesigination" />
    <ScrollView
        android:minWidth="25px"
        android:minHeight="25px"
        android:layout_width="fill_parent"
        android:layout_height="wrap_content"
        android:id="@+id/scrollView1"
        android:layout_weight="0" >
         <TextView
        android:text="Small Text"
        android:textAppearance="?android:attr/textAppearanceSmall"
        android:layout_width="fill_parent"
        android:layout_height="wrap_content"
        android:id="@+id/fl_textVDesc" />
        </ScrollView>
    <Button
        android:text="Next"
        android:layout_width="fill_parent"
        android:layout_height="38.0dp"
        android:id="@+id/fl_Next"/>
</LinearLayout>
在上面的视图中,我有两个文本视图,其中一个将作为标题,另一个将根据标题包含信息,还有一个按钮,用于方便地移动记录。
一旦所有调整完成,看看它在 XamarinTm Studio Designer 中是什么样子:-
图:GridView 自定义项的设计器视图
- 创建文件夹
Fragments(我这样做是为了区分不同的代码部分)并添加 FragmentLeft.cs 文件,它将作为上面创建的 FragmentLeft.axml 文件的代码隐藏文件。在其中添加以下代码:-internal class FragmentLeft : Fragment { int _Index = 0; TextView textDesg,textDesc; string[] arrInformation = new string[] { "Software Developer", "A software developer is a person concerned with facets of the software development process. Their work includes researching, designing, implementing, and testing software.", "Lead Programmer", "A lead programmer is a software engineer in charge of one or more software projects. When primarily contributing in a high-level enterprise software design role, the title Software Architect (or similar) is often used" }; public override void OnCreate (Bundle savedInstanceState) { base.OnCreate (savedInstanceState); // Create your fragment here } public override View OnCreateView (LayoutInflater inflater, ViewGroup container, Bundle savedInstanceState) { var view = inflater.Inflate(Resource.Layout.FragmentLeft, container, false); textDesg = view.FindViewById<TextView>(Resource.Id.fl_textVDesigination); textDesc = view.FindViewById<TextView>(Resource.Id.fl_textVDesc); SetInformationOnText (textDesg, textDesc); return view; } void SetInformationOnText (TextView textDesg, TextView textDesc) { textDesg.Text = arrInformation [_Index]; textDesc.Text = arrInformation [_Index + 1]; _Index = (_Index == 2) ? 0 : 2; } }这里,我从 Fragment 类派生了类,并做了以下更改:-
- 现在重写
Fragment::OnCreateView(),并在作为参数传递给方法的容器中加载 "Resource.Layout.FragmentLeft" 布局。 - 现在使用
FindViewById获取 Resource.Id.fl_textVDesigination 和 Resource.Id.fl_textVDesc 的 textview 对象,并将其存储在类变量中。 - 我在类中添加了一个硬编码的字符串数组,其中偶数位置包含标题文本,奇数位置包含描述。
- 使用
SetInformationOnText函数更新文本视图。
- 现在重写
- 现在添加名为 FragmentModel 的模型类。这是 FragmentModel 类的代码。(类似于 Step2,而不是添加布局文件,添加 C# 类文件)
public class FragmentModel
{
   public string Name {get;set;}
   public string Desigination {get;set;}
}
上述类的每个对象都将作为 FragmentRight 布局的内容。
- 在 FragmentRight 布局文件中添加以下代码:
<?xml version="1.0" encoding="utf-8"?>
<LinearLayout xmlns:android="http://schemas.android.com/apk/res/android"
    android:orientation="vertical"
    android:layout_width="fill_parent"
    android:layout_height="fill_parent"
    android:minWidth="25px"
    android:minHeight="25px">
    <ListView
        android:minWidth="25px"
        android:minHeight="25px"
        android:layout_width="fill_parent"
        android:layout_height="fill_parent"
        android:id="@+id/fr_ListView1" />
</LinearLayout>
在此布局中,我添加了 ListView,它将显示虚构组织中的人员列表及其职位。
- 创建 ListVwAdapter,它派生自 BaseAdapter<FragmentModel>,并实现其抽象方法。在此文件中添加以下代码。
public class ListVwAdapter: BaseAdapter<FragmentModel> { Activity _Context; List<FragmentModel> _lstFragments; public ListVwAdapter (Activity c, List<FragmentModel> lstFragments) { _Context = c; _lstFragments = lstFragments; } #region implemented abstract members of BaseAdapter public override long GetItemId (int position) { return position; } public override View GetView (int position, View convertView, ViewGroup parent) { var item = this [position]; if (convertView == null) convertView = _Context.LayoutInflater.Inflate (Android.Resource.Layout.SimpleListItem2, parent, false); convertView.FindViewById<TextView> (Android.Resource.Id.Text1).Text = item.Name; convertView.FindViewById<TextView> (Android.Resource.Id.Text2).Text = item.Desigination; return convertView; } public override int Count { get { return _lstFragments != null ? _lstFragments.Count : -1; } } #endregion #region implemented abstract members of BaseAdapter public override FragmentModel this [int index] { get { return _lstFragments != null ? _lstFragments[index] : null; } } #endregion }您可以在此处阅读更多关于创建通用 baseadapter 并将其绑定到 ListView 的信息。与文章唯一的区别是,我们正在使用 Android 的
SimpleListItem2并使用 Name 和 Designation 更新Text1和Text2。 - 同样,为 FragmentRight.axml 添加名为 FragmentRight.xml 的代码隐藏文件,并使用
Fragment派生它。internal class FragmentRight : Fragment { List<FragmentModel> _lstFragmentDemo = new List<FragmentModel> (); public override void OnCreate (Bundle savedInstanceState) { base.OnCreate (savedInstanceState); _lstFragmentDemo.Add (new FragmentModel () { Name = "Alok Gupta", Desigination = "Snr Software Engineer" }); _lstFragmentDemo.Add (new FragmentModel () { Name = "Jasdeep Singh", Desigination = "Snr Auditor (Information)" }); _lstFragmentDemo.Add (new FragmentModel () { Name = "Ashish Srivastava", Desigination = "Software Test Engineer" }); _lstFragmentDemo.Add (new FragmentModel () { Name = "Hariharan Ramchandran", Desigination = "Product Architect" }); } public override View OnCreateView (LayoutInflater inflater, ViewGroup container, Bundle savedInstanceState) { var view = inflater.Inflate(Resource.Layout.FragmentRight, container, false); var listView = view.FindViewById<ListView>(Resource.Id.fr_ListView1); listView.Adapter = new ListVwAdapter (this.Activity, _lstFragmentDemo); return view; } }在上面的代码中,我们创建了 FragmentModel 列表并为其提供了一些硬编码值。
在
OnCreateView函数中,加载 FragmentRight 布局并创建 ListVwAdapter 适配器并将其绑定到 listview 对象。 - 现在在 Main.axml 布局文件中,代码如下所示:-
<?xml version="1.0" encoding="utf-8"?>
<LinearLayout xmlns:android="http://schemas.android.com/apk/res/android"
    android:orientation="vertical"
    android:layout_width="fill_parent"
    android:layout_height="fill_parent">
    <Button
        android:id="@+id/myButton"
        android:layout_width="fill_parent"
        android:layout_height="wrap_content"
        android:text="@string/hello" />
    <LinearLayout
        android:orientation="horizontal"
        android:minWidth="25px"
        android:minHeight="25px"
        android:layout_width="fill_parent"
        android:layout_height="match_parent"
        android:id="@+id/linearLayout1">
        <FrameLayout
            android:minWidth="25px"
            android:minHeight="25px"
            android:layout_width="136.0dp"
            android:layout_height="fill_parent"
            android:id="@+id/main_FragmentContainerLeft"
            android:layout_marginRight="6.7dp" />
        <fragment
            android:minWidth="25px"
            android:minHeight="25px"
            android:layout_width="fill_parent"
            android:layout_height="fill_parent"
            android:id="@+id/main_FragmentContainerRight"
            class="monofragmentdemo.FragmentRight" />
    </LinearLayout>
</LinearLayout>
首先在 axml 文件中添加水平 LinearLayout。
- 添加 FrameLayout,它将作为 Fragment 的容器,当通过代码添加 Fragment 时。
- 使用 Fragment 标签在设计时添加 Fragment。您需要将完全限定的类名传递给 fragment 的 class 属性。需要记住的一点是,除了类名,所有内容都应该小写,例如,如果完全限定名为 “MonoFragmentDemo.FragmentRight”,您必须传递 “monofragmentdemo.FragmentRight”。
现在,以下是 MainActivity.cs 文件的代码:-
public class MainActivity : Activity
{
	int count = 1;

	protected override void OnCreate (Bundle bundle)
	{
		base.OnCreate (bundle);

		// Set our view from the "main" layout resource
		SetContentView (Resource.Layout.Main);

		// Get our button from the layout resource,
		// and attach an event to it
		Button button = FindViewById<Button> (Resource.Id.myButton);

		if(button != null)
		button.Click += delegate {
			button.Text = string.Format ("{0} clicks!", count++);
		};

		var newFragment = new FragmentLeft ();
		var ft = FragmentManager.BeginTransaction ();
		ft.Add (Resource.Id.main_FragmentContainerLeft, newFragment);
		ft.Commit ();
	}
}
我们已经在设计级别添加了一个 fragment,现在为了通过编码添加 fragment,我们将使用
FragmentManager。我们将使用BeginTransaction方法启动事务,添加 framelayout 容器和我们希望在屏幕上显示的 fragment 对象,最后调用commit()使其对用户可用。 - 现在构建并运行应用程序,
在 4 英寸屏幕上 在 3.4 英寸屏幕上 

图 “首次运行”
现在一切正常,除了按钮,因为我们还没有为它编写代码。
- 为了添加按钮点击支持,您必须实现
View.IOnClickListener接口。以下代码更改是必要的,以包含按钮点击事件支持。在
OnCreateView方法中:-var nextButton = view.FindViewById<Button>(Resource.Id.fl_Next); if (nextButton != null) nextButton.SetOnClickListener (this);
在
View.IOnClickListener.OnClick(已实现)方法中:-#region IOnClickListener implementation void View.IOnClickListener.OnClick (View view) { SetInformationOnText (textDesg, textDesc); } #endregion - 现在再次构建并运行应用程序
在 4 英寸屏幕上 点击“下一步”按钮后 

您可以看到 FragmentLeft 文本在按钮点击时发生变化。
-
现在我们可以根据不同的屏幕尺寸拥有不同的布局。如果您参考上面的截图,我们在 3.4 英寸和 4 英寸的设备模拟器上具有相同的布局。
现在,如果您正在构建一些宽大或大型的应用程序,在这种情况下,用户很难正确查看移动应用程序。因此,移动电话开发人员有必要为不同的移动应用程序拥有不同的布局,以使其应用程序更受欢迎。
所以现在在
Layout folder下添加 layout-ldpi(低密度屏幕布局)文件夹。您可以在 android 网站上阅读更多关于不同屏幕尺寸的信息。
- 现在将 main.axml 从主布局文件夹复制并粘贴到 layout-ldpi 文件夹中。我对用户设计做了一些更改,代码如下:
<?xml version="1.0" encoding="utf-8"?>
<LinearLayout xmlns:android="http://schemas.android.com/apk/res/android"
    android:orientation="vertical"
    android:layout_width="fill_parent"
    android:layout_height="fill_parent">
    <LinearLayout
        android:orientation="vertical"
        android:minWidth="25px"
        android:minHeight="25px"
        android:layout_width="fill_parent"
        android:layout_height="match_parent"
        android:id="@+id/linearLayout1">
        <FrameLayout
            android:minWidth="25px"
            android:minHeight="25px"
            android:layout_width="match_parent"
            android:layout_height="200dp"
            android:id="@+id/main_FragmentContainerLeft"
            android:layout_marginBottom="6.7dp" />
        <fragment
            android:minWidth="25px"
            android:minHeight="25px"
            android:layout_width="fill_parent"
            android:layout_height="fill_parent"
            android:id="@+id/main_FragmentContainerRight"
            class="monofragmentdemo.FragmentRight" />
    </LinearLayout>
</LinearLayout>
这里我从布局中移除了按钮,并且我们不使用水平线性布局,而是使用垂直线性布局。现在 Main.axml 的设计器看起来像这样:-
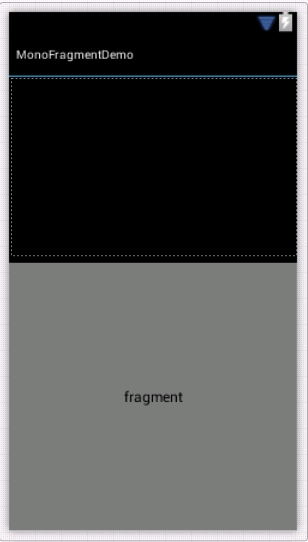
- 现在构建并运行!Android 系统非常智能,它将根据屏幕尺寸选择合适的布局。在 4 英寸模拟器中它将像往常一样运行,而在 3.4 英寸模拟器中将使用我们上面创建的新布局!
在 3_4 英寸屏幕上 点击“下一步”按钮后 

关注点
我使用了MonoAndroid (C#)和Xamarin Studio来构建本教程。请留意,如果我继续学习,您可能会期待更多文章即将发布。
尽管Xamarin Studio是专有软件,但他们提供了免费的入门版本来构建、测试和发布Android应用程序。我正在使用它来学习。
本系列中的其他文章!
- MonoAndroid:用 C# 编写自定义通用 BaseAdapter
- MonoAndroid:在您的移动应用程序中使用 GridView
- MonoAndroid:在移动应用程序中使用 TabHost
- MonoAndroid:使用 dotnet Web 服务(ASMX)
- MonoAndroid:调用次级活动
- MonoAndroid:使用 Started Service
- MonoAndroid:用 C# 编写 ExpandableListView 和 BaseExpandableListAdapter
- MonoAndroid:使用 AlertDialog
本系列技巧/窍门
历史
- 2013 年 8 月 21 日:第一个版本
- 2013 年 8 月 22 日:一些编辑,纠正了一些语法错误
- 2013 年 9 月 6 日:更新了提示和技巧部分
- 2013年10月11日:更新了文章部分。
- 2013年11月5日:更新了文章部分。
- 2013年11月22日:更新了其他文章部分