
RESTful Day #3:在ASP.NET Web API中使用Unity Container和Managed Extensibility Framework (MEF) 解决依赖的依赖,实现控制反转和依赖注入
4.95/5 (83投票s)
在 Asp.net Web API 中使用 Unity Container 和 Managed Extensibility Framework (MEF) 通过控制反转和依赖注入解决依赖项的依赖项。
- 下载 databasescript.zip - 1 KB
- 下载 WebApi.zip - 4.8 MB
- 下载 WebApiSourceCodeDay2.zip - 4.4 MB
- 下载 PDF 文章 - 4.3 MB
目录
- 目录
- 引言
- 路线图
- 现有设计和问题
- 托管可扩展性框架 (MEF)
- 使用 Unity 和 MEF 创建依赖解析器
- 设置业务服务
- 设置数据模型
- 设置 REST 端点 / WebAPI 项目
- 运行应用程序
- 这种设计的优点
- 结论
引言
在我之前的两篇文章中,我解释了如何使用 ASP.NET Web API 和 Entity Framework 创建 RESTful 服务,并使用 Unity Container 解决依赖项。在本文中,我将解释如何使用 Unity Container 和 MEF(Managed Extensibility Framework) 通过控制反转来创建松散耦合的系统。我不会过多地解释理论,而是更侧重于实际实现。对于正在关注本系列的读者,他们可以使用之前创建的现有解决方案。对于本文的新读者,我提供了之前和当前源代码的下载链接。
有关 DI 和 IOC 的理论和理解,您可以参考以下链接:Unity 和 控制反转 (IOC)。
路线图

这是我学习 RESTful API 的路线图,
- RESTful 第 1 天:使用 Entity Framework、通用仓库模式和工作单元的 Web API 企业级应用程序架构。
- RESTful 第 2 天:使用 Unity 容器和引导程序在 Web API 中使用依赖注入实现控制反转。
- RESTful 第 3 天:使用 Unity 容器和托管可扩展性框架 (MEF) 在 Asp.net Web API 中使用控制反转和依赖注入解决依赖关系的依赖关系。
- RESTful 第 4 天:使用 MVC 4 Web API 中的属性路由进行自定义 URL 重写/路由。
- RESTful 第 5 天:使用 Action Filter 在 Web API 中实现基本身份验证和基于令牌的自定义授权。
- RESTful 第 6 天:使用 Action Filter、异常过滤器和 NLog 在 Web API 中进行请求日志记录和异常处理/日志记录。
- RESTful 第 7 天:使用 NUnit 和 Moq 框架在 WebAPI 中进行单元测试和集成测试(第 1 部分)。
- RESTful 第 8 天:使用 NUnit 和 Moq 框架在 WebAPI 中进行单元测试和集成测试(第 2 部分)。
- RESTful Day #9:在ASP.NET Web API中扩展OData支持.
- RESTful 第 10 天:在 Visual Studio 2010 中创建带有 CRUD 操作的自托管 ASP.NET WebAPI
我将特意使用 Visual Studio 2010 和 .NET Framework 4.0,因为在 .NET Framework 4.0 中,有些实现很难找到,但我会通过展示如何做到这一点来使其变得容易。
现有设计和问题
我们已经有了一个现有的设计。如果您打开解决方案,您会看到如下结构,

我们尝试通过以下方式设计一个松散耦合的架构:
- 数据模型(负责与数据库通信):只与服务层通信。
- 服务(充当 REST 端点和数据访问之间的业务逻辑层):在 REST 端点和数据模型之间通信。
- REST API,即控制器:只通过暴露的接口与服务通信。
但是,当我们尝试从服务中解决 UnitOfWork 的依赖项时,我们必须在 WebAPI 项目中引用 DataModel dll;这违反了我们的系统,如下图所示,

在本文中,我们将尝试从现有解决方案中解决依赖项(服务)的依赖项(数据模型)。我的控制器依赖于服务,我的服务依赖于数据模型。现在,我们将设计一种架构,其中组件在对象创建和实例化方面将相互独立。为了实现这一点,我们将利用 MEF(Managed Extensibility Framework) 以及 Unity Container 和反射。

理想情况下,我们的 Bootstrapper 类中不应该有以下代码,
container.RegisterType<IProductServices, ProductServices>().RegisterType<UnitOfWork>(new HierarchicalLifetimeManager());
托管可扩展性框架 (MEF)
您可以从 msdn 链接阅读有关 Unity 的信息。我只是引用 msdn 中的一些行,
“托管扩展框架 (MEF) 是一个用于创建轻量级、可扩展应用程序的库。它允许应用程序开发人员发现和使用扩展,无需任何配置。它还允许扩展开发人员轻松封装代码并避免脆弱的硬依赖。MEF 不仅允许在应用程序内部重用扩展,还允许跨应用程序重用。”
“MEF 是 .NET Framework 4 的一个组成部分,凡是使用 .NET Framework 的地方都可以使用它。你可以在客户端应用程序中使用 MEF,无论它们是使用 Windows Forms、WPF 还是任何其他技术,也可以在使用 ASP.NET 的服务器应用程序中使用。”
使用 Unity 和 MEF 创建依赖解析器
打开你的 Visual Studio,我使用的是 VS 2010,你可以使用 VS 2010 或更高版本。加载解决方案。
步骤 1:右键单击解决方案资源管理器并添加一个名为 Resolver 的新项目,

我故意选择这个名字,你已经知道为什么了 J
步骤 2:右键单击 Resolver 项目,然后单击 ManageNugetPackage,在添加新包的界面中,在线库中搜索 Unity.MVC3,

将包安装到您的解决方案中。
步骤 3:右键单击解析器项目,并添加对 System.ComponentModel.Composition 的引用。
您可以在 GAC 中找到该 dll。我使用的是 framework 4.0,因此引用了相同版本的 dll。

此 DLL 是 MEF 的一部分,并已随 .NET Framework 4.0 安装在系统的 GAC 中。此 DLL 提供了 MEF 的核心类。
步骤 4:只需向 Resolver 项目添加一个名为 IComponent 的接口,其中包含名为 Setup 的初始化方法。我们将尝试在我们将在其他项目(如 DataModel、Services 和 WebApI)中创建的 Resolver 类中实现此接口。
namespace Resolver
{
    /// <summary>
    /// Register underlying types with unity.
    /// </summary>
    public interface IComponent
    {

    }
}
步骤 5:在我们声明 Setup 方法之前,再添加一个接口,负责作为注册类型的契约。我将此接口命名为 IRegisterComponent,
namespace Resolver
{
    /// <summary>
    /// Responsible for registering types in unity configuration by implementing IComponent
    /// </summary>
    public interface IRegisterComponent
    {
        /// <summary>
        /// Register type method
        /// </summary>
        /// <typeparam name="TFrom"></typeparam>
        /// <typeparam name="TTo"></typeparam>
        /// <param name="withInterception"></param>
        void RegisterType<TFrom, TTo>(bool withInterception = false) where TTo : TFrom;

        /// <summary>
        /// Register type with container controlled life time manager
        /// </summary>
        /// <typeparam name="TFrom"></typeparam>
        /// <typeparam name="TTo"></typeparam>
        /// <param name="withInterception"></param>
        void RegisterTypeWithControlledLifeTime<TFrom, TTo>(bool withInterception = false) where TTo : TFrom;
    }
}
在此接口中,我声明了两个方法,一个 `RegisterType` 和另一个 `RegisterType`,带有对象受控的生命周期,即对象的生命周期将是分层的方式。这与我们在 Unity 中所做的方式类似。
步骤 6:现在在我们之前创建的 IComponent 接口上声明 Setup 方法,它将 IRegisterComponent 实例作为参数,
void SetUp(IRegisterComponent registerComponent);
所以我们的 IComponent 接口变为,
namespace Resolver
{
    /// <summary>
    /// Register underlying types with unity.
    /// </summary>
    public interface IComponent
    {
        void SetUp(IRegisterComponent registerComponent);
    }
}
步骤 6:现在我们将编写一个打包器,或者您也可以说是一个包装器,用于 MEF 和 Unity 来注册类型/组件。这是核心 MEF 实现。创建一个名为 ComponentLoader 的类,并向其中添加以下代码,
using System;
using System.Collections.Generic;
using System.Linq;
using System.Text;
using Microsoft.Practices.Unity;
using System.ComponentModel.Composition.Hosting;
using System.ComponentModel.Composition.Primitives;
using System.Reflection;

namespace Resolver
{
    public static class ComponentLoader
    {
        public static void LoadContainer(IUnityContainer container, string path, string pattern)
        {
            var dirCat = new DirectoryCatalog(path, pattern);
            var importDef = BuildImportDefinition();
            try
            {
                using (var aggregateCatalog = new AggregateCatalog())
                {
                    aggregateCatalog.Catalogs.Add(dirCat);

                    using (var componsitionContainer = new CompositionContainer(aggregateCatalog))
                    {
                        IEnumerable<Export> exports = componsitionContainer.GetExports(importDef);

                        IEnumerable<IComponent> modules =
                            exports.Select(export => export.Value as IComponent).Where(m => m != null);

                        var registerComponent = new RegisterComponent(container);
                        foreach (IComponent module in modules)
                        {
                            module.SetUp(registerComponent);
                        }
                    }
                }
            }
            catch (ReflectionTypeLoadException typeLoadException)
            {
                var builder = new StringBuilder();
                foreach (Exception loaderException in typeLoadException.LoaderExceptions)
                {
                    builder.AppendFormat("{0}\n", loaderException.Message);
                }

                throw new TypeLoadException(builder.ToString(), typeLoadException);
            }
        }

        private static ImportDefinition BuildImportDefinition()
        {
            return new ImportDefinition(
                def => true, typeof(IComponent).FullName, ImportCardinality.ZeroOrMore, false, false);
        }
    }

    internal class RegisterComponent : IRegisterComponent
    {
        private readonly IUnityContainer _container;

        public RegisterComponent(IUnityContainer container)
        {
            this._container = container;
            //Register interception behaviour if any
        }

        public void RegisterType<TFrom, TTo>(bool withInterception = false) where TTo : TFrom
        {
            if (withInterception)
            {
                //register with interception
            }
            else
            {
                this._container.RegisterType<TFrom, TTo>();
            }
        }

        public void RegisterTypeWithControlledLifeTime<TFrom, TTo>(bool withInterception = false) where TTo : TFrom
        {
            this._container.RegisterType<TFrom, TTo>(new ContainerControlledLifetimeManager());
        }
    }
}
步骤 7:现在我们的 Resolver 包装器已准备就绪。构建项目并将其引用添加到 DataModel、BusinessServices 和 WebApi 项目,如下图所示,

设置业务服务
我们已经在 BusinessServices 项目中添加了 Resolver 的引用。我们同意在每个项目中实现 IComponent 接口。
所以创建一个名为 DependencyResolver 的类,并实现 IComponent 接口,我们也使用反射来导入 IComponent 类型。所以添加一个类,并向该 DependencyResolver 类添加以下代码,
using System.ComponentModel.Composition;
using DataModel;
using DataModel.UnitOfWork;
using Resolver;

namespace BusinessServices
{
    [Export(typeof(IComponent))]
    public class DependencyResolver : IComponent
    {
        public void SetUp(IRegisterComponent registerComponent)
        {
            registerComponent.RegisterType<IProductServices, ProductServices>();

        }
    }
}

请注意,我们已经实现了 `SetUp` 方法,并且在该方法中,我们注册了 ProductService 的类型。
所有现有代码库保持不变。我们不需要触及 IProductServices 接口或 ProductServices 类。
设置数据模型
我们还在 DataModel 项目中添加了 Resolver 项目引用。因此,我们将尝试在此项目中注册 UnitOfWork 的类型。我们以同样的方式进行,只需添加一个 DependencyResolver 类并实现其 Setup 方法以注册 UnitOfWork 的类型。为了使代码更具可读性和规范性,我做了一个更改。我只是为 UnitOfWork 添加了一个接口,并将其命名为 IUnitOfWork。现在我的 UnitOfWork 类继承自它,您可以在我们在前两篇文章中讨论的早期项目版本中进行此练习。
所以我的 IUnitOfWork 包含 UnitOfWork 中单个公共方法的声明,
namespace DataModel.UnitOfWork
{
    public interface IUnitOfWork
    {
        /// <summary>
        /// Save method.
        /// </summary>
        void Save();
    }
}
现在在 DepenencyResolver 类中注册 UnitOfWork 的类型,我们的类变为如下图所示,
using System.ComponentModel.Composition;
using System.Data.Entity;
using DataModel.UnitOfWork;
using Resolver;

namespace DataModel
{
    [Export(typeof(IComponent))]
    public class DependencyResolver : IComponent
    {
        public void SetUp(IRegisterComponent registerComponent)
        {
            registerComponent.RegisterType<IUnitOfWork,UnitOfWork.UnitOfWork>();
        }
    }
}

同样,无需触及该项目的任何现有代码。
设置 REST 端点 / WebAPI 项目
我们的工作完成了 90%。

我们现在需要设置我们的 WebAPI 项目。我们将不会在这个项目中添加任何 DependencyResolver 类。我们将颠倒我们已有的 Bootstrapper 类中层的调用机制,所以当你打开你的 bootstrapper 类时,你会得到类似以下的代码:
using System.Web.Http;
using System.Web.Mvc;
using BusinessServices;
using DataModel.UnitOfWork;
using Microsoft.Practices.Unity;
using Unity.Mvc3;

namespace WebApi
{
    public static class Bootstrapper
    {
        public static void Initialise()
        {
            var container = BuildUnityContainer();

            DependencyResolver.SetResolver(new UnityDependencyResolver(container));

            // register dependency resolver for WebAPI RC
            GlobalConfiguration.Configuration.DependencyResolver = new Unity.WebApi.UnityDependencyResolver(container);
        }

        private static IUnityContainer BuildUnityContainer()
        {
            var container = new UnityContainer();

            // register all your components with the container here
            // it is NOT necessary to register your controllers

            // e.g. container.RegisterType<ITestService, TestService>();
            container.RegisterType<IProductServices, ProductServices>().RegisterType<UnitOfWork>(new HierarchicalLifetimeManager());

            return container;
        }
    }
}
现在,我们需要稍微修改代码库,使我们的系统松散耦合。只需从 WebAPI 项目中删除 DataModel 的引用。
我们不希望我们的 DataModel 暴露给 WebAPI 项目,这正是我们的目标,所以我们现在切断了 DataModel 项目的依赖。

将以下 Bootstrapper 类代码添加到现有的 Bootstrapper 类中,
using System.Web.Http;
//using DataModel.UnitOfWork;
using Microsoft.Practices.Unity;
using Resolver;
using Unity.Mvc3;

namespace WebApi
{
    public static class Bootstrapper
    {
        public static void  Initialise()
        {
            var container = BuildUnityContainer();

            System.Web.Mvc.DependencyResolver.SetResolver(new UnityDependencyResolver(container));

            // register dependency resolver for WebAPI RC
            GlobalConfiguration.Configuration.DependencyResolver = new Unity.WebApi.UnityDependencyResolver(container);
        }

        private static IUnityContainer BuildUnityContainer()
        {
            var container = new UnityContainer();

            // register all your components with the container here
            // it is NOT necessary to register your controllers

            // e.g. container.RegisterType<ITestService, TestService>();
           // container.RegisterType<IProductServices, ProductServices>().RegisterType<UnitOfWork>(new HierarchicalLifetimeManager());

            RegisterTypes(container);

            return container;
        }

        public static void RegisterTypes(IUnityContainer container)
        {

            //Component initialization via MEF
            ComponentLoader.LoadContainer(container, ".\\bin", "WebApi.dll");
            ComponentLoader.LoadContainer(container, ".\\bin", "BusinessServices.dll");

        }
    }
}
这有点像重新定义 Bootstrapper 类,而无需触及我们现有的控制器方法。我们现在甚至不需要注册 ProductServices 的类型,我们已经在 BusinessServices 项目中完成了此操作。

请注意,在 RegisterTypes 方法中,我们使用 ComponentLoader 通过反射加载组件/dll。我们编写了两行代码,第一行用于加载 *WebAPI.dll*,另一行用于加载 Business Services.dll。
如果 `BusinessServices.dll` 的名称是 `WebAPI.Services.dll`,那么我们只需编写一行代码来加载 WebAPI 和 BusinessService 两个 dll,如下所示,
ComponentLoader.LoadContainer(container, ".\\bin", "WebApi*.dll");
是的,我们可以使用正则表达式。
运行应用程序
运行应用程序,我们得到:

我们已经添加了测试客户端,但对于新读者,只需右键单击 WebAPI 项目,转到管理 Nuget 包,然后在在线包的搜索框中键入 WebAPITestClient,

您将得到“ASP.NET Web API 的简单测试客户端”,只需添加它。您将在 Areas-> HelpPage 中得到一个帮助控制器,如下所示:

我已经在之前的文章中提供了数据库脚本和数据,您可以使用相同的。
在应用程序 URL 中追加 "/help",您将获得测试客户端,

您可以单击每个服务进行测试。一旦您单击服务链接,您将被重定向到该特定服务的测试服务页面。在该页面右下角有一个“测试 API”按钮,只需按下该按钮即可测试您的服务,

GetAllProduct 服务,

创建新产品,

在数据库中,我们得到了新产品,

更新产品。

我们在数据库中获取,

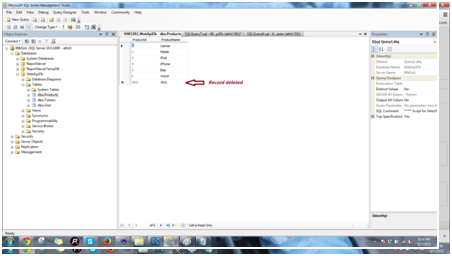
删除产品。

在数据库中。
这种设计的优点
在我早期的文章中,我更关注设计缺陷,但我们当前的设计却带来了几个额外的优势,
- 我们获得了一个可扩展且松散耦合的应用程序设计,可以以相同的方式添加更多新组件。
- 通过反射自动注册类型。假设我们想将任何接口实现注册到我们的 REST 端点,我们只需在 Bootstrapper 类中加载该 dll,或者如果 dll 具有相同的后缀名称,那么我们只需将该 DLL 放置在 bin 文件夹中,它将在运行时自动加载。

- 数据库事务或任何此类模块现在不会暴露给服务终结点,这使得我们的服务更安全并维护了设计结构。
结论
我们现在知道如何使用 Unity 容器解决依赖项,并使用 MEF 执行控制反转。在我的下一篇文章中,我将尝试解释如何在我的 WebAPI 中为 REST 服务打开多个终结点,并以真正的 REST 方式创建自定义 URL。在此之前,祝您编码愉快 :) 您也可以从 GitHub 下载源代码。如果源代码中缺少所需的包,请添加它们。
我的其他系列文章
MVC: https://codeproject.org.cn/Articles/620195/Learning-MVC-Part-Introduction-to-MVC-Architectu
OOP: https://codeproject.org.cn/Articles/771455/Diving-in-OOP-Day-Polymorphism-and-Inheritance-Ear